
Blog
How To Remove Gas Tank On Pressure Washer
If you own a pressure washer, you may find yourself in a situation where you need to remove the gas tank. Whether it’s for maintenance or repair purposes, knowing how to properly remove the gas tank on your pressure washer is essential. Fortunately, the process is relatively straightforward and can be accomplished with a few simple steps.
Step 1: Prep Work
Before you begin, make sure to turn off the engine and disconnect the spark plug. This will prevent any accidental starts and ensure your safety throughout the process. It’s also a good idea to drain any remaining fuel from the tank to avoid spills and leaks.


Step 2: Remove Outer Connections
The next step is to disconnect any outer connections to the gas tank. This may include fuel lines, vent tubes, and any other attachments. Carefully inspect each connection and use the necessary tools to loosen and remove them without damaging the components.
Step 3: Loosen Mounting Bolts
Once the outer connections are removed, locate the mounting bolts that secure the gas tank to the pressure washer frame. Use a socket wrench or a suitable tool to gently loosen and remove these bolts. Be cautious not to misplace them, as you will need them to reattach the gas tank later.
Step 4: Lift and Remove the Gas Tank
With the mounting bolts removed, carefully lift the gas tank away from the pressure washer frame. Pay attention to any remaining fuel or debris that may be present and handle the tank with care to avoid spills. Once the gas tank is clear of the frame, you can set it aside or proceed with any necessary maintenance or repairs.
Remember, always consult your pressure washer’s user manual for specific instructions and safety precautions before attempting to remove the gas tank. If you are unsure or uncomfortable with the process, it’s best to seek professional assistance.
By following these steps, you will be able to successfully remove the gas tank on your pressure washer. Whether you need to clean, repair, or replace the tank, knowing how to remove it properly is an essential skill for any pressure washer owner.
Safety Precautions for Gas Tank Removal
Removing the gas tank on a pressure washer can be a potentially dangerous task if not performed with caution. It is important to take certain safety precautions to ensure your well-being. Before beginning the process, make sure to follow these guidelines:
1. Wear Protective Gear
Prior to removing the gas tank, it is essential to wear the appropriate protective gear. This includes safety goggles to protect your eyes from any splashing fuel, gloves to prevent direct contact with gasoline, and a respiratory mask to prevent inhalation of harmful fumes.
2. Work in a Well-Ventilated Area
Performing the gas tank removal in a well-ventilated area is crucial. Avoid working in enclosed spaces or areas with limited air circulation to minimize the risk of inhaling toxic gases.
3. Turn Off the Engine and Disconnect the Spark Plug
Prior to starting the gas tank removal process, ensure that the pressure washer’s engine is completely powered off. This will prevent accidental ignition or electric shock. Disconnect the spark plug to further eliminate any potential electrical hazards.
4. Empty the Gas Tank
Before removing the gas tank, it is important to ensure that it is completely empty. This can be done by running the pressure washer until it runs out of fuel or by manually draining the fuel tank. This step is vital to prevent any fuel spills or leaks during the removal process.
5. Have a Fire Extinguisher On Hand
As an additional safety measure, it is advisable to have a fire extinguisher nearby when working with gasoline or fuel-related tasks. This will allow you to quickly and efficiently put out any potential fires that may occur.
| Summary |
|---|
| Before removing the gas tank on your pressure washer, ensure you have the correct protective gear, work in a well-ventilated area, turn off the engine and disconnect the spark plug, empty the gas tank, and have a fire extinguisher nearby. Following these safety precautions will greatly reduce the risk of accidents or injuries during the gas tank removal process. |
Tools and Equipment Needed for Gas Tank Removal
Before attempting to remove the gas tank from your pressure washer, it is important to gather all the necessary tools and equipment. Having these items on hand will make the process easier and ensure that you can complete the task safely. Here is a list of the tools and equipment you will need:
1. Safety Gloves
It is essential to protect your hands while working with a pressure washer. Safety gloves will help to prevent any injuries or accidents that may occur during the gas tank removal process.
2. Safety Goggles
When working with a pressure washer, there is always a risk of splashing chemicals or debris. Safety goggles will protect your eyes from any potential hazards, ensuring your safety throughout the gas tank removal process.
3. Adjustable Wrench
An adjustable wrench is necessary for loosening the hose and fitting connections on the gas tank. The adjustable design allows you to easily loosen or tighten connections as needed.
4. Screwdriver
A screwdriver is useful for removing screws or bolts that may be holding the gas tank in place. You may need a flathead or Phillips head screwdriver, depending on the type of screws used.
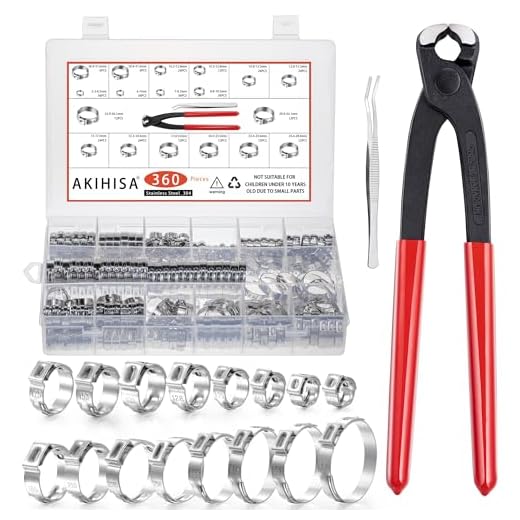
5. Pliers
Pliers can be used to remove hose clamps or other tight connections on the gas tank. They provide a strong grip and allow you to safely maneuver and disconnect various parts of the gas tank.
6. Drain Pan
A drain pan is necessary to catch any fuel or fluids that may spill during the gas tank removal process. It will help to prevent any mess and keep your work area clean.
7. Fuel Line Clamp
A fuel line clamp can be used to stop the flow of fuel while disconnecting the gas tank. This will prevent any fuel from leaking out and ensure a safe removal process.
8. Replacement Gas Tank (if necessary)
If you are removing the gas tank for repair or replacement purposes, it is important to have a replacement gas tank on hand. Ensure that the new tank is compatible with your pressure washer model.
By having these tools and equipment readily available, you will be well-prepared to remove the gas tank from your pressure washer with ease and efficiency.
Step-by-Step Guide to Removing the Gas Tank on a Pressure Washer
If you need to remove the gas tank on your pressure washer for maintenance or repair purposes, it’s essential to follow a step-by-step process to ensure a safe and efficient removal. Here’s a guide to help you through the process:
Step 1: Safety Precautions
Before starting any work on the pressure washer, make sure to turn off the engine and disconnect the spark plug to prevent accidental ignition. Also, allow the pressure washer to cool down if it has been in use recently.
Step 2: Locate the Gas Tank
The gas tank is usually located near the engine, typically on top or at the side. It is a container that holds the fuel necessary for the pressure washer to function.
Step 3: Empty the Gas Tank
Prior to removing the gas tank, it’s crucial to drain it, ensuring you have a safe environment to work in. Place a suitable container under the pressure washer’s gas tank, then remove the cap and let the fuel drain completely.
Step 4: Disconnect Fuel Lines
The gas tank is connected to the carburetor by fuel lines. Locate the fuel line that connects the tank to the carburetor and carefully disconnect it. Be cautious when removing any clamps or screws that secure the fuel line to the tank to prevent damage.
Step 5: Remove Mounting Bolts
Depending on the pressure washer model, the gas tank may be secured to the frame or engine with mounting bolts. Use the appropriate tools, such as a wrench or socket set, to remove these bolts and free the gas tank from its position.
Step 6: Lift and Remove the Gas Tank
With the mounting bolts removed, gently lift the gas tank away from its position on the pressure washer. Be mindful of any remaining fuel that may spill out during the removal process. Place the gas tank in a safe area away from any potential ignition sources.
Step 7: Reinstall or Replace the Gas Tank
If you need to reinstall the gas tank after maintenance or repair work, carefully follow the steps in reverse order. Make sure to securely fasten the mounting bolts, reconnect the fuel line, and refill the gas tank with fresh fuel.
Remember to always consult the pressure washer’s manual for specific instructions, as different models may have slight variations in the removal process. By following this step-by-step guide, you can safely and effectively remove the gas tank on your pressure washer.
Tips for Maintaining and Reinstalling the Gas Tank
Proper maintenance and handling of the gas tank on your pressure washer is essential for its optimal performance. Here are some tips to help you maintain and reinstall the gas tank:
- Regularly clean the gas tank: It is important to keep the gas tank clean from dirt, debris, and any residue that may accumulate over time. Use a clean cloth or sponge to wipe down the interior and exterior of the tank.
- Check for leaks: Before reinstalling the gas tank, thoroughly inspect it for any signs of leaks. Look for cracks, loose fittings, or damaged fuel lines. If you notice any issues, it is recommended to replace the damaged parts before using the pressure washer.
- Use fresh fuel: It is always best to use fresh fuel when filling up the gas tank. Gasoline can become stale over time, which can affect the performance of your pressure washer. Consider using a fuel stabilizer to prolong the shelf life of the gasoline.
- Tighten all connections: When reinstalling the gas tank, ensure that all connections are properly tightened. This includes the fuel lines, fittings, and vent cap. Loose connections can result in fuel leaks or insufficient fuel delivery to the engine.
- Store the pressure washer properly: If you plan to store your pressure washer for an extended period, it is recommended to drain the gas tank. Leaving fuel in the tank for long periods can lead to fuel degradation and clogging of the carburetor.
By following these tips, you can ensure that your gas tank remains in good condition and your pressure washer operates at its best. Proper maintenance and care will prolong the lifespan of your equipment and help you achieve optimal cleaning results.
Questions and answers,
Why would I need to remove the gas tank on a pressure washer?
There could be several reasons why you might need to remove the gas tank on a pressure washer. One common reason is if you need to clean or repair the tank. Another reason could be if you are upgrading or replacing the tank with a higher capacity one. Additionally, you may need to remove the gas tank if you are performing maintenance or repair work on other parts of the pressure washer that require access to the tank.
What tools or equipment do I need to remove the gas tank?
To remove the gas tank on a pressure washer, you may need the following tools: a wrench or socket set, pliers, a screwdriver, and possibly a gas line disconnect tool. The specific tools required may vary depending on the make and model of your pressure washer. It is always a good idea to consult the owner’s manual or manufacturer’s instructions for guidance on which tools to use.
Can I remove the gas tank on my pressure washer without draining the fuel?
In most cases, it is recommended to drain the fuel from the gas tank before removing it from a pressure washer. This is to prevent any accidental spills or leaks that could be hazardous. However, if it is not possible to drain the fuel or if the tank is only partially filled, you can try to tilt the pressure washer at an angle that keeps the fuel from spilling out of the tank during removal. It is important to be cautious and take safety precautions if you choose to remove the gas tank without draining the fuel.
Are there any safety precautions I should take when removing the gas tank on a pressure washer?
Yes, there are a few safety precautions you should take when removing the gas tank on a pressure washer. First, make sure the pressure washer is turned off and the engine is cool before attempting to remove the gas tank. It is also important to work in a well-ventilated area to avoid inhaling any fumes. Additionally, if you are removing the gas tank to perform maintenance or repair work, it is always a good idea to wear protective gloves and eye protection to prevent any injuries.
Do I need to disconnect any fuel lines before removing the gas tank?
Yes, before removing the gas tank on a pressure washer, you will typically need to disconnect the fuel line. This is to ensure that the fuel does not continue to flow while the tank is being removed, which could be dangerous. The fuel line is typically connected to the tank with a clamp or a quick-release mechanism. You may need to use pliers or a gas line disconnect tool to loosen the connection and detach the fuel line from the tank.
Why would I need to remove the gas tank on my pressure washer?
You may need to remove the gas tank on your pressure washer for various reasons. One common reason is if the tank is damaged or leaking, and needs to be replaced. Another reason could be if you need to access other parts of the pressure washer that are covered by the gas tank, such as the carburetor or fuel filter.
What tools do I need to remove the gas tank on my pressure washer?
To remove the gas tank on your pressure washer, you will typically need a few basic tools. These may include a wrench or pliers to loosen and remove any bolts or screws securing the gas tank, a flathead or Phillips screwdriver to disconnect any fuel lines or hoses, and a container to drain any remaining fuel from the tank. It’s always a good idea to consult the user manual or manufacturer’s instructions for your specific pressure washer model to ensure you have the correct tools and follow the proper steps.