
Blog
How To Remove Nozzel From The Pressure Washer
If you own a pressure washer, you know how important it is to keep it well-maintained in order to ensure optimal performance. One of the key components that may need to be removed and cleaned or replaced is the nozzle. The nozzle is responsible for controlling the flow and direction of the water, and over time, it can become clogged with dirt, debris, or mineral deposits.
In this article, we will guide you through the process of removing the nozzle from your pressure washer.
Before you begin, make sure you have turned off the pressure washer and disconnected it from the power source. Safety should always be your first priority when working with any type of machinery.

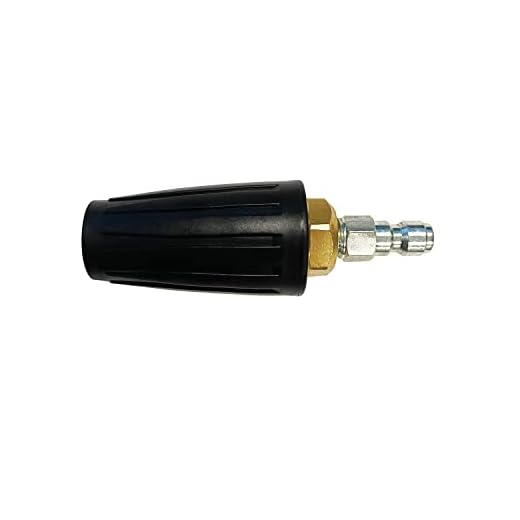

To remove the nozzle, locate the nozzle connection on the pressure washer wand. It is usually located at the end of the wand and is held in place by a threaded connection.
Using a wrench or pliers, carefully loosen the nozzle by turning it counterclockwise. Be careful not to use excessive force, as this may damage the threads or the nozzle itself.
Once the nozzle is loose, you can unscrew it completely by hand. Set the nozzle aside in a safe place.
If you are planning to clean the nozzle, inspect it for any visible signs of damage or wear. Use a small brush or toothpick to remove any debris or build-up that may be obstructing the flow of water.
When you are ready to reinstall the nozzle, simply screw it back onto the wand in a clockwise direction. Make sure it is securely tightened, but avoid over-tightening.
Now that you know how to remove and reinstall the nozzle on your pressure washer, you can ensure that your machine continues to function efficiently. Regular maintenance and cleaning of the nozzle will help prolong its lifespan and prevent any issues with water flow or pressure.
Why You Should Remove the Nozzle from Your Pressure Washer
If you own a pressure washer, it’s important to understand the benefits of removing the nozzle. While it may seem like an unnecessary step, removing the nozzle can have several advantages for both the longevity of your pressure washer and the effectiveness of your cleaning tasks.
1. Safety First
One of the main reasons to remove the nozzle from your pressure washer is safety. By taking off the nozzle, you can prevent accidental discharge or injury. The nozzle is the part responsible for controlling the pressure and flow of water. When it’s detached, you can ensure that no water will be sprayed out while you’re working on the machine.
2. Maintenance and Cleaning
Removing the nozzle also allows for easier maintenance and cleaning of your pressure washer. Over time, debris, dirt, or other particles can get stuck in the nozzle, which can affect its performance. By removing it, you can inspect and clean the nozzle thoroughly, ensuring that it’s functioning optimally.
Additionally, removing the nozzle allows you to clean the other parts of the pressure washer more effectively. Without the nozzle in place, you can direct water into hard-to-reach areas, removing dirt and grime that may have built up over time.
3. Nozzle Replacement
Another benefit of removing the nozzle is the ability to replace it if necessary. Nozzles can wear out or become damaged over time, affecting the quality of the water pressure and spray. By regularly removing the nozzle, you can assess its condition and determine if a replacement is needed. This ensures that your pressure washer continues to operate at its best.
Conclusion
Removing the nozzle from your pressure washer is a simple step with several benefits. It enhances safety, allows for easier maintenance and cleaning, and gives you the opportunity to replace a worn-out nozzle. By taking the time to remove the nozzle, you can ensure that your pressure washer stays in top shape and performs at its maximum efficiency.
Step-by-Step Guide on Removing the Nozzle
Removing the nozzle from your pressure washer is a simple process that can be done with a few tools and steps. Follow the guide below to safely remove the nozzle:
Step 1: Safety First
Before you begin, make sure to turn off the pressure washer and disconnect it from the power source. This will prevent any accidental start-ups while you are working.
Step 2: Release the Pressure
Next, you need to release the pressure built up in the system. To do this, squeeze the trigger on the pressure washer gun and hold it until all the pressure is released. This step is important to prevent any unexpected spraying or injuries.
Step 3: Remove the Nozzle
Once the pressure is released, locate the nozzle on the end of the pressure washer wand. Depending on the model, there may be a quick-connect fitting or a threaded connection.
- If it is a quick-connect fitting, simply push the collar on the fitting towards the nozzle and pull the nozzle off.
- If it is a threaded connection, use a wrench to loosen the nozzle by turning it counterclockwise. Once it is loose, unscrew the nozzle by hand until it is completely removed from the wand.
Be cautious as the nozzle may still be hot after use, so allow it to cool down before handling it.
Step 4: Clean or Replace the Nozzle
After removing the nozzle, inspect it for any clogs or damage. If there are clogs, clean the nozzle using a small wire brush or a pin to remove any debris. If the nozzle is damaged, it will need to be replaced with a new one.
Remember to choose a nozzle that is compatible with your pressure washer model and desired spray pattern.
Step 5: Reattach the Nozzle
Once the nozzle is clean or replaced, it’s time to reattach it to the pressure washer wand.
- If it is a quick-connect fitting, align the nozzle with the fitting and push it in until you hear a click, indicating that it is securely attached.
- If it is a threaded connection, simply screw the nozzle back onto the wand by turning it clockwise. Use a wrench to ensure it is tightened properly.
Make sure the nozzle is snugly attached, but be careful not to overtighten it as it may cause damage.
That’s it! You have successfully removed and reattached the nozzle on your pressure washer. You can now turn on the power and use your pressure washer with a clean or new nozzle.
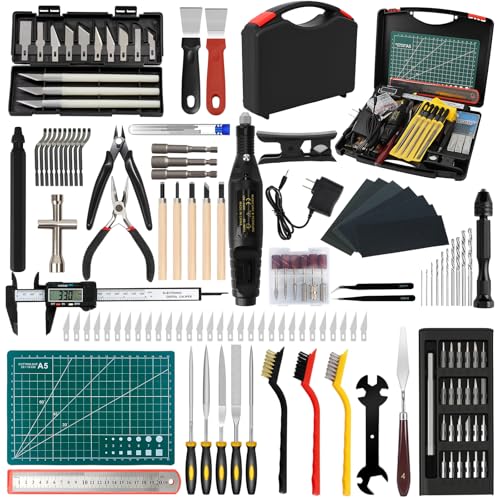
Tools Required for Nozzle Removal
Removing the nozzle from a pressure washer requires the use of a few essential tools. These tools ensure a safe and efficient removal process. Here are the tools you’ll need:
1. Adjustable wrench: This tool is used to loosen and tighten the nozzle. It allows you to have a firm grip on the nozzle, ensuring that it doesn’t slip during the removal process.
2. Needle nose pliers: These pliers are useful for removing any small debris or obstructions that may be preventing the nozzle from being removed. They allow you to reach into tight spaces and grasp onto small objects.
3. Safety goggles: It is important to protect your eyes during the removal process, as there may be pressurized water or debris that can cause injury. Safety goggles will shield your eyes from any potential hazards.
4. Work gloves: Work gloves provide added protection for your hands while handling the pressure washer and its components. They prevent your hands from getting dirty or injured during the nozzle removal process.
Having these tools on hand will make the process of removing the nozzle from your pressure washer easier and safer. Make sure to wear the appropriate safety gear and follow the manufacturer’s instructions for removing the nozzle. Always exercise caution when working with machinery and pressurized equipment.
Safety Precautions to Take Before Removing the Nozzle
Before removing the nozzle from a pressure washer, there are several important safety precautions you should take to ensure your own safety and the safety of others around you. By following these precautions, you can minimize the risk of accidents and injuries.
1. Wear Protective Gear
It is crucial to wear the appropriate protective gear when working with a pressure washer. This includes safety goggles or glasses to protect your eyes from debris and water spray. Additionally, wear sturdy gloves to protect your hands and a long-sleeved shirt to shield your arms from potential hazards.
2. Switch Off the Pressure Washer
Prior to removing the nozzle, make sure to turn off the pressure washer and unplug it from the power source. This will prevent accidental spraying and ensure that the machine is not running while you are performing maintenance.
3. Release Pressure and Disconnect the Water Supply
After turning off the pressure washer, release any remaining pressure from the system by squeezing the trigger on the nozzle. This will prevent any sudden release of pressure when removing the nozzle. Once the pressure is released, disconnect the water supply hose from the pressure washer to avoid any interruptions while working.
4. Allow the Pressure Washer to Cool Down
Pressure washers can become hot during use, so it is important to let the machine cool down before attempting any maintenance. This will protect you from potential burns and ensure that the pressure washer is safe to handle.
5. Read the Manufacturer’s Instructions
Prior to removing the nozzle, familiarize yourself with the specific instructions provided by the manufacturer. Different pressure washers may have different methods for removing the nozzle, so it is essential to follow the manufacturer’s guidelines to avoid any damage to the machine.
| Precaution | Description |
|---|---|
| Wear Protective Gear | Eyewear, gloves, and clothing to protect against debris and water spray. |
| Switch Off the Pressure Washer | Turn off the machine and unplug it from the power source. |
| Release Pressure and Disconnect the Water Supply | Squeeze the trigger to release pressure and disconnect the water supply hose. |
| Allow the Pressure Washer to Cool Down | Wait for the machine to cool down before starting maintenance. |
| Read the Manufacturer’s Instructions | Follow the specific guidelines provided by the manufacturer. |
Common Issues When Removing the Nozzle
Removing the nozzle from a pressure washer can sometimes be a tricky task. Here are some common issues that you may encounter:
1. Stuck Nozzle
One common issue is a nozzle that is stuck and difficult to remove. This can happen due to dirt or debris getting lodged in the nozzle or if it has been overtightened. To address this issue, try using a pair of pliers or a wrench to provide more leverage when trying to unscrew the nozzle. If that doesn’t work, you may need to apply some penetrating oil to loosen the nozzle.
2. Nozzle Tip Coming Off
Another common issue is the nozzle tip coming off while trying to remove it. This can happen if the nozzle hasn’t been properly secured or if it is damaged. To prevent this from happening, make sure to insert the nozzle securely into the pressure washer gun and tighten it until it is snug. If the nozzle tip is damaged, you may need to replace it.
3. Nozzle Getting Stuck in Gun
Sometimes, the nozzle may get stuck inside the pressure washer gun, making it difficult to remove. This can occur due to dirt or debris getting trapped in the gun or if the threads are damaged. To resolve this issue, try cleaning the gun with a soft brush or compressed air to remove any dirt or debris. If the threads are damaged, you may need to replace the gun.
Remember to always follow the manufacturer’s instructions when removing the nozzle from your pressure washer to avoid any potential issues.
Tips for Maintaining and Cleaning the Nozzle
Maintaining and cleaning the nozzle of your pressure washer is essential to ensure optimum performance and to prevent potential damage. Here are some tips to help you keep your nozzle in top condition:
- Regularly inspect the nozzle: Before and after each use, inspect the nozzle for any signs of wear, damage, or clogging. Replace the nozzle if it shows any signs of damage.
- Remove any debris: Use a soft brush or needle to remove any debris or dirt that may have accumulated on the nozzle. Pay special attention to the small openings to ensure they are clear.
- Flush out with water: After each use, flush out the nozzle with water to remove any residual detergent or chemicals. This will prevent build-up and clogging.
- Clean with vinegar: If you notice any stubborn clogs or mineral deposits, soak the nozzle in a solution of vinegar and water. This will help dissolve the build-up before rinsing with clean water.
- Use a nozzle cleaner: Consider using a specialized nozzle cleaner to thoroughly clean and maintain the nozzle. These cleaners are designed to remove even the toughest deposits and keep your nozzle functioning efficiently.
- Store properly: When not in use, store the nozzle in a clean, dry environment. This will help prevent corrosion and damage.
- Replace when necessary: Nozzles can wear out over time, especially if used frequently. If you notice a significant drop in pressure or if the nozzle is damaged, replace it with a new one to ensure optimal performance.
By following these tips, you can ensure that your pressure washer nozzle stays clean and in good condition, allowing you to tackle any cleaning task with ease.
Questions and answers,
Why would I need to remove the nozzle from my pressure washer?
There are several reasons why you might need to remove the nozzle from your pressure washer. One common reason is if the nozzle is clogged or not spraying properly. Removing the nozzle allows you to clean it or replace it with a new one. Additionally, some people may need to remove the nozzle to attach a different type of nozzle or accessory.
What tools do I need to remove the nozzle from my pressure washer?
The tools you will need to remove the nozzle from your pressure washer may vary depending on the specific model and design. In most cases, you will only need a wrench or pliers to unscrew the nozzle from the wand or gun of the pressure washer. However, it’s always best to consult the user manual or contact the manufacturer for specific instructions and recommended tools.
Can I remove the nozzle while the pressure washer is running?
No, it is not recommended to remove the nozzle from the pressure washer while it is running. The pressure washer should always be turned off and the unit should be depressurized before attempting to remove the nozzle. This can help prevent any accidental injuries or damage to the equipment.
How do I remove a stuck nozzle from my pressure washer?
If the nozzle is stuck and difficult to remove from your pressure washer, there are a few steps you can try. Firstly, you can try using a penetrating oil or lubricant on the threads of the nozzle to help loosen it. Allow the lubricant to sit for a few minutes, then try using a wrench or pliers to gently turn and unscrew the nozzle. If this doesn’t work, you may need to apply more pressure or try using a strap wrench for more leverage. Additionally, you can consult the user manual or contact the manufacturer for further guidance.
How often should I remove and clean the nozzle on my pressure washer?
The frequency at which you should remove and clean the nozzle on your pressure washer can vary depending on usage and conditions. However, in general, it is recommended to check and clean the nozzle at least once a season or every 50 hours of use. Regular cleaning can help maintain proper spray patterns and prevent clogs or blockages. If you notice a decrease in performance or uneven spraying, it may be a sign that the nozzle needs to be cleaned or replaced.
Why would I need to remove the nozzle from my pressure washer?
There are a few reasons why you might need to remove the nozzle from your pressure washer. One common reason is if the nozzle becomes clogged and needs to be cleaned. Another reason could be if you want to switch to a different type of nozzle for a specific cleaning task. Additionally, removing the nozzle may be necessary for maintenance or repair purposes.
What is the best way to remove the nozzle from a pressure washer?
The best way to remove the nozzle from a pressure washer can vary depending on the specific model you have. In general, you should start by turning off the pressure washer and releasing any pressure in the system. Then, carefully unscrew the nozzle from the end of the wand or lance. If it is difficult to unscrew, you can try using a wrench or pliers to get a better grip. Just be sure to take caution and not damage the nozzle or the pressure washer while removing it.