
Blog
How To Use Pressure Washer To Prepare House For Painting


If you’re planning to give your house a fresh coat of paint, it’s important to prep the surface properly. One of the most effective tools you can use is a pressure washer. By using a pressure washer to clean your house before painting, you can remove dirt, grime, and old paint, ensuring that your new coat of paint will adhere properly and last longer.
Step 1: Choose the right pressure washer
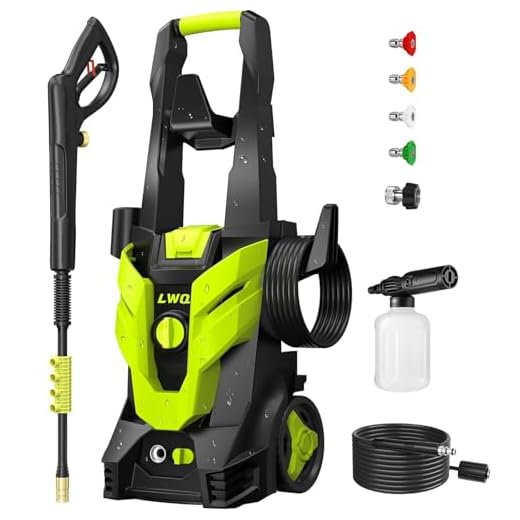
Before you start, make sure you have the proper equipment. Look for a pressure washer with enough power to effectively clean your house without damaging the surfaces. A pressure washer with a psi (pounds per square inch) between 1500 and 3000 is usually sufficient for most house painting projects.
Step 2: Prepare the area
Before you begin using the pressure washer, it’s important to prepare the area around your house. Remove any obstacles or loose items that could be damaged by the high-pressure water. Cover delicate plants and shrubs with plastic sheets to protect them from the water and cleaning agents.
Step 3: Test the pressure
Before you start cleaning, test the pressure washer on a small, inconspicuous area of your house. This will allow you to see how the water pressure affects the surface and adjust the settings if necessary. You should aim to remove dirt and loose paint without damaging the underlying surface.
Step 4: Clean the surface
Once you’re familiar with the pressure washer and have tested it on a small area, you can start cleaning the rest of the house. Begin at the top and work your way down, applying the high-pressure water in a sweeping motion. Be sure to cover all the surfaces, including walls, fences, and even the roof if necessary.
Step 5: Allow the surfaces to dry
After you’ve finished cleaning, allow the surfaces to dry completely before applying paint. This will ensure that the paint adheres properly and gives you the best results. Depending on the weather conditions, this may take anywhere from a few hours to a full day.
By following these steps and using a pressure washer to clean your house before painting, you can ensure that your new coat of paint will look great and last longer. Proper surface preparation is key to a successful paint job, and a pressure washer can make the process much easier and more efficient.
Get Your House Ready
One of the most crucial steps in preparing your house for painting is properly cleaning the exterior surfaces. Using a pressure washer can help remove dirt, grime, and other contaminants that can interfere with the adhesion of the paint.
Before starting the pressure washing process, make sure to cover any delicate plants or furniture near the house to protect them from being damaged by the high-pressure water. Also, close all windows and doors to prevent water from entering the house.
Start by inspecting the exterior surfaces for any loose or peeling paint. If you find any, scrape off the old paint using a paint scraper. It’s important to remove all loose paint to ensure a smooth and long-lasting paint job.
Next, fill the pressure washer with a mixture of water and a cleaning agent specifically designed for pressure washing houses. Follow the manufacturer’s instructions for the correct ratio of water to cleaning agent.
Begin pressure washing the house from top to bottom, working in small sections. Hold the pressure washer nozzle several feet away from the surface and move it gradually closer if necessary. Keep the nozzle at a consistent distance to avoid causing damage to the surface.
Pay extra attention to areas with stubborn stains or mold growth. In these cases, you may need to use a higher pressure setting on the pressure washer or apply a specialized cleaner to effectively remove the stains.
After pressure washing the entire exterior, thoroughly rinse off any remaining cleaning solution. This will help prevent any residue from interfering with the paint’s adhesion.
Allow the house to dry completely before proceeding with the painting process. This usually takes at least 24 hours, depending on the weather conditions.
Once the house is completely dry, inspect the surfaces again for any signs of remaining dirt, loose paint, or damage. Make any necessary repairs and touch-ups before applying the primer and paint.
By properly cleaning and preparing your house before painting, you can ensure a professional-looking finish that will last for years to come.
|
PRO TIP: Consider using a surface cleaner attachment for your pressure washer. This tool can help distribute the water evenly and cover larger surface areas more efficiently, saving you time and effort. |
Preparing Your House for Painting
Before you start painting your house, it is important to properly prepare the surfaces to ensure a smooth and long-lasting finish. Using a pressure washer is an effective way to clean and prepare the exterior of your house for painting.
1. Clear the Area
Before using a pressure washer, make sure to clear the area around your house. Remove any furniture, decorations, or plants that could get in the way or get damaged during the process. Trim any bushes or trees that are touching the house to ensure they won’t interfere with the cleaning.
2. Inspect the Surfaces
Thoroughly inspect the surfaces that you plan to paint. Look for any cracks, flaking paint, or other damage that needs to be repaired beforehand. Use a scraper to remove loose or peeling paint. Fill any cracks or holes with putty and sand the area smooth.
3. Choose the Right Nozzle
When using a pressure washer, it is important to choose the right nozzle for the job. A 25-degree nozzle is usually recommended for preparing surfaces for painting. This will provide enough pressure to remove dirt and loose paint without causing damage.
4. Pressure Wash the Surfaces
Start pressure washing the surfaces, beginning from the top and working your way down. Hold the pressure washer nozzle about 12-18 inches away from the surface and use sweeping motions to remove dirt, grime, and loose paint. Be careful not to stay in one spot for too long to avoid damaging the surface.
5. Let the Surfaces Dry
After pressure washing, allow the surfaces to dry completely before proceeding with the painting. This usually takes around 24-48 hours, depending on the weather conditions. Make sure the surfaces are fully dry to ensure proper adhesion of the paint.
By properly preparing your house for painting, you can achieve a professional-looking finish that will last for years to come. Pressure washing is an essential step that helps to remove dirt, grime, and loose paint, creating a clean surface for the paint to adhere to.
Using a Pressure Washer
Before you begin using a pressure washer to prepare your house for painting, it’s important to familiarize yourself with the machine and its settings. Here are some steps to follow:

| Step 1: | Read the instruction manual that comes with your pressure washer. Make sure you understand the safety precautions and operating instructions. |
| Step 2: | Prepare the area you will be pressure washing by removing any loose objects, such as outdoor furniture or decorations. |
| Step 3: | Inspect the exterior surfaces of your house for any loose or peeling paint, as well as any areas of dirt or grime buildup. These areas may require more attention during the pressure washing process. |
| Step 4: | Adjust the pressure washer’s settings according to the surface you will be cleaning. Lower pressure settings are typically best for painted surfaces, while higher settings may be appropriate for concrete or brick. |
| Step 5: | Start at the top of your house and work your way down. Hold the pressure washer wand at a 45-degree angle and maintain a consistent distance of 6-12 inches from the surface you are cleaning. |
| Step 6: | Moving in a side-to-side motion, spray the water in a sweeping motion to remove dirt and mildew. Be careful not to apply too much pressure, as this can damage the surface. |
| Step 7: | Pay extra attention to areas with peeling paint or heavy dirt buildup. You may need to use a higher pressure setting or a rotating nozzle attachment to remove stubborn stains. |
| Step 8: | Once you have finished pressure washing the entire house, allow the surfaces to dry thoroughly before applying any paint or primer. This will ensure the best adhesion and longevity of your new paint job. |
Remember to always exercise caution when using a pressure washer, as the high-pressure water can cause injury if mishandled. Wear protective clothing, such as goggles and gloves, and avoid pointing the wand at yourself or others. Following these steps will help you effectively use a pressure washer to prepare your house for painting.
Questions and answers,
What is the first step in preparing a house for painting using a pressure washer?
The first step in preparing a house for painting using a pressure washer is to inspect the exterior surfaces for any signs of damage or loose paint.

Is it necessary to cover windows and doors before pressure washing a house?
Yes, it is important to cover windows and doors before pressure washing a house to protect them from water and debris.
What kind of detergent should I use when pressure washing my house before painting?
It is recommended to use a mild detergent specifically designed for pressure washers when cleaning the exterior surfaces of your house.
Should I use a high or low pressure setting when pressure washing my house?
When pressure washing a house, it is best to start with a low pressure setting and gradually increase the pressure if necessary. Using too high of a pressure setting can damage the surfaces of your house.
Recent Posts
-

How To Connect Soap To Honda Pressure Washer
June 28, 2024 -

A To Z Pressure Washing Scam
June 27, 2024 -

How To Pressure Wash Your Home With A Garden Hose
June 27, 2024 -

Where Can I Buy Honda Pressure Washer Parts
June 25, 2024 -
