
Blog
How To Treat A Deck After Pressure Washing


Pressure washing your deck is an effective way to remove dirt, grime, and mildew buildup, leaving it looking fresh and revitalized. However, after pressure washing, it’s important to take additional steps to ensure that your deck remains in great condition and is properly protected. Treating your deck after pressure washing will help prolong its lifespan and keep it looking its best.
Step 1: Allow Sufficient Drying Time
Before applying any treatments or sealants, it’s crucial to allow your deck ample time to dry thoroughly. This may take a few days, depending on the climate and weather conditions. It’s important to ensure that the wood is completely dry to prevent any moisture from being trapped, which can lead to rot or mold growth.
Step 2: Inspect and Repair any Damaged Areas
While your deck is drying, take the opportunity to carefully inspect it for any signs of damage or wear. Look for loose boards, protruding nails, or any other areas in need of repair. Addressing these issues before treating your deck will help prevent further damage and ensure a longer-lasting and safer outdoor space.
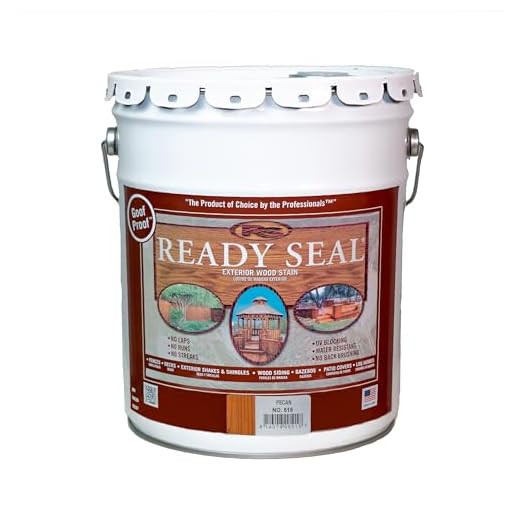
Step 3: Choose and Apply the Appropriate Treatment

When selecting a treatment for your deck, consider factors such as the type of wood, climate, and desired level of protection. There are various options available, including stains, sealants, and oils. Apply the chosen treatment according to the manufacturer’s instructions, making sure to cover all surfaces evenly. This will help enhance the natural beauty of the wood and protect it from UV rays, moisture, and other elements.
Step 4: Regular Maintenance
After treating your deck, it’s important to establish a regular maintenance routine. This may include sweeping away debris, cleaning up spills promptly, and periodically reapplying a protective coating. Regular maintenance will help extend the life of your deck and keep it looking beautiful for years to come.
By following these steps and properly treating your deck after pressure washing, you can enjoy a clean and well-maintained outdoor space that provides endless enjoyment and adds value to your home.
Preparing Your Deck for Pressure Washing
Before you begin pressure washing your deck, it’s important to properly prepare it to ensure the best results. Follow these steps to get your deck ready for pressure washing:
1. Clear the Deck
Start by removing all furniture, plants, and other objects from your deck. This will allow you to have clear access to all areas and prevent any damage or obstructions during the pressure washing process.
2. Sweep and Clean
Using a broom or leaf blower, sweep away any loose debris, dirt, leaves, and branches from the deck surface. Then, give it a thorough cleaning by scrubbing with a deck cleaner solution and water. This will help to remove any stains, mold, mildew, or algae that may have accumulated over time.
3. Cover Nearby Plants and Objects
If you have plants, shrubs, or any other objects near your deck that you want to protect, use plastic sheeting or drop cloths to cover them. This will prevent any damage or chemical exposure during the pressure washing process.
4. Check for Loose Nails and Repair
Inspect the deck surface for any loose or raised nails. Use a hammer to gently tap them back into place or replace them if necessary. This will prevent any injuries and ensure a smooth and safe pressure washing process.
5. Test the Pressure Washer
Before starting the pressure washing, test the equipment on a small, inconspicuous area of the deck to ensure that it won’t cause any damage. Adjust the pressure and nozzle settings as needed to find the right balance between effectiveness and safety.
6. Protect Yourself
Prioritize safety by wearing protective gear such as safety goggles, gloves, and closed-toe shoes. This will protect you from any debris, cleaning solutions, or high-pressure water that may come into contact with your body.
7. Remove Stubborn Stains
If there are any stubborn stains or discoloration on your deck, you may need to use a deck brightener or stain remover. Follow the instructions provided with the product and apply it to the affected areas before pressure washing.
8. Wet the Deck Surface
Before you start pressure washing, wet the entire deck surface with a hose. This will help to loosen any dirt and make the pressure washing process more effective.
By following these steps and properly preparing your deck for pressure washing, you can achieve the best results and ensure that your deck is clean, safe, and ready for any further treatment or maintenance.
Important Steps to Take
After pressure washing your deck, it is important to take a few additional steps to ensure that it remains in good condition and is ready for use. Here are some important steps to take:
1. Allow Sufficient Drying Time
After pressure washing, it is crucial to allow your deck ample time to dry before moving forward. Moisture that remains trapped in the wood can lead to rot and other damage. Depending on the weather conditions and the type of wood, this drying process can take anywhere from 24 to 48 hours.
2. Inspect for Damage
While pressure washing your deck, it is possible that you may have inadvertently caused some damage. Carefully inspect the surface for any loose boards, cracks, or splintering. If you notice any damage, take the time to repair or replace those areas before proceeding.
Note: If you are unsure about how to tackle any repairs, it is recommended to consult a professional.
3. Apply a Protective Coating
Once your deck is completely dry and any needed repairs have been addressed, it is time to apply a protective coating. Using a high-quality sealant or stain can help protect your deck from future damage caused by the sun, moisture, and foot traffic.
Pro Tip: Make sure to choose a product that is specifically designed for use on decks and follow the manufacturer’s instructions for application.
4. Regular Maintenance
After treating your deck, it is important to establish a regular maintenance routine. This may include sweeping away debris, spot cleaning as needed, and reapplying a protective coating periodically.
Note: Regular maintenance will help extend the lifespan of your deck and keep it looking beautiful for years to come.
Pressure Washing Your Deck
Pressure washing your deck is an important step in maintaining its appearance and prolonging its lifespan. Over time, decks can accumulate dirt, grime, and mildew, which can not only make them look unattractive but also cause damage. Pressure washing can help remove these contaminants and restore your deck to its original condition.
Benefits of Pressure Washing
There are several benefits to pressure washing your deck:
- Cleans deep into the wood: Pressure washing can reach deep into the wood fibers, removing ingrained dirt and grime that regular cleaning methods may not be able to reach.
- Removes mildew and algae: Over time, decks can develop mildew and algae growth, which not only look unsightly but can also compromise the integrity of the wood. Pressure washing can effectively remove these growths and prevent further damage.
- Prepares the deck for treatment: If you plan on staining or sealing your deck, pressure washing is an essential first step. It helps remove any existing finish or sealer, allowing for better adhesion of the new treatment.
- Restores the deck’s appearance: After pressure washing, your deck will look refreshed and rejuvenated. The natural beauty of the wood will be brought back, making your outdoor space more inviting.
How to Pressure Wash Your Deck
Here is a step-by-step guide on how to pressure wash your deck:
- Clear the deck: Remove all furniture, plants, and other objects from the deck before starting the pressure washing process. This will prevent any damage to these items.
- Sweep the deck: Use a broom to sweep away any loose dirt, leaves, or debris from the deck surface. This will make the pressure washing more effective.
- Choose the right pressure washer: Select a pressure washer with an appropriate psi (pounds per square inch) rating for your deck. Too high pressure can damage the wood, while too low pressure may not effectively clean it.
- Wet the deck: Before starting the pressure washer, thoroughly wet the deck surface. This will help prevent the wood from soaking up too much water and potentially causing damage.
- Start pressure washing: Begin pressure washing the deck, working in sections from one end to the other. Hold the nozzle at a slight angle to the surface and maintain a consistent distance to avoid gouging the wood.
- Remove stubborn stains: For stubborn stains, use a deck cleaner or a mild detergent before pressure washing. Apply the cleaner, scrub with a brush, and then rinse with the pressure washer.
- Allow the deck to dry: After pressure washing, allow the deck to air dry completely before applying any treatments or sealants. This will ensure proper absorption and adhesion of the products.
Remember to follow the manufacturer’s instructions for your specific pressure washer and any cleaning products you use. With regular pressure washing, your deck will not only look better but also last longer.
| Materials Needed | Tools Needed |
|---|---|
| Pressure washer | Broom |
| Deck cleaner or mild detergent | Deck brush |
| Garden hose | |
| Protective eyewear |
Best Practices and Techniques
When treating a deck after pressure washing, it’s important to follow these best practices and techniques to ensure the best results:

- Allow the deck to fully dry: After pressure washing, give the deck ample time to dry completely. This can take anywhere from a few hours to a couple of days, depending on the weather conditions.
- Inspect the deck for any damage: Before applying any treatments, carefully inspect the deck for any signs of damage, such as loose boards or nails. Address any necessary repairs before proceeding.
- Select the appropriate sealer or stain: Choose a sealer or stain that is specifically formulated for use on decks. Consider factors such as the deck’s exposure to sunlight, its location, and the desired finish. Follow the manufacturer’s instructions for application.
- Prepare the deck surface: To ensure proper adhesion of the sealer or stain, clean the deck surface again using a deck cleaner and a scrub brush. Rinse thoroughly and let the deck dry completely before applying any treatments.
- Apply the treatment in the right conditions: Avoid treating the deck on hot, sunny days, as this can cause the sealer or stain to dry too quickly and result in an uneven finish. Ideally, choose a day with mild temperatures and low humidity.
- Use the right tools: When applying the sealer or stain, use a brush or a roller specifically designed for decks. This will ensure even coverage and help reach in between boards and tight corners.
- Apply multiple thin coats: Instead of applying one thick coat, it’s generally better to apply multiple thin coats of sealer or stain. This allows for better penetration and durability.
- Allow sufficient drying time: After applying the treatment, allow the deck to dry for the recommended amount of time. This can vary depending on the product, so refer to the manufacturer’s instructions.
- Maintain the deck: Regularly clean the deck and reapply sealer or stain as needed to protect the wood and maintain its appearance. This will help extend the life of the deck and keep it looking its best.
By following these best practices and techniques, you can ensure that your treated deck remains in excellent condition for years to come. Remember to always prioritize safety and carefully read and follow the instructions provided by the product manufacturer.
Post-Cleaning Deck Maintenance
Proper maintenance after pressure washing your deck is essential to ensure its longevity and keep it looking its best. Here are some important steps to follow:
1. Allow the Deck to Dry: After pressure washing, it is crucial to allow the deck to dry completely before taking further steps. This usually takes about 48 hours, depending on weather conditions.

2. Inspect for Damage: Carefully inspect the deck for any signs of damage that might require repair. Look for loose boards, popped nails, or any other issues that need attention.
3. Repair and Replace: If you find any damaged or worn-out areas, make the necessary repairs and replacements. This may involve replacing a few boards, tightening loose screws, or driving in new nails.
4. Sanding: After repairs, sand the deck surface to smoothen the wood and remove any splinters or rough spots. This step will also help in preparing the deck for staining or sealing.
5. Staining or Sealing: Applying a wood stain or sealer is an important step in protecting your deck from weather damage and maintaining its appearance. Choose a product that is suitable for your deck’s wood type and follow the manufacturer’s instructions for application.
6. Regular Cleaning: To keep your deck looking its best, it is recommended to regularly clean it with a mild detergent and water solution. This will help remove dirt, mildew, and other debris that can accumulate over time.
7. Repeat as Needed: Depending on the amount of foot traffic and weather exposure, you may need to repeat the staining or sealing process every 2-3 years. Regularly inspect your deck for signs of wear and repeat the necessary maintenance steps.
By following these post-cleaning deck maintenance steps, you can ensure that your deck remains in good condition and provides a beautiful outdoor space for many years to come.
Questions and answers
What is pressure washing?
Pressure washing is a method of cleaning surfaces using a high-pressure water spray. It is commonly used to remove dirt, grime, mold, and mildew from a variety of surfaces, including decks.
Is it necessary to treat a deck after pressure washing?
Yes, it is important to treat a deck after pressure washing. Pressure washing can strip away the outer layer of wood, leaving it more vulnerable to damage from the elements. Treating the deck helps to restore and protect the wood, prolonging its lifespan.
What steps should be taken to treat a deck after pressure washing?
There are several steps to follow when treating a deck after pressure washing. First, allow the deck to completely dry. Then, inspect the surface for any damage or loose boards that need repair. Next, apply a wood cleaner to remove any remaining dirt or stains. After that, sand the deck to smooth out any rough areas. Finally, apply a deck sealer or stain to protect the wood and enhance its appearance.
How often should a deck be treated after pressure washing?
The frequency of treating a deck after pressure washing depends on several factors, including the climate, the quality of the wood, and the amount of foot traffic on the deck. In general, it is recommended to treat a deck every 1-3 years to ensure optimal protection and appearance.
Recent Posts
-

How To Connect Soap To Honda Pressure Washer
June 28, 2024 -

A To Z Pressure Washing Scam
June 27, 2024 -

How To Pressure Wash Your Home With A Garden Hose
June 27, 2024 -

Where Can I Buy Honda Pressure Washer Parts
June 25, 2024 -
