
Blog
How To Take Tip Off Pressure Washer
Pressure washers are powerful tools that are used for cleaning a variety of surfaces, including driveways, decks, and vehicles. One of the most important parts of a pressure washer is the tip, which determines the pressure and angle of the water spray. Over time, it may become necessary to remove the tip for cleaning or replacement. While this may seem like a daunting task, it can be easily done with the right tools and techniques.
Step 1: Before attempting to remove the tip, make sure that the pressure washer is turned off and that the trigger is released. This will prevent any accidental spraying of water and ensure your safety.
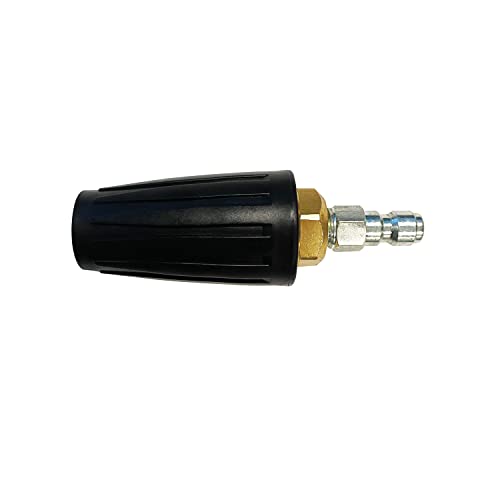
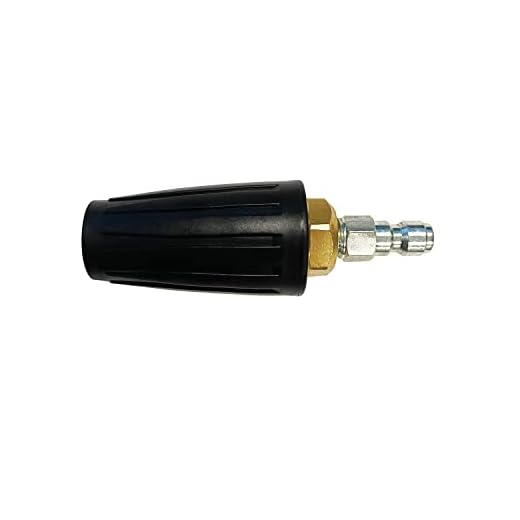
Step 2: Locate the tip on the end of the spray wand. Depending on the make and model of your pressure washer, the tip may either be threaded or held in place with a quick-connect fitting. If it is threaded, use an adjustable wrench to unscrew the tip in a counterclockwise direction. If it is a quick-connect fitting, simply pull back on the collar and gently pull the tip out.
Step 3: Once the tip is removed, inspect it for any signs of damage or wear. If the tip is clogged, use a small wire or pin to unclog it. If the tip is damaged, it may need to be replaced with a new one. Refer to the manufacturer’s instructions or consult a professional if you are unsure about what type of tip to use.
Step 4: After cleaning or replacing the tip, reattach it to the spray wand by either screwing it back on or pushing it into the quick-connect fitting until it clicks into place. Make sure it is secure and properly aligned before turning on the pressure washer.


By following these simple steps, you can easily take the tip off your pressure washer for cleaning or replacement. Remember to always exercise caution and refer to the manufacturer’s instructions for your specific pressure washer model. Proper maintenance of your pressure washer’s tip will ensure optimal performance and longevity of your machine.
Preparing Your Pressure Washer
Before taking the tip off your pressure washer, it is important to properly prepare the machine. Taking the necessary precautions can ensure a safe and efficient cleaning experience. Follow these steps to prepare your pressure washer:
1. Safety First
- Make sure the pressure washer is turned off and unplugged.
- Wear appropriate safety gear, such as gloves and goggles, to protect yourself from any potential injuries.
2. Inspect the Tip
Take a close look at the tip to ensure it is clean and free from any debris or damage. If the tip is clogged or damaged, it may need to be replaced.
3. Remove Any Attachments
If there are any attachments or accessories attached to the pressure washer, such as a surface cleaner or a soap dispenser, remove them before taking off the tip.
4. Release Pressure
Before removing the tip, release the pressure from the pressure washer. This can be done by squeezing the trigger on the spray gun to allow any built-up pressure to escape.
5. Turn Off Water Supply
Locate the water supply valve and turn it off to prevent any water from flowing into the pressure washer while the tip is being removed.
6. Access the Tip
Depending on the design of your pressure washer, you may need to unscrew a cap or release a locking mechanism to access the tip. Refer to the manufacturer’s instructions for specific guidance.
7. Remove the Tip
Gently twist or pull the tip to remove it from the pressure washer. Be careful not to force it or use excessive force, as this may cause damage.
By following these steps, you can safely and effectively remove the tip from your pressure washer, allowing for easy cleaning and maintenance.
Safety Precautions before Taking the Tip Off
Before taking the tip off of a pressure washer, it is important to follow some safety precautions to ensure personal safety and prevent any damage to the machine.
1. Turn Off the Pressure Washer
Prior to removing the tip, make sure to turn off the pressure washer and unplug it from the power source. This will prevent any accidental startups or electric shocks.
2. Relieve Pressure
Release any pressure in the system by squeezing the trigger on the gun to allow any remaining water and pressure to escape. This will help avoid any sudden bursts of water or accidental injuries.
3. Wear Protective Gear
Wearing the appropriate safety gear is crucial when working with a pressure washer. Put on safety goggles or a face shield to protect your eyes from any debris or water splashes. Additionally, wear gloves to safeguard your hands from chemicals or any sharp edges.
4. Check for Damage
Inspect the tip and the surrounding components for any signs of damage or wear. If there are cracks, dents, or other visible issues, do not attempt to remove the tip and consult a professional for assistance.
5. Follow Manufacturer’s Guidelines
Refer to the manufacturer’s manual or guidelines for specific instructions on removing the tip. Each pressure washer may have different mechanisms or requirements, so following the recommended steps will ensure the process is done correctly and safely.
| Important Safety Reminders: |
|---|
| – Never point the pressure washer tip at yourself or others. |
| – Do not tamper with or modify the tip or any other parts of the pressure washer. |
| – Keep children and pets away from the work area. |
| – Never operate the pressure washer without the spray tip properly attached. |
| – If you are unsure or uncomfortable with removing the tip, seek professional assistance. |
By following these safety precautions, you can safely remove the tip from your pressure washer and perform any necessary maintenance or replacements.
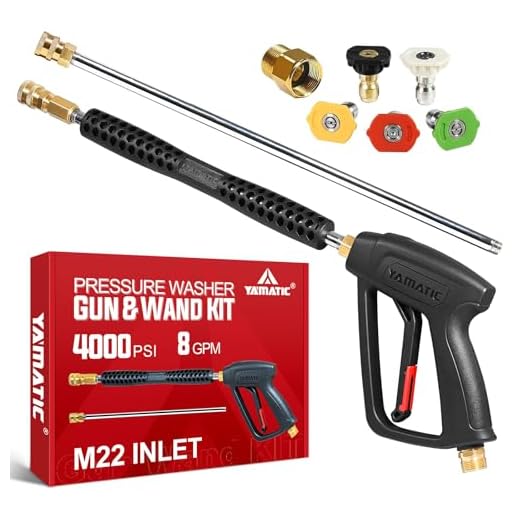
Identifying the Right Tip on Your Pressure Washer
When using a pressure washer, it is important to choose the right tip for the job you are doing. The tip you use will determine the pressure and spray pattern of the water, so it is crucial to select the proper one for optimal cleaning performance. Here are some tips for identifying the right tip on your pressure washer:
1. Consult the user manual: The first step in choosing the right tip is to refer to the user manual of your pressure washer. The manual will provide you with information on the different tips available and their recommended applications.
2. Consider the spray pattern: Different tips produce different spray patterns, such as a narrow stream, a wide fan, or a rotating pattern. Determine the type of spray pattern you need for the task at hand, whether it is to remove stubborn dirt, clean a large surface area, or apply detergent.
3. Check the color coding: Many pressure washer tips are color-coded to indicate their specific use. For example, a red tip might be designated for a high-pressure narrow stream, while a yellow tip may be for a wider fan spray. Refer to the color coding guide provided by the manufacturer to select the appropriate tip.
4. Consider the pressure rating: Each tip is designed to handle a specific pressure range. It is important to choose a tip that can handle the pressure output of your pressure washer. Using a tip that is not rated for the machine’s pressure can result in damage or inefficiency.
5. Test and adjust: Once you have selected a tip, it is always a good idea to test it on a small, inconspicuous area before tackling the entire surface. You can then make any necessary adjustments, such as swapping to a different tip or adjusting the distance from the surface, to achieve the desired cleaning results.
| Tip Color | Spray Pattern | Recommended Use |
|---|---|---|
| Red | Narrow stream | Removing stubborn dirt |
| Yellow | Wide fan spray | Cleaning large surface areas |
| Green | Rotating pattern | Applying detergent |
Remember, the right tip can make a significant difference in the performance of your pressure washer. Take the time to identify the appropriate tip for the job and ensure a more efficient and effective cleaning experience.
Steps to Remove the Tip from Your Pressure Washer
Removing the tip from your pressure washer is a simple process that can be done in a few easy steps. Follow the instructions below:
| Step 1: | Switch off the pressure washer and disconnect it from the power source. This is important to ensure your safety. |
| Step 2: | Locate the nozzle tip at the end of the pressure washer wand. It is usually color-coded and marked with the spray angle. |
| Step 3: | Hold the pressure washer wand firmly with one hand and use the other hand to rotate the tip counterclockwise. Apply gentle pressure to loosen the tip. |
| Step 4: | Continue rotating the tip counterclockwise until it is completely loose. You should be able to remove it effortlessly. |
| Step 5: | Once the tip is removed, inspect it for any signs of damage or wear. If necessary, clean or replace the tip before reattaching it. |
Removing the tip from your pressure washer is an essential step for maintenance and troubleshooting. Remember to always handle the tip with care, as it can be delicate and prone to damage. Following these steps will help you remove the tip safely and efficiently.
Cleaning and Maintaining the Tip
To ensure the optimal performance of your pressure washer, it is important to clean and maintain the tip regularly. A clogged or worn-out tip can affect the pressure and flow of water, resulting in poor cleaning results. Here are some steps you can follow to clean and maintain the tip:
| Step | Description |
|---|---|
| 1 | Turn off the pressure washer and disconnect it from the power source. |
| 2 | Remove the tip from the spray wand by twisting it counterclockwise. |
| 3 | Inspect the tip for any dirt, debris, or clogs. |
| 4 | Soak the tip in a mixture of water and mild detergent for a few minutes. |
| 5 | Use a small brush, such as a toothbrush, to gently scrub the tip and remove any remaining dirt or debris. |
| 6 | Rinse the tip thoroughly with clean water to remove any soap residue. |
| 7 | Inspect the tip again to ensure it is clean and free from clogs. |
| 8 | Replace the tip on the spray wand by twisting it clockwise until it is securely attached. |
| 9 | Test the pressure washer to ensure proper functioning. |
By regularly cleaning and maintaining the tip of your pressure washer, you can ensure optimal performance and prolong its lifespan. Remember to always follow the manufacturer’s instructions and guidelines for cleaning and maintenance.
Reattaching the Tip to Your Pressure Washer
Once you have finished cleaning with your pressure washer and removed the tip, it’s important to know how to reattach it properly. Here are some steps to follow:
1. Check for any damage
Before reattaching the tip, inspect it for any signs of damage or wear. Look for cracks, chips, or any other issues that may affect its performance. If you notice any damage, it’s best to replace the tip to ensure efficient cleaning.
2. Align the tip with the nozzle
Once you have confirmed that the tip is in good condition, align it with the nozzle of the pressure washer. Make sure the tip is facing the correct way and that it fits snugly into place. The tip should slide into the nozzle smoothly without any resistance.
3. Push and twist
To secure the tip, push it firmly into the nozzle and twist it clockwise. This twisting motion locks the tip in place and prevents it from coming off during operation. Make sure to apply enough pressure to ensure a tight fit, but be careful not to overtighten as this can cause damage.
Note: Some pressure washers may have a locking mechanism or collar that needs to be lifted or turned before you can reattach the tip. Refer to your pressure washer’s manual for specific instructions on how to properly attach the tip.
With these simple steps, you can easily reattach the tip to your pressure washer and get back to cleaning efficiently. Always double-check that the tip is securely fastened before starting the pressure washer to prevent any accidents or damage.
Questions and answers
What is a pressure washer tip?
A pressure washer tip is an attachment that controls the spray pattern and intensity of water coming out of the nozzle of a pressure washer. It determines the cleaning power and the type of surface that can be cleaned.
How do I remove the tip from a pressure washer?
To remove the tip from a pressure washer, you should first turn off the machine and disconnect it from the power source. Then, you can use a wrench to unscrew the tip from the end of the nozzle. Be careful not to lose the tip or damage it during the process.
Why would I need to take the tip off of my pressure washer?
There are several reasons why you might need to take the tip off of your pressure washer. For example, if the tip is worn out or damaged, you may need to replace it with a new one. Additionally, you may want to change the tip to adjust the pressure or spray pattern for different cleaning tasks.
What types of tips are available for pressure washers?
There are various types of tips available for pressure washers, each with a different spray pattern and pressure level. Some common types include 0-degree, 15-degree, 25-degree, and 40-degree tips. There are also tips specifically designed for soap application and turbo nozzles for extra cleaning power.
Can I use different tips on my pressure washer for different applications?
Yes, you can use different tips on your pressure washer for different applications. Depending on the task at hand, you may need to adjust the pressure and spray pattern to achieve the desired cleaning results. By using different tips, you can customize the performance of your pressure washer to suit various surfaces and cleaning needs.