
Blog
How To Take Apart A Simoniz Pressure Washer


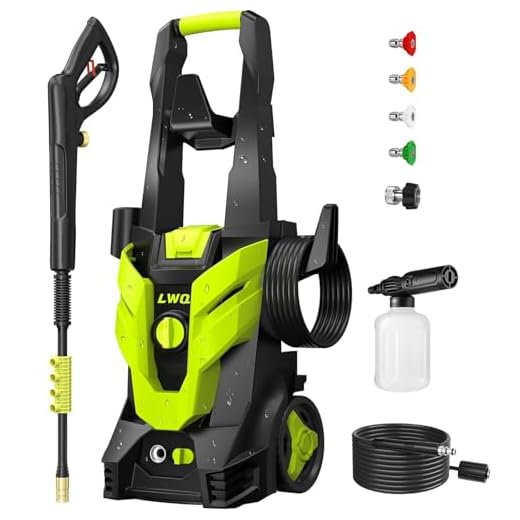


Simoniz pressure washers are known for their powerful cleaning ability and durability. However, even the best machines can sometimes require maintenance or repairs. If you find yourself in a situation where you need to take apart your Simoniz pressure washer, it’s important to follow the proper steps to ensure a successful disassembly.
Safety first: Before diving into the disassembly process, make sure to disconnect the washer from any power source and relieve any built-up pressure in the system. This will prevent any accidental injuries and ensure a safe working environment.
Gather the necessary tools: To effectively disassemble your Simoniz pressure washer, you’ll need a set of basic tools including a screwdriver, pliers, wrenches, and possibly a socket set. Having these tools on hand will make the disassembly process much smoother and more efficient.
Refer to the owner’s manual: Each Simoniz pressure washer model may have slightly different components and disassembly processes. Before starting, consult the owner’s manual for your specific model to familiarize yourself with the correct procedures and precautions. This will save you time and minimize the risk of damaging any parts.
Taking Apart Your Simoniz Pressure Washer: Step by Step Guide
If you encounter any issues with your Simoniz pressure washer and need to perform maintenance or repairs, taking it apart can be a necessary step. While it may seem daunting at first, with the right tools and knowledge, disassembling your pressure washer can be a straightforward process. Follow this step-by-step guide to safely take apart your Simoniz pressure washer.
1. Safety First: Before beginning any disassembly, ensure that the pressure washer is turned off and disconnected from any power sources. This will prevent any accidents or injuries.
2. Gather the Tools: You will need a set of basic hand tools such as wrenches, screwdrivers, and pliers. Additionally, find a clean and clear workspace where you can lay out the disassembled parts.
3. Start with the Nozzles and Accessories: Begin by removing any nozzles, attachments, or accessories from the pressure washer. These can usually be detached by hand or with the help of a wrench or pliers.
4. Remove the Pressure Hose and Gun: If your pressure washer comes with a separate pressure hose and gun, disconnect them from the main unit. Loosen any connections and be careful to release any built-up pressure before detaching the hose and gun.
5. Open the Casing: Using the appropriate screwdriver or wrench, carefully remove the screws or bolts that secure the casing of the pressure washer. Set the screws aside in a safe place to avoid misplacing them.
6. Access the Pump and Motor: With the casing removed, you will have access to the pump and motor assembly. Take note of how these components are connected before proceeding.
7. Disconnect Power and Water Connections: Before disconnecting any wires or hoses, ensure that the pressure washer is completely turned off and the water supply is shut off. This will prevent any accidental damage or leaks.
8. Detach Pump and Motor Assembly: Carefully disconnect any wires or hoses connecting the pump and motor assembly to the pressure washer. Take extra care with any electrical connections, making sure to handle them properly and avoid damaging the wires.
9. Clean and Inspect Parts: Once the pump and motor assembly is detached, take the opportunity to clean the parts and inspect them for any signs of wear or damage. If any parts need to be replaced, make note of them for future reference.
10. Reassemble in Reverse Order: To put your Simoniz pressure washer back together, simply follow the steps in reverse order. Start by reattaching the pump and motor assembly, then connect the power and water connections, and finally, secure the casing with the screws or bolts.
By following this step-by-step guide, you will be able to safely and effectively take apart your Simoniz pressure washer. Remember to exercise caution and take note of how the parts are connected before detaching them. If you are unsure about any step, it is always recommended to consult the manufacturer’s manual or seek professional assistance.
Materials and Tools Needed
Before you begin taking apart your Simoniz pressure washer, it’s important to gather all the necessary materials and tools. Here’s a list of everything you’ll need:
Materials:
- A clean and well-lit workspace
- Protective gloves
- Eye protection
- Clean rags or towels
- Plastic bags or containers for organizing small parts
- Replacement parts (if necessary)
Tools:
- Phillips screwdriver
- Flathead screwdriver
- Adjustable wrench
- Socket set
- Needle-nose pliers
- Wire brush
- Clean brush or toothbrush
- Pressure gauge
Having these materials and tools readily available will help ensure a smooth disassembly process and make it easier for you to reassemble your pressure washer once any necessary repairs or maintenance tasks have been completed.
Precautions and Safety Measures
Before you begin taking apart your Simoniz pressure washer, it is important to take some precautions and follow safety measures to ensure your personal safety and protect the machine from damage. Here are some important steps to keep in mind:
1. Disconnect the Power
Before starting any disassembly, make sure to disconnect the power supply to the pressure washer. Unplug it from the electrical outlet or switch off the circuit breaker to prevent any accidental startup or electrical shock.
2. Depressurize the System
Release the pressure in the system by squeezing the trigger on the wand or gun. This will relieve any built-up pressure and prevent any sudden bursts of water while disassembling the machine.
3. Wear Protective Gear
When disassembling the pressure washer, make sure to wear protective gear such as gloves and safety goggles. This will protect your hands and eyes from any potential injury caused by sharp edges or flying debris.
4. Work in a Well-Ventilated Area
Before you begin taking apart the pressure washer, ensure you are working in a well-ventilated area. This will help to dissipate any fumes or chemicals that may be present during the disassembly process.
5. Take Note of the Assembly
Before removing any components, take note of the assembly and take clear pictures or make diagrams if necessary. This will help you remember the original configuration and make reassembly easier.
6. Use the Correct Tools
Make sure you have the correct tools handy before starting the disassembly process. Using the wrong tools can damage parts and make reassembly more difficult. Refer to the user manual or manufacturer’s instructions for the recommended tools.
7. Follow Proper Disassembly Steps
Follow the proper disassembly steps outlined in the user manual or manufacturer’s instructions. Avoid forcing or prying components as this can cause damage. If you encounter any difficulty, refer to the instructions or seek professional assistance.
By following these precautions and safety measures, you can ensure a safe and successful disassembly of your Simoniz pressure washer, allowing for any necessary maintenance or repairs.
Step 1: Disconnecting the Power Source
Before attempting to take apart your Simoniz Pressure Washer, it is crucial to ensure your safety by disconnecting the power source. This will prevent any accidental start-ups or electrical hazards while you work on the machine.
To disconnect the power source:
- Locate the power cord of your pressure washer.
- Unplug the power cord from the electrical outlet.
- Make sure the switch on the pressure washer is in the “Off” position.
- If your pressure washer is cordless and powered by a battery, remove the battery pack from the unit.
By disconnecting the power source, you minimize the risk of injury and can safely proceed to the next steps of disassembling your Simoniz Pressure Washer.
Step 2: Removing the Spray Gun and Wand
Before starting the disassembly process, it is important to ensure that the pressure washer is turned off and disconnected from any power source. Safety should always come first.
To start removing the spray gun and wand, locate the connection point where the spray gun attaches to the high-pressure hose. This connection is typically secured with a twist-lock or a quick-connect mechanism.
If your pressure washer has a twist-lock mechanism, simply turn the spray gun counterclockwise to loosen and remove it from the hose. Be careful not to overtighten the connection when reassembling.
For units with a quick-connect mechanism, depress the collar or release button located near the connection point. While holding the collar or button down, gently pull the spray gun away from the hose to detach it.
Once the spray gun is removed, the wand can be detached as well. To do this, grasp the wand firmly and twist it counterclockwise to loosen it from the spray gun. Pull the wand away from the gun to remove it completely.
It is essential to inspect the spray gun, wand, and their connectors for any signs of damage or wear. Replace any faulty parts before reassembling the pressure washer to ensure optimal performance and safety.
Keep the spray gun, wand, and all related components in a safe place during the disassembly process, as they will be needed when reassembling the pressure washer later on.
Step 3: Detaching the Pressure Hose
Before you can fully disassemble your Simoniz pressure washer, you’ll need to detach the pressure hose. This hose connects the pressure washer’s pump to the spray gun, allowing water to flow through and create high-pressure spray.
1. Turn off the pressure washer and disconnect it from the power source.
Before working with any parts of the pressure washer, always make sure it is turned off and unplugged for safety reasons.
2. Release any residual pressure.
It’s important to release any residual pressure in the system before detaching the pressure hose. This can be done by squeezing the trigger on the spray gun to drain any remaining water.
3. Locate the connection point of the pressure hose.
The pressure hose is typically connected to the pressure washer’s pump with a threaded connection or a quick-connect system. Take note of how the hose is connected before attempting to detach it.
4. Unscrew the hose connection or release the quick-connect.
If the pressure hose is connected with threads, use a pair of pliers or an adjustable wrench to unscrew the connection in a counterclockwise direction. If it’s a quick-connect system, you will need to follow the manufacturer’s instructions to release the connection.
5. Detach the pressure hose from the pump.
Once the connection is loosened or released, carefully remove the pressure hose from the pump. Be cautious of any remaining water that may spill out.
By following these steps, you can safely detach the pressure hose from your Simoniz pressure washer, allowing you to continue with the disassembly process.
Step 4: Disconnecting the Water Inlet
To begin disassembling your Simoniz pressure washer, you will first need to disconnect the water inlet. This is an essential step to ensure the safe removal of components and prevent any water leakage during the process. Follow these simple steps to complete this step:
1. Locate the water inlet valve on the pressure washer. It is usually situated near the bottom, on the side of the machine.
2. Turn off the water supply by turning the valve or knob in a clockwise direction. This will prevent water from flowing into the pressure washer during the disassembly process.
3. Once the water supply is turned off, use a wrench or pliers to loosen and remove the water inlet connection. Be gentle during this step to avoid damaging the components.
4. Inspect the water inlet for any signs of damage or clogging. Clean or replace the inlet if necessary.
By disconnecting the water inlet, you have successfully prepared your Simoniz pressure washer for further disassembly. Proceed to the next step to continue the process.
Step 5: Removing the Pump Assembly
Now that you have removed the pressure hose and gun, it’s time to remove the pump assembly from the pressure washer. The pump assembly is responsible for creating the water pressure that powers the machine, so it’s important to handle it with care.
Before you begin, make sure the pressure washer is turned off and the engine is cool. This will help prevent any accidental injuries during the removal process.
1. Disconnect the pump from the engine
Locate the bolts or screws that secure the pump assembly to the engine. Use a wrench or screwdriver to remove these fasteners, carefully disconnecting the pump from the engine.
2. Remove the pump from the frame
Once the pump is disconnected from the engine, you will need to remove it from the frame of the pressure washer. Look for any additional bolts or screws holding the pump in place and remove them.
Depending on the model of your Simoniz pressure washer, there may also be a mounting bracket securing the pump assembly to the frame. If this is the case, remove any bolts or screws holding the bracket in place before attempting to remove the pump.
With all the fasteners removed, carefully lift the pump assembly from the frame. Be sure to support the weight of the pump with both hands to avoid dropping it or causing any damage.
Once the pump assembly is removed, set it aside in a safe location where it won’t be accidentally damaged or stepped on.
Caution:
Always exercise caution when handling the pump assembly, as it may still contain residual water or pressure. Take care not to tip or shake the pump excessively to avoid any leaks or spills.
With the pump assembly removed from the pressure washer, you are now ready to move on to the next step, which is disassembling the pump itself.
Questions and answers
What tools do I need to take apart a Simoniz pressure washer?
To take apart a Simoniz pressure washer, you will need a set of screwdrivers, an adjustable wrench, pliers, and potentially a socket set depending on the model.
Can I take apart a Simoniz pressure washer without any prior mechanical experience?
While prior mechanical experience is not necessarily required, it is recommended to have some basic knowledge and understanding of tools and machinery to safely disassemble a Simoniz pressure washer.
Are there any specific precautions I should take before attempting to take apart a Simoniz pressure washer?
Yes, it is important to disconnect the power supply and remove any residual pressure from the washer before attempting to take it apart. Additionally, wearing protective gloves and eyewear is highly recommended.
How long does it typically take to take apart a Simoniz pressure washer?
The time it takes to take apart a Simoniz pressure washer can vary depending on the model and individual skill level. On average, it may take anywhere from 30 minutes to a few hours.
Can I find a step-by-step guide or tutorial on how to take apart a specific model of Simoniz pressure washer?
Yes, you can find step-by-step guides and tutorials on how to take apart specific models of Simoniz pressure washers on the manufacturer’s website or through online forums and DIY websites.
Recent Posts
-

How To Connect Soap To Honda Pressure Washer
June 28, 2024 -

A To Z Pressure Washing Scam
June 27, 2024 -

How To Pressure Wash Your Home With A Garden Hose
June 27, 2024 -

Where Can I Buy Honda Pressure Washer Parts
June 25, 2024 -
