
Blog
How To Take Apart A Karcher Pressure Washer Handle
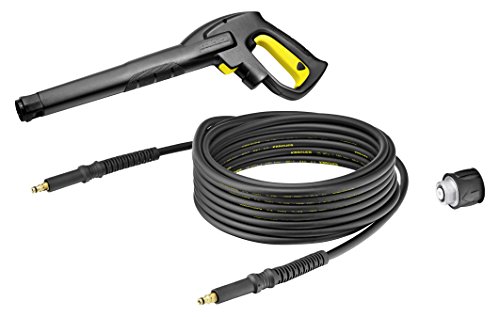


If you’re experiencing issues with your Karcher pressure washer handle and need to take it apart for repair or maintenance, this guide will walk you through the process step by step. Whether you’re a DIY enthusiast or a professional, knowing how to disassemble your pressure washer handle can save you time and money.
Step 1: Gather the necessary tools
Before you begin, make sure you have all the tools you’ll need for the job. This may include a screwdriver, pliers, a wrench, and possibly a socket wrench set. It’s important to have the correct tools on hand to avoid damaging any parts of the handle or washer.
Step 2: Disconnect the handle from the pressure washer
Start by turning off the pressure washer and disconnecting the handle from the unit. This will involve removing any screws or bolts that secure the handle in place. Carefully set aside any small parts, such as washers or fittings, as you remove them, taking care not to lose anything.
Step 3: Separate the handle components

Once the handle is detached from the pressure washer, you can begin separating the various components. This may involve unscrewing or unclipping different parts. Pay attention to the order in which you remove the components, as this will make reassembly easier.
Step 4: Clean and inspect the handle parts
With the handle disassembled, take the time to clean each part thoroughly. Use mild soap and water to remove any dirt or grime. Take this opportunity to inspect each part for damage or wear. If any parts are damaged, you may need to replace them before reassembling the handle.
Step 5: Reassemble the handle
Once all the parts are clean and dry, begin reassembling the handle in the reverse order of disassembly. Refer to any manuals or diagrams you may have for guidance, and make sure each component is securely fastened. Take care not to overtighten any screws or bolts, as this can cause damage or stripped threads.
By following these steps, you can successfully take apart a Karcher pressure washer handle and address any issues or perform necessary maintenance. Remember to exercise caution and always refer to the manufacturer’s instructions and safety guidelines for your specific model.
Steps to Disassemble a Karcher Pressure Washer Handle
Disassembling a Karcher pressure washer handle can be a necessary step in performing maintenance or repairs on the unit. Here are the steps to follow:
1. Start by unplugging the pressure washer from the power source and turning off the water supply to the unit.
2. Use a wrench or pliers to unscrew any screws or bolts securing the handle to the pressure washer. Set them aside in a safe place.
3. Carefully slide off any clips or connectors that may be holding the handle in place. Take note of their position for reassembly.
4. Once the clips or connectors have been removed, gently pull the handle away from the pressure washer body. Be cautious not to force it and damage any internal components.
5. If the handle doesn’t come off easily, double-check for any additional screws or clips that may still be holding it in place. Ensure all fasteners are removed before proceeding.
6. After removing the handle, inspect the internal components for any signs of damage or wear. Clean or replace any parts as necessary.
7. To reassemble the handle, reverse the steps above. Carefully align the handle with the pressure washer body and secure it in place with the clips or connectors.
8. Finally, tighten any screws or bolts to ensure a secure fit. Reconnect the pressure washer to the power source and water supply.
By following these steps, you will be able to successfully disassemble and reassemble a Karcher pressure washer handle, allowing for maintenance or repairs to be performed effectively.
Preparation
Before beginning the process of taking apart a Karcher pressure washer handle, it is important to gather all the necessary tools and materials. This will ensure a smooth and efficient disassembly process. Here are the items you will need:
Tools:
- Screwdriver (Phillips and flathead)
- Allen wrench set
- Adjustable wrench
- Needle-nose pliers
Materials:
- Clean cloth or towel
- Lubricating oil
- Replacement parts (if necessary)
Once you have gathered all the required tools and materials, make sure you have a clear workspace with enough room to work comfortably. It is also advisable to wear protective gloves and safety glasses to prevent any injuries during the disassembly process.
Removing the Handle
To begin the process of taking apart a Karcher pressure washer handle, you will first need to locate the screws or bolts that are holding it in place. Look for any visible screws or bolts on the handle itself or on the body of the pressure washer. Use a screwdriver or socket wrench to unscrew and remove these fasteners.
Once the screws or bolts have been removed, you can gently pry the handle away from the body of the pressure washer. Be careful not to use excessive force, as this could cause damage to the handle or other parts of the pressure washer.
If the handle seems to be stuck, you can try using a lubricant, such as WD-40, to help loosen any stuck parts. Apply the lubricant to the joints and connections of the handle and let it sit for a few minutes before attempting to remove the handle again.
As you remove the handle, be sure to keep track of any small screws or other fasteners that may be attached to it. You will need these to reassemble the handle later.
Once the handle has been removed, you can inspect it for any signs of damage or wear. If necessary, you can clean the handle with mild soap and water to remove any dirt or debris. Allow the handle to dry completely before attempting to reassemble it or use it with the pressure washer.
Remember to refer to the instruction manual or contact the manufacturer for specific guidance on disassembling and reassembling the handle of your particular Karcher pressure washer model.
Disassembling the Handle Components
Before taking apart the handle of your Karcher pressure washer, make sure to turn off the machine and unplug it from the power source. Safety should always be your top priority.
1. Start by removing the screws that hold the handle together. These screws are usually located on the backside of the handle. Use a screwdriver to carefully unscrew them and set them aside in a safe place.
2. Once the screws are removed, gently pry apart the two halves of the handle. You may need to use a flathead screwdriver or a plastic pry tool for this step. Slowly work your way around the handle, applying gentle pressure until the two halves separate.
3. With the handle halves separated, take a moment to inspect the components inside. You may notice a trigger mechanism, a valve, and other small parts. These are the components responsible for controlling the water flow and pressure.
4. If you need to further disassemble the handle for cleaning or repair purposes, carefully disconnect the trigger mechanism and any other attached parts. Make sure to keep track of how everything is connected for easy reassembly later.
5. Clean the handle components using mild soap and water. Be careful not to use abrasive cleaners or scrub too vigorously, as this may damage the plastic or rubber parts. Rinse the components thoroughly and allow them to dry completely before reassembly.
6. Once the components are clean and dry, reassemble the handle by aligning the two halves and pressing them together firmly. Make sure all the tabs and slots align properly before proceeding.
7. Finally, secure the handle halves back together using the screws you removed earlier. Tighten them securely, but be careful not to over-tighten as this may strip the screw holes or damage the plastic.
By following these steps, you should be able to successfully disassemble and reassemble the handle of your Karcher pressure washer. Remember to always consult the manufacturer’s instructions for your specific model if you have any doubts or concerns.
Question-answer
What tools do I need to take apart a Karcher pressure washer handle?
To take apart a Karcher pressure washer handle, you will need a set of screwdrivers, pliers, and a wrench.
Can I take apart a Karcher pressure washer handle without any tools?
No, you will need a set of screwdrivers, pliers, and a wrench to disassemble a Karcher pressure washer handle.
Is it difficult to take apart a Karcher pressure washer handle?
Taking apart a Karcher pressure washer handle can be a bit challenging, especially if you are not familiar with the process. It requires some manual dexterity and the use of specific tools.
Why would I need to take apart a Karcher pressure washer handle?
There can be several reasons why you might need to take apart a Karcher pressure washer handle. Some common reasons include repairing any broken or damaged parts, replacing worn-out components, or cleaning and maintaining the handle to ensure optimal performance.
What is a Karcher pressure washer handle?
A Karcher pressure washer handle is the part of the pressure washer that you hold onto while using it. It usually has a trigger that you pull to release the water at high pressure.
Recent Posts
-

How To Connect Soap To Honda Pressure Washer
June 28, 2024 -

A To Z Pressure Washing Scam
June 27, 2024 -

How To Pressure Wash Your Home With A Garden Hose
June 27, 2024 -

Where Can I Buy Honda Pressure Washer Parts
June 25, 2024 -
