
Blog
How To Sttach A Spray Tip To A Pressure Washer
Pressure washers are powerful tools that can effectively clean a variety of surfaces. One of the key components of a pressure washer is the spray tip, which determines the spray pattern and pressure of the water. Attaching a spray tip to a pressure washer may seem like a simple task, but it is important to do it correctly to ensure safe and effective use of the machine.
To attach a spray tip to a pressure washer, begin by turning off the machine and releasing the pressure in the system. This can be done by pulling the trigger on the spray gun to dispense any remaining water. Once the pressure is released, locate the spray wand on the pressure washer. This is the long tube-like attachment that extends from the machine. Make sure the spray wand is securely attached to the pressure washer.
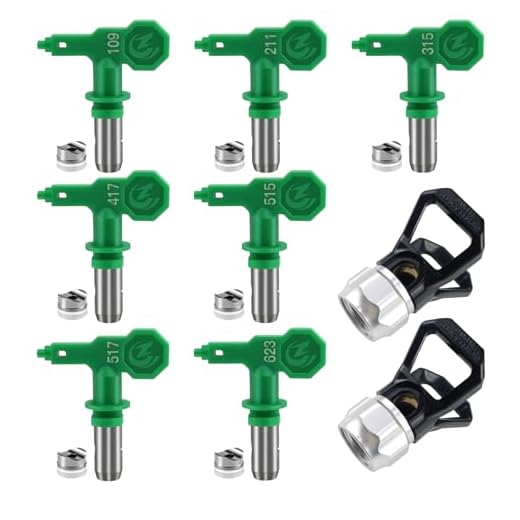
Next, take the desired spray tip and examine it. Spray tips are color-coded to indicate the spray pattern and pressure. For example, a red spray tip may have a narrow spray pattern and high pressure, while a green spray tip may have a wide spray pattern and lower pressure. Choose the spray tip that is appropriate for the surface you are cleaning and the task at hand.


To attach the spray tip, simply insert it into the end of the spray wand. It should fit snugly and securely. Give it a gentle tug to ensure it is properly attached. Once the spray tip is secured, you can turn on the pressure washer and begin using it. Keep in mind that different spray tips will produce different results, so it may be necessary to experiment with different spray patterns and pressures to achieve the desired cleaning effect.
In conclusion, attaching a spray tip to a pressure washer is a straightforward process. By following these simple steps, you can ensure that the spray tip is securely attached and that the pressure washer is ready for use. Remember to always use the appropriate spray tip for the task at hand and to follow all safety guidelines provided by the manufacturer. With the right spray tip, you can maximize the cleaning power of your pressure washer and achieve outstanding results.
Important Tips for Attaching a Spray Tip to a Pressure Washer
Attaching a spray tip to a pressure washer is a simple but crucial step in ensuring effective cleaning. Here are some important tips to keep in mind:
1. Choose the Right Spray Tip
Before attaching the spray tip, it’s essential to select the appropriate one for the task at hand. Spray tips come in various sizes and angles, each serving a specific purpose. For example, a 0-degree spray tip delivers a concentrated stream for tough cleaning jobs, while a 40-degree spray tip provides a wider coverage area for lighter cleaning tasks.
2. Check Compatibility
Ensure that the spray tip you have chosen is compatible with your pressure washer. Different pressure washers have specific connections and thread sizes for attaching spray tips. Consult the user manual or contact the manufacturer to confirm compatibility.
3. Properly Secure the Spray Tip
When attaching the spray tip, ensure it is securely fastened to the pressure washer wand. A loose spray tip can cause leaks and reduced performance. Tighten the spray tip using a wrench or by hand, depending on the type of connection. However, be careful not to overtighten, as this can damage the spray tip or the wand.
4. Test Before Use
Before starting your cleaning task, it’s advisable to test the pressure washer with the attached spray tip in a safe area. This allows you to ensure that the spray pattern and pressure are suitable for the intended task. Adjustments can be made as necessary before beginning the actual cleaning process.
5. Regular Maintenance
After each use, remove the spray tip and clean any debris or deposits that may have accumulated. Inspect the spray tip for any signs of damage, such as clogs or worn-out parts, and replace if necessary. Regular maintenance of the spray tip will help ensure it continues to perform optimally and prolong its lifespan.
By following these important tips, you can confidently attach a spray tip to your pressure washer and achieve efficient and effective cleaning results. Remember to prioritize safety and always refer to the manufacturer’s instructions for your specific pressure washer model.
Proper Method for Attaching a Spray Tip to a Pressure Washer
When using a pressure washer, it is important to properly attach the spray tip to ensure optimal performance and prevent any accidents or damage. Here is a step-by-step guide on how to attach a spray tip to a pressure washer:
Step 1: Safety Precautions
Before you begin, make sure the pressure washer is turned off and disconnected from any power source. Wear gloves and safety goggles to protect yourself from any potential injuries.
Step 2: Choose the Right Spray Tip
There are different spray tips available, each designed for specific cleaning tasks. Determine the type of cleaning you want to perform and choose the appropriate spray tip accordingly.
Step 3: Remove the Old Spray Tip
If there is a spray tip already attached to the pressure washer, you need to remove it. Simply twist the spray tip counterclockwise until it comes off.
Step 4: Insert the New Spray Tip
Take the new spray tip and align it with the nozzle on the pressure washer gun. Gently push it in until it locks into place. Give it a slight twist to ensure it is securely attached.
Step 5: Test the Spray Tip
Once the new spray tip is attached, turn on the pressure washer and test the spray pattern. Ensure that the spray pattern is consistent and meets your desired needs. Adjust the spray tip if necessary.
| Warning | Safety | Troubleshooting |
|---|---|---|
| Do not attempt to attach or remove a spray tip while the pressure washer is running. | Always follow the manufacturer’s instructions and safety guidelines when operating a pressure washer. | If the spray pattern is uneven or inconsistent, check for any clogs or debris in the spray tip. |
By following these steps, you can safely and effectively attach a spray tip to your pressure washer, ensuring optimal performance and cleanliness for your cleaning tasks.
Choosing the Right Spray Tip for Your Pressure Washer
Choosing the right spray tip for your pressure washer is essential for achieving optimal cleaning results. The spray tip you use determines the spray pattern and pressure of the water that comes out of the pressure washer, allowing you to customize the cleaning power based on the task at hand.
There are different types of spray tips, each with its own specific spray pattern and pressure rating. The most common spray tips are:
| Spray Tip | Spray Pattern | Pressure Rating |
|---|---|---|
| 0-degree | Direct, narrow stream | High pressure (max power) |
| 15-degree | Narrow, concentrated stream | High pressure (more power) |
| 25-degree | Medium-width fan | Medium pressure (balanced power and coverage) |
| 40-degree | Wide fan | Low pressure (gentle cleaning) |
| Detergent tip | Low-pressure, wide pattern | Designed for applying cleaning solutions |
When selecting a spray tip, consider the type of surface you will be cleaning and the level of dirt or grime you need to remove. For tough stains or heavily soiled areas, a narrower spray pattern with higher pressure may be more effective. On delicate surfaces or for lighter cleaning tasks, a wider spray pattern with lower pressure may be suitable.
It is important to note that using a spray tip with too high pressure on sensitive surfaces can cause damage, while using a spray tip with too low pressure may not effectively clean tougher stains.
Remember to always follow the manufacturer’s guidelines and recommendations for your pressure washer when selecting a spray tip. This will help ensure your safety and the longevity of your pressure washer.
By choosing the right spray tip for your pressure washer, you can optimize your cleaning performance and achieve the desired results for every cleaning task.
Question-answer
What is a spray tip?
A spray tip is a small component that attaches to the end of a pressure washer wand and controls the spray pattern and intensity of the water.
How do I attach a spray tip to a pressure washer?
To attach a spray tip to a pressure washer, first, make sure the pressure washer is turned off. Then, align the tip with the end of the wand and push it in until it clicks into place. Finally, give it a tug to ensure it is securely attached.
What types of spray tips are available for pressure washers?
There are several types of spray tips available for pressure washers, including 0-degree, 15-degree, 25-degree, 40-degree, and soap nozzle tips. Each tip has a different spray pattern and intensity, allowing for various cleaning tasks.
Can I use any spray tip with my pressure washer?
No, it is important to use spray tips specifically designed for your pressure washer. Using incompatible spray tips can damage the machine or cause it to malfunction. Always consult the manufacturer’s instructions or contact customer support to ensure compatibility.
How often should I replace my spray tip?
The frequency of spray tip replacement depends on several factors, such as the usage frequency and the water quality in your area. However, it is generally recommended to inspect and replace spray tips if they show signs of wear, clogging, or if the spray pattern becomes irregular.
What is a spray tip?
A spray tip is an attachment for a pressure washer that determines the pattern and intensity of the spray.