
Blog
How To Repair A Pressure Washer Wand


Pressure washers are essential tools for cleaning various surfaces such as driveways, decks, and cars. The wand is a crucial component of a pressure washer, as it allows you to direct the high-pressure water to the desired area. However, over time, the pressure washer wand may experience issues such as leaks, clogs, or damage.
If you are facing problems with your pressure washer wand, don’t worry! With a few simple steps, you can repair the wand yourself and save money on professional repairs or a replacement. In this article, we will guide you through the process of repairing a pressure washer wand, so you can get back to your cleaning tasks in no time.
The first step in repairing a pressure washer wand is to inspect it for any visible damage. Look for cracks, dents, or loose fittings that may be causing leaks or decreased performance. Additionally, check the nozzle and spray gun for any signs of clogs or blockages. Failing to address these issues can lead to further damage and reduced effectiveness of your pressure washer.
Once you have identified the problem, the next step is to gather the necessary tools and materials for the repair. You may need a wrench, pliers, replacement fittings or O-rings, and lubricant. It’s important to make sure you have the correct replacement parts that match your pressure washer wand’s specifications. Consult the manufacturer’s manual or website, or contact their customer service for assistance if needed.

Before starting the repair, make sure to turn off the pressure washer and disconnect it from the power source. This will help prevent any accidents or injuries during the repair process. Once the pressure washer is safely turned off, carefully remove the damaged or faulty component of the wand using the appropriate tools. Replace it with the new part, ensuring a secure fit. Apply lubricant to the fittings and O-rings to ensure smooth operation and prevent leaks.
After completing the repair, reassemble the pressure washer wand, making sure all connections are tight and secure. Double-check for any leaks or issues before using the pressure washer again. If everything looks good, you can reconnect the pressure washer to the power source and test the wand’s functionality. It should now work like new, allowing you to continue with your cleaning tasks effectively.
Repairing a pressure washer wand is a relatively simple process that can save you time and money. By following these steps and taking care of your pressure washer wand, you can prolong its lifespan and ensure optimal performance for years to come.
Pressure Washer Wand Repair: A Step-by-Step Guide
If you are experiencing issues with your pressure washer wand, such as leaks or lack of pressure, it may be time to repair it. Repairing a pressure washer wand can save you money and prevent the need for a replacement. Follow these step-by-step instructions to successfully repair your pressure washer wand.
Step 1: Inspect the Wand
The first step in repairing your pressure washer wand is to inspect it for any visible damage. Look for cracks, leaks, or loose fittings that may be causing the issues. If you find any damage, take note of it as you may need to replace certain parts.
Step 2: Clean the Wand
Before proceeding with the repair, it is important to thoroughly clean the pressure washer wand. Use a mild detergent and water to remove any dirt, grime, or debris that may be clogging the wand or causing the issues.
After cleaning, rinse the wand thoroughly with water to ensure no detergent residue is left behind. Allow the wand to dry completely before continuing with the repair process.
Step 3: Identify the Problem
Once the wand is clean and dry, it is time to identify the specific problem. If you are experiencing low pressure, the issue may be a clog in the nozzle or a worn-out O-ring. Leaks, on the other hand, may be caused by a damaged hose or a loose connection. Carefully examine the wand to determine the exact cause of the problem before proceeding.
Step 4: Replace Faulty Parts
If you have identified specific parts that need to be replaced, it is important to do so before attempting any repairs. Replace worn-out O-rings, damaged hoses, or any other faulty components according to the manufacturer’s instructions.
Step 5: Repair or Replace Fittings
If the issue with your pressure washer wand lies with the fittings, you may need to repair or replace them. Tighten any loose fittings with an adjustable wrench and use plumber’s tape to secure the connections. If the fittings are damaged beyond repair, consult your pressure washer’s manual or contact the manufacturer for replacement parts.
Step 6: Reassemble and Test
Once all necessary repairs and replacements have been made, reassemble the pressure washer wand according to the manufacturer’s instructions. Ensure all fittings are secure and tighten any connections as needed.
Before using the pressure washer wand, it is important to test it to ensure the repairs were successful. Turn on the pressure washer and check for leaks or any other issues. Adjust the pressure settings as needed and inspect the wand for proper functionality.
By following these step-by-step instructions, you can successfully repair your pressure washer wand and extend its lifespan. Regular maintenance and prompt repairs can help keep your pressure washer in optimal condition for years to come.
Identifying the Issue: Common Problems with Pressure Washer Wands
Pressure washer wands are a vital component of the machine and are prone to various issues that can hinder their performance. By identifying the issue with your pressure washer wand, you can take the necessary steps to repair it and ensure optimal functioning. Here are some common problems you may encounter:
1. Leaking
One of the most frequent issues with pressure washer wands is leaks. Leaks can occur at various points along the wand, such as the connection to the hose or the nozzle. These leaks can result from worn-out O-rings or damaged seals. To fix this issue, you will need to replace the faulty O-rings or seals with new ones to ensure a proper seal.
2. Low Pressure
If you notice a significant drop in pressure from your pressure washer wand, it could indicate a problem with the wand itself. Low pressure may be caused by a clogged nozzle, a bent wand, or a blockage in the wand’s internal components. Start by inspecting and cleaning the nozzle to remove any debris. If the low pressure persists, examine the wand for any bends or blockages and address the issue accordingly.
3. Spray Pattern Issues
Another common problem involves irregular spray patterns from the pressure washer wand. You may notice that the spray is too narrow, too wide, or uneven. This can be caused by a damaged or worn-out nozzle. Inspect the nozzle for any signs of damage and replace it if necessary. Additionally, ensure that the nozzle is securely attached to the wand to prevent any spray pattern issues.
4. Trigger Issues
The trigger on the pressure washer wand can also experience problems. If you find that the trigger is sticking or not working properly, it may need to be cleaned or lubricated. Remove the trigger mechanism and clean it thoroughly, ensuring there are no obstructions. Apply a small amount of lubricant to ensure smooth operation. If the trigger is damaged, you may need to replace it.
By identifying these common problems with pressure washer wands, you can troubleshoot and repair the issue yourself, saving time and money. Regular maintenance and proper care of your pressure washer wand can help prevent these problems from occurring in the first place. Remember to always follow the manufacturer’s instructions for maintenance and troubleshooting specific to your pressure washer model.
Precautions: Safety Measures to Follow Before Repair
Before attempting any repairs on a pressure washer wand, it is important to follow these safety precautions to ensure your well-being:
- Disconnect the pressure washer from its power source.
- Release pressure by engaging the trigger on the wand to allow any built-up pressure to escape.
- Wear protective clothing, including safety goggles, gloves, and work boots.
- Make sure the area around you is clear of any potential hazards or obstacles.
- Keep pets and children away from the work area.
- Inspect the wand for any visible damage or leaks before proceeding with repairs.
- Read and understand the manufacturer’s instructions and make sure you have the necessary tools and replacement parts.
- If you are not familiar with pressure washer repairs, it may be best to consult a professional to avoid any accidents or further damage.
By following these safety measures, you can minimize the risk of injury and ensure a successful and safe repair of your pressure washer wand.
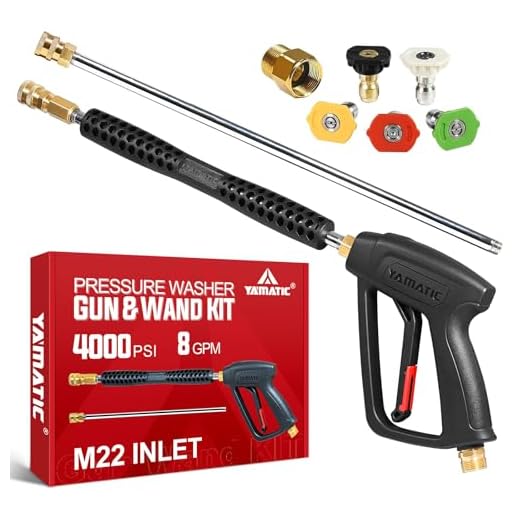
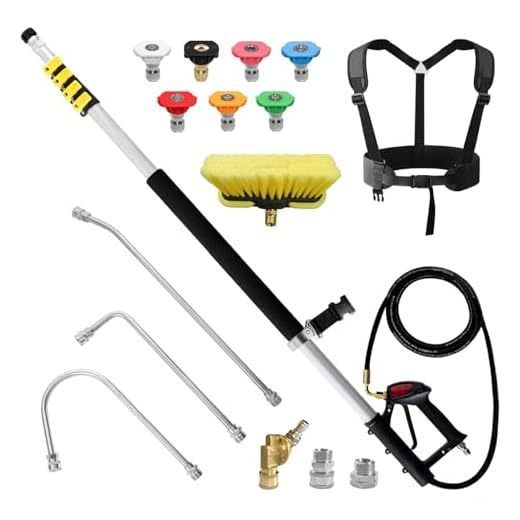
Tools Required: Essential Equipment for Pressure Washer Wand Repair
Repairing a pressure washer wand can be a task that requires the right tools. Having the necessary equipment on hand will help make the repair process easier and more effective. Here is a list of essential tools you will need:
1. Adjustable wrench: This tool is essential for loosening and tightening various parts of the pressure washer wand. It allows you to easily adjust fittings and connections.
2. Screwdriver set: A set of screwdrivers with different sizes and types of heads will come in handy for removing and replacing screws in the wand. This allows you to access internal components for repair and maintenance.
3. Pipe wrench: For dealing with stubborn or rusted fittings, a pipe wrench will provide the necessary leverage to loosen them. This tool is especially useful when removing or installing the nozzle of the pressure washer wand.
4. Needle-nose pliers: These pliers have a long, narrow nose that is perfect for reaching into tight spaces and gripping small components. They are ideal for handling small nuts, bolts, and washers during the repair process.
5. Pressure gauge: A pressure gauge is useful for checking the water pressure produced by the pressure washer. It helps diagnose any issues with the wand and ensures that it is functioning at optimal levels.
6. Teflon tape: Teflon tape is a useful tool for creating a watertight seal on threaded connections. It is especially important for preventing leaks and ensuring that the repaired wand functions properly.
7. Safety equipment: While not a tool, safety equipment such as gloves and safety glasses are essential for protecting yourself during the repair process. These items will help prevent injuries and ensure a safe repair experience.
Having these tools readily available will make the repair of a pressure washer wand much easier and more efficient. By using the right equipment, you can successfully fix any issues with your wand and restore it to working condition.
Repair Techniques: How to Fix Common Issues with Pressure Washer Wands
A pressure washer wand is an essential tool for outdoor cleaning tasks, but like any tool, it can encounter some common issues over time. Knowing how to repair these common issues can save you time and money. In this article, we will discuss some repair techniques for fixing common problems with pressure washer wands.
Issue 1: Leaking Wand
If you notice that your pressure washer wand is leaking, the first thing you should check is the O-rings. O-rings are small rubber seals that create a watertight connection between different components of the wand. Over time, these O-rings can wear out or become damaged, leading to leaks.
To fix this issue, you will need to replace the O-rings. Start by removing the wand from the pressure washer. Then, locate the O-rings on the wand. Carefully remove the old O-rings and replace them with new ones. Make sure to lubricate the O-rings with silicone grease before installing them back onto the wand. Finally, reattach the wand to the pressure washer and check if the leaking issue has been resolved.
Issue 2: Low Pressure
If you are experiencing low pressure from your pressure washer wand, there are a few possible causes to consider. First, check the nozzle for any debris or blockages. Use a small wire or needle to remove any clogs that may be affecting the water flow.
If the nozzle is clean and the pressure is still low, the next step is to inspect the wand for any leaks or cracks. A damaged wand can affect the pressure output of the pressure washer. If you find any cracks or leaks, you will need to replace the wand.
Issue 3: Stuck Wand Trigger
A stuck wand trigger is another common issue that pressure washer wand users may encounter. This can happen due to debris or dirt that has accumulated inside the trigger mechanism. To fix this issue, start by removing the wand from the pressure washer and disconnecting it from the hose.
Next, remove the trigger assembly from the wand by unscrewing it. Carefully clean the trigger assembly using a brush or compressed air to remove any dirt or debris. Once the trigger assembly is clean, apply some lubricant to the moving parts and reassemble it onto the wand. Reattach the wand to the pressure washer and test if the trigger is functioning properly.
Issue 4: Bent Wand
If your pressure washer wand has become bent, it can affect the performance and efficiency of the tool. A bent wand may also put unnecessary strain on the pressure washer, leading to premature wear and tear.
To fix this issue, you will need to straighten the wand. Start by using a heat gun to heat the bent area, allowing it to become more pliable. Then, gently apply pressure to straighten the wand. Be careful not to apply too much pressure, as this can cause further damage. Once the wand is straightened, allow it to cool before reattaching it to the pressure washer.
| Issue | Repair Technique |
|---|---|
| Leaking Wand | Replace worn-out or damaged O-rings |
| Low Pressure | Clean nozzle; inspect and replace damaged wand |
| Stuck Wand Trigger | Clean trigger assembly; apply lubricant; reassemble |
| Bent Wand | Straighten using heat gun; apply gentle pressure |
By following these repair techniques, you can address common issues with pressure washer wands and keep your outdoor cleaning tasks running smoothly. Remember to always follow safety guidelines and instructions when working with pressure washer equipment.
Maintenance Tips: How to Extend the Lifespan of Your Pressure Washer Wand
Proper maintenance of your pressure washer wand can significantly extend its lifespan and ensure optimal performance. Here are some useful tips to keep in mind:
| Tip | Description |
|---|---|
| 1 | Inspect the wand regularly |
| 2 | Clean the wand after each use |
| 3 | Remove any debris or blockages |
| 4 | Check for any leaks |
| 5 | Replace worn or damaged parts |
| 6 | Store the wand properly |
Regularly inspecting the wand for any signs of wear and tear is crucial. Look out for any cracks, bent sections, or loose fittings. Addressing these issues promptly can prevent further damage.
After each use, make sure to clean the wand thoroughly. Use a mild detergent and warm water to remove any dirt, grime, or chemical residues. Avoid using abrasive cleaners or harsh chemicals as they can damage the wand’s surface.
If you notice any debris or blockages in the wand, carefully remove them using a small brush or compressed air. Blockages can affect the pressure and performance of the washer, so it’s essential to keep the wand clear.
Check for any leaks in the wand’s connections and fittings. Tighten any loose connections and replace any damaged seals or O-rings. Leaks can reduce the efficiency of the pressure washer and may lead to further problems if left unaddressed.
If you find any worn or damaged parts, such as spray nozzles or trigger handles, replace them promptly. Using worn-out components can compromise the performance and safety of the pressure washer wand.
When storing the pressure washer wand, make sure to remove any attachments and store it in a clean, dry area. Avoid storing it in extreme temperatures or exposing it to direct sunlight for extended periods.
By following these maintenance tips, you can ensure that your pressure washer wand remains in good condition and performs optimally for a long time. Additionally, referring to the manufacturer’s guidelines and instructions can provide further guidance on proper maintenance practices.
Questions and answers
What are some common problems with pressure washer wands?
Some common problems with pressure washer wands include leaks, clogs, and bent or broken parts.
How can I fix a leaking pressure washer wand?
If your pressure washer wand is leaking, it could be due to a loose connection or a damaged seal. To fix it, tighten any loose connections and replace any damaged seals.
What should I do if my pressure washer wand gets clogged?
If your pressure washer wand gets clogged, remove the nozzle and soak it in a cleaning solution to dissolve any dirt or debris. Use a small brush to scrub away any stubborn clogs. Rinse the nozzle thoroughly before reattaching it to the wand.
Can I straighten a bent pressure washer wand?
Yes, you can straighten a bent pressure washer wand by using a pipe wrench or pliers to gently bend it back into shape. However, be careful not to apply too much force as it may cause further damage.
What should I do if a part of my pressure washer wand is broken?
If a part of your pressure washer wand is broken, you will need to replace the broken part. Consult the manufacturer’s instructions or contact customer support for guidance on finding and installing the correct replacement part.
What are common problems that can occur with a pressure washer wand?
Common problems that can occur with a pressure washer wand include leaks, clogs, and breakage.
Recent Posts
-

How To Connect Soap To Honda Pressure Washer
June 28, 2024 -

A To Z Pressure Washing Scam
June 27, 2024 -

How To Pressure Wash Your Home With A Garden Hose
June 27, 2024 -

Where Can I Buy Honda Pressure Washer Parts
June 25, 2024 -
