
Blog
How To Remove Pressure Washer Handle Fitting


Pressure washers are powerful tools that help clean a variety of surfaces, from driveways and sidewalks to cars and outdoor furniture. One essential component of a pressure washer is the handle fitting, which connects the handle to the main body of the machine. Over time, the handle fitting may become damaged or worn out, requiring replacement. In this article, we will guide you through the process of removing the pressure washer handle fitting, so you can easily replace it and get back to cleaning efficiently.
Before you begin, it is important to gather the necessary tools and equipment. You will need a wrench or pliers, depending on the type of fitting on your pressure washer. It is also advisable to have a towel or cloth nearby to clean any dirt or debris that may be present on the handle fitting.
To remove the pressure washer handle fitting, start by turning off the power and water supply to the machine. This will prevent any accidents or injuries during the removal process. Once the power and water are shut off, locate the handle fitting on the pressure washer. It is typically located near the top of the machine, where the handle connects to the body.

Depending on the manufacturer and model of your pressure washer, the handle fitting may be secured with a nut or a quick-release mechanism. If there is a nut, use the wrench or pliers to loosen and remove it. Turn the nut counterclockwise until it is loose enough to remove by hand. If your pressure washer has a quick-release mechanism, simply press the release button or lever and pull the handle fitting away from the machine.
Once the handle fitting is removed, inspect it for any damage or wear. If it is damaged, you can easily find a replacement at your local hardware store or from the manufacturer. To install the new handle fitting, follow the process in reverse. Place the new fitting onto the pressure washer and secure it either by tightening the nut or engaging the quick-release mechanism. Ensure that the handle fitting is secure and tight before turning on the power and water supply to the pressure washer.
In conclusion, removing the pressure washer handle fitting is a straightforward process that requires a few simple steps. By following these steps and taking the necessary precautions, you can easily remove and replace the handle fitting on your pressure washer, ensuring its optimal performance and longevity.
Tools Needed for Removing Pressure Washer Handle Fitting
Removing the handle fitting on a pressure washer requires the use of specific tools to ensure the job is done correctly and safely. Here is a list of the tools you will need:
1. Adjustable Wrench
An adjustable wrench is essential for loosening and tightening nuts and bolts. It allows you to adjust the size of the wrench to fit different sizes of fittings on the pressure washer handle. Make sure to choose a wrench that is large enough to fit the fittings securely to prevent slipping during the removal process.
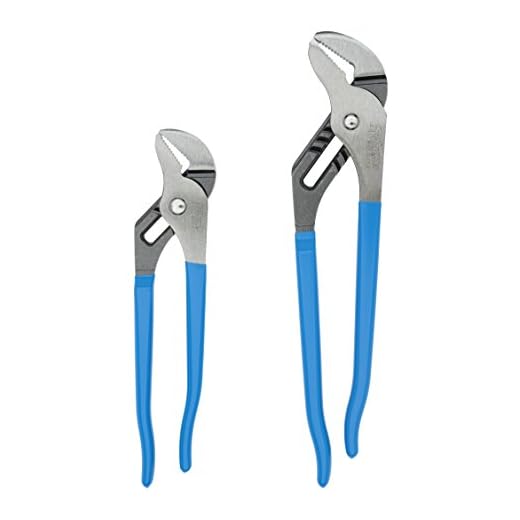
2. Channel Lock Pliers
Channel lock pliers are useful for gripping and turning objects with a firm grip. They have adjustable jaws that allow you to adjust the width of the grip to fit different sizes of fittings. These pliers are perfect for loosening or tightening the fittings on the pressure washer handle.
3. Screwdriver
A screwdriver is needed to remove screws or fasteners that may be holding the handle fitting in place. Depending on the model of your pressure washer, you may need a Philips or flathead screwdriver. Always use the appropriate type and size of the screwdriver to avoid damaging the screws or the surrounding parts of the pressure washer.
4. Safety Gloves
Safety gloves are crucial when working with a pressure washer handle. They protect your hands from injuries and provide a better grip on the tools you are using. Choose gloves that fit well and are made of a durable material to ensure maximum protection.
With these tools in hand, you are ready to safely and effectively remove the handle fitting on your pressure washer. Remember to always follow the manufacturer’s instructions and take necessary safety precautions while working on any machinery.
Wrench and Screwdriver
When removing the pressure washer handle fitting, you will need a wrench and a screwdriver to assist you. These tools will help in loosening and removing the fittings with ease.
Wrench
A wrench is a vital tool for loosening and tightening nuts and bolts. In this case, you will use it to loosen the nut that secures the handle fitting in place. Make sure to use the correct size wrench that fits the nut properly to avoid damaging it.
With the wrench in one hand, place it on the nut and turn it counterclockwise. Apply steady and even pressure to loosen the nut. Once it is loosened, you can remove it completely by hand.
Screwdriver
A screwdriver is another necessary tool when removing the pressure washer handle fitting. It will be used to unscrew any screws or fasteners that secure the fitting in place.
Inspect the handle fitting to locate any screws or fasteners that may need to be removed. Choose the appropriate screwdriver based on the type of screws present. Place the screwdriver’s tip into the screw head and turn it counterclockwise to loosen and remove the screws.
Once the screws are removed, you will be able to detach the handle fitting from the pressure washer unit.
Steps to Remove Pressure Washer Handle Fitting
To remove the pressure washer handle fitting, follow these steps:
- Turn off the pressure washer and disconnect it from the power source.
- Release any pressure in the system by squeezing the trigger gun.
- Locate the handle fitting on the end of the pressure washer wand where the trigger gun connects.
- There may be a retaining clip or screw holding the handle fitting in place. Use a screwdriver or pliers to remove the clip or screw.
- Once the clip or screw is removed, gently twist and pull the handle fitting away from the wand.
- If the handle fitting is stuck, you can use a lubricant such as WD-40 to help loosen it. Apply the lubricant, wait a few minutes, and then try twisting and pulling again.
- Once the handle fitting is removed, inspect it for any damage or wear. If necessary, replace it with a new one.
By following these steps, you can easily remove the pressure washer handle fitting and replace it if needed.
Turn Off the Pressure Washer
Before removing the pressure washer handle fitting, you need to make sure that the pressure washer is turned off and completely powered down. This will ensure your safety and prevent any accidents or injuries.

Start by locating the power switch on the pressure washer and flipping it to the off position. This will cut off the power supply to the machine and stop the flow of water.
Additionally, it is recommended to unplug the pressure washer from the power source to eliminate any risk of accidental startups. This step is crucial for your safety, especially when working on any components of the washer.
Once you have turned off and unplugged the pressure washer, wait for a few minutes to allow any residual pressure to dissipate. This step is important to prevent any unexpected releases of pressure when working on the handle fitting.
By ensuring that the pressure washer is turned off and completely powered down, you can safely proceed with removing the handle fitting without any risks or hazards.
Locate the Handle Fitting
Before you can remove the pressure washer handle fitting, you need to locate it on your machine. The handle fitting is the part of the pressure washer where the handle attaches to the body. It is usually located near the top of the machine.
To find the handle fitting, follow these steps:

Step 1: Turn off the pressure washer
Before you begin any maintenance or repairs on your pressure washer, it is important to turn off the machine and unplug it from the power source if it is electric. This will prevent any accidents or injuries.
Step 2: Examine the pressure washer
Take a close look at your pressure washer to locate the handle fitting. The handle fitting is typically a metal or plastic piece that protrudes from the body of the machine. It may have a screw or bolt securing it in place. Look for any signs of damage or wear that may be causing the handle to become loose or malfunction.
If you are having trouble finding the handle fitting, consult your pressure washer’s manual. The manual should have a diagram or detailed instructions on where to locate the handle fitting.
Once you have located the handle fitting, you are ready to remove it and perform any necessary repairs or replacements.
Questions and answers,
What tools do I need to remove a pressure washer handle fitting?
To remove a pressure washer handle fitting, you will need an adjustable wrench, a socket wrench, and some thread sealant.
Is it difficult to remove a pressure washer handle fitting?
Removing a pressure washer handle fitting is generally not difficult. However, it may require some strength and the proper tools. If you have difficulty removing it, you may need to use some penetrating oil and let it sit for a while before attempting again.
Can I remove a pressure washer handle fitting without any tools?
No, it is not possible to remove a pressure washer handle fitting without any tools. You will need at least an adjustable wrench or a socket wrench to loosen and remove the fitting.
What is the purpose of the thread sealant?
The thread sealant is used to create a watertight seal between the pressure washer handle fitting and the hose. It helps prevent any leakage or damage caused by water pressure.
Do I need to replace the pressure washer handle fitting after removing it?
In most cases, it is not necessary to replace the pressure washer handle fitting after removing it. However, if the fitting is damaged or worn out, it is recommended to replace it to ensure proper functionality and prevent any leakage.
What tools do I need to remove a pressure washer handle fitting?
To remove a pressure washer handle fitting, you will need a wrench, pliers, and possibly a screwdriver. The specific tools required may vary depending on the make and model of your pressure washer.
Can I remove a pressure washer handle fitting without any tools?
No, you will need tools to remove a pressure washer handle fitting. The fitting is typically secured tightly and will require the use of a wrench, pliers, or other tools to loosen and remove it.
Recent Posts
-

How To Connect Soap To Honda Pressure Washer
June 28, 2024 -

A To Z Pressure Washing Scam
June 27, 2024 -

How To Pressure Wash Your Home With A Garden Hose
June 27, 2024 -

Where Can I Buy Honda Pressure Washer Parts
June 25, 2024 -
