
Blog
How To Remove Nozzle For Excel Pressure Washer


Proper maintenance and cleaning of your Excel pressure washer are essential to ensure its optimal performance and longevity. One of the crucial components that require attention is the nozzle. Over time, the nozzle may become clogged or damaged, affecting the pressure and spray pattern of your pressure washer. In such cases, removing the nozzle for cleaning or replacement becomes necessary.
To remove the nozzle safely, follow these simple steps:
Step 1: Turn off the pressure washer and disconnect the power supply. Safety should be your top priority to avoid any accidents or injuries.
Step 2: Locate the nozzle attachment point. The nozzle is usually located at the end of the wand or lance, which is the long rod that extends from the pressure washer. Look for a threading mechanism or a quick-connect system.
Step 3: If your pressure washer has a threading mechanism, rotate the nozzle counterclockwise to loosen it. Use a pair of pliers or a wrench if necessary, but be cautious not to damage the nozzle or the pressure washer.
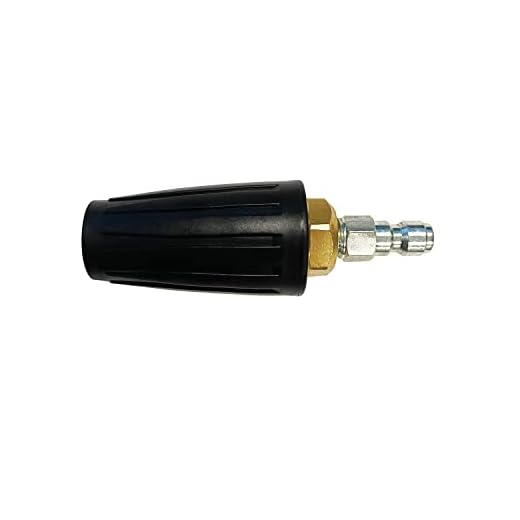
Step 4: For pressure washers with a quick-connect system, push the collar on the attachment point and pull the nozzle away to disconnect it. Some models may require additional steps, so consult the user manual for specific instructions.
Step 5: Once the nozzle is detached, inspect it for any debris, obstructions, or damage. Clean the nozzle thoroughly using a soft brush or a pin to remove any clogs or dirt particles. If the nozzle is beyond repair, consider replacing it with a new one.
Note: Always refer to the user manual or manufacturer’s instructions for your particular Excel pressure washer model, as the process of removing the nozzle may slightly vary.
By regularly removing and cleaning the nozzle of your Excel pressure washer, you can optimize its performance and ensure that your cleaning tasks are accomplished efficiently. Remember to follow proper safety precautions and maintain your pressure washer to enjoy its benefits for years to come.
Steps to Remove Nozzle for Excel Pressure Washer
If you need to remove the nozzle from your Excel pressure washer, follow these simple steps:
- Turn off the pressure washer and disconnect it from the power source. Safety first!
- Release any residual pressure in the system by squeezing the trigger on the spray gun or wand.
- Locate the nozzle on the end of the spray gun or wand. It’s usually a small metal piece with a hole in the center.
- Inspect the nozzle for any dirt, debris, or clogs that may be obstructing the flow of water. If necessary, clean it before removing.
- Get a firm grip on the nozzle and twist it counterclockwise to unscrew it from the spray gun or wand. Some models may have a locking mechanism that you need to disengage before unscrewing.
- Once the nozzle is loose, continue twisting it counterclockwise until it comes off completely.
- Inspect the nozzle for any damage or wear and tear. If necessary, replace it with a new one.
With these steps, you should be able to remove the nozzle from your Excel pressure washer easily. Remember to always handle the nozzle with care and use the appropriate equipment when working with high-pressure machines.
Preparing for Nozzle Removal
Before removing the nozzle on your Excel pressure washer, there are a few steps you should take to ensure a safe and effective removal process:
- Disconnect the pressure washer from any power source and make sure the engine is completely off.
- Release any pressure in the system by triggering the gun and releasing the water.
- Gather the necessary tools for the nozzle removal, such as a wrench or pliers, depending on the type of nozzle.
- Inspect the nozzle for any signs of damage or wear. If the nozzle is damaged or worn, it may need to be replaced instead of just removed.
- Put on safety glasses and gloves to protect yourself from any potential injury.
Once you have completed these preparatory steps, you will be ready to safely remove the nozzle from your Excel pressure washer.
Removing the Nozzle
Removing the nozzle from your Excel pressure washer is a simple task that can be done in a few easy steps. Follow the instructions below to safely remove the nozzle:
Step 1: Prepare the Pressure Washer
Before removing the nozzle, make sure to turn off the pressure washer and disconnect it from the power source. This will prevent any accidental operation of the machine while you are working on it.
Step 2: Locate the Nozzle
The nozzle is located at the end of the pressure hose. It is typically a metal or plastic attachment that regulates the spray pattern of the water. Take a moment to identify the nozzle before proceeding with the removal process.
Step 3: Depressurize the System
In order to safely remove the nozzle, it is important to release any pressure that may be trapped in the system. To do this, engage the trigger on the spray gun until all the pressure is released and the water stops flowing.
Step 4: Unscrew the Nozzle
With the pressure released, you can now unscrew the nozzle from the end of the pressure hose. Hold onto the base of the nozzle firmly with one hand, and use your other hand to twist it counterclockwise. Depending on the model, the nozzle may have a locking mechanism that needs to be released before it can be unscrewed. Refer to the user manual for specific instructions on your Excel pressure washer model.
Step 5: Store the Nozzle Safely
Once the nozzle is removed, it is important to store it in a safe place where it will not become damaged or lost. Consider using a small container or bag specifically designated for storing pressure washer accessories. This will help keep your nozzle organized and easily accessible for future use.
Removing the nozzle from your Excel pressure washer is a straightforward process that can be completed quickly and safely. By following these steps, you will be able to remove and store the nozzle with ease.
Cleaning and Maintenance Tips
To ensure optimal performance and longevity of your Excel pressure washer, it is important to clean and maintain the nozzle regularly. Here are some tips to help you keep your pressure washer in top shape:
1. Use soapy water: Before removing the nozzle, use a mixture of mild detergent and water to clean the entire nozzle area. This will help remove any dirt or debris that may have accumulated.
2. Inspect the nozzle: Check the nozzle for any signs of damage or wear. Look for cracks, clogs, or worn-out parts. If you notice any issues, it’s best to replace the nozzle before further use.
3. Remove the nozzle: To remove the nozzle, first, make sure the pressure washer is turned off and the water supply is disconnected. Then, twist the nozzle counterclockwise to loosen it from the spray gun. Gently pull the nozzle out once it is loose.
4. Clean the nozzle: After removing the nozzle, rinse it with clean water to remove any remaining dirt or detergent. You can use a small brush or toothpick to remove any stubborn debris from the nozzle’s openings.
5. Inspect the O-rings: While the nozzle is removed, take a moment to inspect the O-rings. These rubber rings located at the base of the nozzle can wear out over time. If you notice any damage or deterioration, replace the O-rings to prevent leaks and ensure a tight seal.
6. Reassemble the nozzle: Once the nozzle and O-rings are clean and in good condition, carefully insert the nozzle back into the spray gun. Twist it clockwise until it is securely tightened. Make sure it is snug but avoid overtightening.
7. Conduct a test run: Before using the pressure washer, turn on the water supply and run the pressure washer for a few minutes without the nozzle attached. This will flush out any remaining debris and ensure proper water flow before attaching the nozzle.
8. Regular maintenance: To keep your pressure washer in optimal condition, it is important to follow the manufacturer’s recommended maintenance schedule. This may include regular oil changes, fuel system cleaning, and spark plug replacement.
By following these cleaning and maintenance tips, you can ensure that your Excel pressure washer remains reliable and effective for years to come.

Important Safety Precautions
When removing the nozzle on your Excel pressure washer, it is important to prioritize safety to prevent injuries or damage. Follow these safety precautions before attempting to remove the nozzle:
- Wear protective gear: Always wear safety goggles and gloves to protect your eyes and hands from any potential hazards.
- Turn off the pressure washer: Before removing the nozzle, make sure to turn off the pressure washer and unplug it from the power source to avoid accidents.
- Release pressure: To release any built-up pressure, squeeze the trigger on the spray gun until you no longer feel any resistance.
- Avoid pointing the nozzle towards yourself: When removing the nozzle, ensure that it is not pointing towards you or anyone nearby to prevent injuries.
- Inspect the nozzle: Before removing the nozzle, visually inspect it for any damages or clogs. If you notice any issues, address them before proceeding with removal.
- Follow manufacturer’s instructions: Refer to the user manual or instructions provided by the manufacturer for specific guidelines on how to safely remove the nozzle from your Excel pressure washer model.
By following these important safety precautions, you can safely remove the nozzle from your Excel pressure washer without any incidents or harm. Always prioritize safety to ensure a smooth and accident-free maintenance process.
Questions and answers,
Why do I need to remove the nozzle for my Excel pressure washer?
You may need to remove the nozzle in order to clean or replace it, or to attach a different nozzle for specialized cleaning tasks.
What tools do I need to remove the nozzle?
You will typically need a wrench or pliers to loosen and remove the nozzle. The specific tool required may differ depending on the model of your Excel pressure washer.

How do I remove the nozzle from my Excel pressure washer?
To remove the nozzle, first shut off the pressure washer and make sure the gun trigger is released to relieve any pressure. Then, use a wrench or pliers to loosen and unscrew the nozzle counterclockwise. Once it is loose, simply pull it out of the lance.
Can I clean the nozzle without removing it?
Yes, you can clean the nozzle without removing it by using a nozzle cleaning tool or a small wire to remove any debris that may be clogging it. However, it is generally more effective to remove the nozzle for a thorough cleaning or to replace it if necessary.
How often should I remove and clean the nozzle?
The frequency of cleaning will depend on how often you use your pressure washer and the type of debris you typically encounter. As a general guide, it is recommended to clean the nozzle at least once every few months or whenever you notice a decrease in cleaning performance.
Recent Posts
-

How To Connect Soap To Honda Pressure Washer
June 28, 2024 -

A To Z Pressure Washing Scam
June 27, 2024 -
How To Pressure Wash Your Home With A Garden Hose
June 27, 2024 -

Where Can I Buy Honda Pressure Washer Parts
June 25, 2024 -
