
Blog
How To Pressure Wash And Stain Your Deck


If you want to improve the appearance and longevity of your deck, pressure washing and staining are two essential steps. Over time, your deck can accumulate dirt, grime, and mildew, which can not only make it look unattractive, but also cause damage. By pressure washing your deck, you can remove all these unwanted substances, leaving a clean surface for staining. Staining, on the other hand, helps protect the wood from the elements and gives it a fresh new look.
Before you begin pressure washing, it’s important to prepare your deck properly. Start by removing any furniture, plants, and other objects from the deck. Then, use a broom or brush to sweep away any loose debris such as leaves, dirt, and cobwebs. Next, cover any nearby plants or shrubs with plastic sheeting to protect them from the pressure washer’s spray.
When pressure washing your deck, it’s crucial to use the right technique to avoid damaging the wood. Hold the pressure washer nozzle about two feet away from the surface of the deck and aim it in the direction of the wood grain. Move the nozzle in a sweeping motion, keeping it at a consistent distance from the deck. Be careful not to linger too long in one spot, as this can cause uneven cleaning or even strip the wood.
Once you’ve finished pressure washing, give your deck ample time to dry before staining. Typically, it’s recommended to wait at least 48 hours, but this can vary depending on the climate and weather conditions. Once your deck is dry, you can proceed with staining. Choose an exterior wood stain that is suitable for your deck’s wood type, color preference, and level of protection. Apply the stain using a brush or roller, following the manufacturer’s instructions.
By following these steps, you can effectively pressure wash and stain your deck, enhancing its appearance and extending its lifespan. Regular maintenance, including annual pressure washing and staining, will help keep your deck looking beautiful for years to come.
Steps to Pressure Wash and Stain Your Deck
Maintaining your deck by pressure washing and staining it regularly is important to keep it looking its best and protect it from damage. Here are the steps to pressure wash and stain your deck to ensure a successful and long-lasting result:
Step 1: Prepare the area
Before starting, clear the deck of any furniture, plants, or debris. Cover any nearby plants or sensitive areas with plastic or drop cloths to protect them from the pressure washer and staining materials.
Step 2: Pressure wash the deck
Use a pressure washer to clean the deck surface thoroughly. Start by wetting the deck with water to prepare it for cleaning. Then, using a wide-angle spray tip, apply a deck cleaner or a mixture of mild detergent and water to the surface. Scrub the deck with a stiff brush or broom to remove dirt, grime, and any existing stain. Finally, rinse the deck with clean water, making sure to remove all soap residue.
Step 3: Let the deck dry
Allow the deck to dry completely before proceeding to the next step. This usually takes 24-48 hours, depending on the weather conditions. Check the moisture level by sprinkling water on the deck surface – if it beads up, the deck is still wet and needs more time to dry.
Step 4: Sand the deck (optional)
If your deck has rough or splintered areas, you may need to sand it to create a smooth surface. Use a sanding block or power sander with a medium-grit sandpaper to sand down any problematic spots. After sanding, sweep or vacuum the deck to remove all dust.
Step 5: Apply the stain
Choose a high-quality deck stain that suits your preference and the type of wood your deck is made of. Stir the stain thoroughly to ensure an even application. Using a brush or roller, apply the stain to the deck boards in smooth, even strokes, following the direction of the wood grain. Work in small sections to avoid overlap lines and ensure consistent coverage. Allow the first coat to dry according to the manufacturer’s instructions, and apply a second coat if desired for a deeper color and enhanced protection.
Step 6: Maintain your deck
Once the stain is dry, regularly sweep or blow off any leaves, debris, or dirt from the deck surface. Avoid using harsh chemical cleaners or power washing the deck again unless necessary. Regularly inspect the deck for signs of wear or damage, such as loose boards or nails, and address them promptly to prevent further issues.
By following these steps, you can effectively pressure wash and stain your deck, ensuring its longevity, beauty, and enjoyment for years to come.
Preparing Your Deck for Pressure Washing
Before you begin pressure washing your deck, it is important to properly prepare the surface to ensure effective cleaning and staining. This involves a few simple steps:
1. Clear the Deck
Remove all furniture, plants, and other items from your deck. This will prevent any obstacles during the pressure washing process and allow for a thorough cleaning.
2. Sweep the Surface
Use a broom or brush to sweep away any loose dirt, leaves, and debris from the deck. This will make the pressure washing more effective and prevent clogging of the equipment.
3. Protect Nearby Areas
Before starting the pressure washing, it is essential to cover any nearby plants, windows, or outdoor furniture that could be damaged by the water or debris. Use plastic sheets or drop cloths to provide this protection.
4. Inspect the Deck
Closely inspect your deck for any signs of damage, such as loose boards, nails, or rotting wood. Repairing these issues prior to pressure washing will help maintain the longevity of your deck.
5. Wet the Surface
Before applying the pressure washer, wet the surface of your deck with plain water. This will help to loosen dirt and grime, making it easier to remove during the pressure washing process.
6. Use a Deck Cleaner
Apply a deck cleaner according to the manufacturer’s instructions. This will help to remove any stubborn stains, mold, or mildew that may be present on your deck.
7. Scrub the Surface (Optional)
If necessary, use a scrub brush or deck broom to agitate the deck cleaner and loosen any embedded dirt or stains. Be sure to scrub in the direction of the wood grain to avoid causing any damage.
8. Rinse Thoroughly
Once the deck cleaner has had time to work, thoroughly rinse the deck with clean water. This will remove any remaining dirt, cleaner residue, and ensure a clean surface for staining.
Following these steps to prepare your deck for pressure washing will help to ensure a successful and satisfying deck staining project. It is important to allow the deck to dry completely before moving on to the staining process.
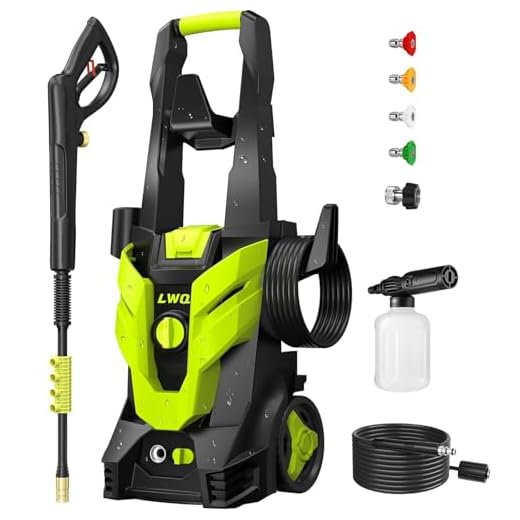
Choosing the Right Pressure Washer
When it comes to pressure washing your deck, choosing the right pressure washer is essential for achieving the best results. There are a few key factors to consider before making your purchase.
Firstly, you’ll need to decide whether you want to go for an electric pressure washer or a gas-powered one. Electric pressure washers are generally more lightweight and easier to maneuver, while gas-powered ones are more powerful and suitable for larger decks or heavy-duty tasks.
Next, you’ll need to determine the pressure and flow rate that is appropriate for your deck. Pressure is measured in pounds per square inch (PSI), and a pressure washer with a PSI of around 1500-2000 is usually sufficient for most decks. The flow rate, measured in gallons per minute (GPM), determines how quickly the water can clean the surface. A flow rate of around 1.5-2.5 GPM is typically recommended.
It’s also important to consider the nozzle options that come with the pressure washer. Different nozzles provide varying spray patterns, from a wide spray for general cleaning to a narrow spray for stubborn stains. Having a variety of nozzle options can help you achieve a more precise and efficient cleaning process.
Lastly, take into account the overall build quality and durability of the pressure washer. Look for a model with sturdy construction and a reliable motor that can withstand regular use. Additionally, consider the warranty offered by the manufacturer, as it can give you some peace of mind in case of any issues.
By taking the time to choose the right pressure washer for your deck, you’ll be ensuring that your cleaning and staining process goes smoothly and efficiently. It’s worth investing in a quality pressure washer that meets your specific needs and will help you achieve a beautifully rejuvenated deck.
Using the Pressure Washer to Clean Your Deck
Before staining your deck, it’s important to thoroughly clean it to remove any dirt, grime, or previous finishes. One effective way to do this is by using a pressure washer. Follow these steps to use your pressure washer to clean your deck:
1. Prepare the area:

Clear the deck of any furniture, plants, or other objects that may obstruct the cleaning process. Sweep away loose debris, such as leaves or twigs, and cover any nearby plants or delicate surfaces with plastic to protect them.
2. Safety first:
Wearing protective eyewear, gloves, and closed-toe shoes is essential when using a pressure washer. The high-pressure water can cause injury if not handled with care.
3. Attach the appropriate nozzle:
Most pressure washers come with various nozzles for different tasks. For cleaning a deck, use a nozzle with a 40- to 60-degree spray pattern, as this will provide a wider coverage area and minimize the risk of damaging the wood.
4. Test the pressure:
Before spraying the entire deck, test the pressure washer on a small, inconspicuous area of the deck. This will help you determine the appropriate pressure setting and distance to maintain while cleaning the rest of the deck.
5. Start from a distance:
Begin by standing about 2-3 feet away from the deck surface. Gradually move closer if necessary, but be cautious not to get too close as it may damage the wood. Keep the nozzle moving at a steady, consistent pace to avoid leaving marks or lines on the deck.
6. Clean the entire deck:
Work your way across the entire deck, cleaning one section at a time. Pay extra attention to heavily soiled areas, corners, and gaps between the boards. Ensure that you cover all surfaces, including railings and stairs.
7. Allow time to dry:
After cleaning, allow the deck to dry completely before moving on to the staining process. Depending on the weather and humidity levels, this may take anywhere from 24 to 48 hours.
By following these steps and using your pressure washer correctly, you can effectively clean your deck and prepare it for staining. Always read the manufacturer’s instructions for your specific pressure washer model before use.
Drying and Inspecting Your Deck
Once you have finished pressure washing your deck, it is important to allow it to dry thoroughly before proceeding with any further steps. This will ensure that the stain adheres properly and lasts longer.

First, give your deck ample time to air dry. Depending on the weather conditions and the size of your deck, this could take anywhere from a few hours to a few days. During this time, keep the area clear of any furniture, plants, or other items that could obstruct the drying process.
Using a moisture meter, you can check the moisture levels of your deck. The ideal moisture content for staining a deck is usually around 15-20%. If the moisture levels are higher than that, it is recommended to wait for the deck to dry further before applying any stain.
Once your deck is fully dry, inspect it for any signs of damage or wear. Look for loose boards, nails or screws that may need to be tightened or replaced. Check for any splintering, cracks, or discoloration on the surface of the deck. Addressing these issues before staining will help to ensure a smooth and beautiful finish.
Additionally, be sure to inspect the surrounding areas of your deck, such as railings, steps, and pergolas. These areas may require additional cleaning or repairs before staining to maintain the overall aesthetic and functionality of your deck.
By properly drying and inspecting your deck, you can ensure that it is in the best condition possible before applying any stain. This will help to prolong the life of your deck and keep it looking its best for years to come.
Staining and Sealing Your Deck
After pressure washing your deck, the next step is to stain and seal it to protect it from the elements and keep it looking great for years to come. Staining and sealing your deck can also enhance its natural beauty and give it a fresh, new look.
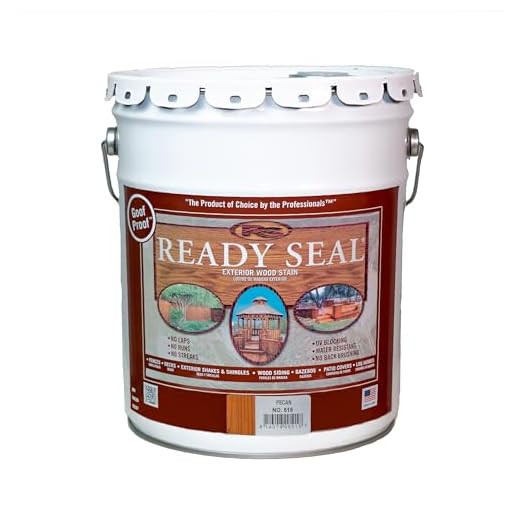
Choosing the Right Stain
Before you start staining your deck, it’s important to choose the right stain for your specific deck material. There are different types of stains available, including transparent, semi-transparent, and solid color stains. Transparent stains allow the natural grain and texture of the wood to show through, while solid color stains provide maximum coverage and hide imperfections.
If you want a more natural look, a transparent or semi-transparent stain is a good choice. However, if you want to completely change the color of your deck or hide any blemishes, a solid color stain is the way to go. Consider the overall look you want to achieve and select a stain that matches your desired outcome.
Applying the Stain
Before applying the stain, be sure to clean and prepare your deck properly. Remove any debris or loose paint using a brush or scraper. If there are any tough stains, you can use a deck cleaner and a scrub brush to remove them. After cleaning, let the deck dry completely before moving on to the next step.
When applying the stain, use a brush, roller, or sprayer to ensure even coverage. Start from one end and work your way to the other, applying the stain along the length of the boards. Be careful not to leave any puddles or drips, as these can lead to an uneven finish. If necessary, you can apply a second coat once the first coat has dried.
Sealing Your Deck
After staining, it’s important to seal your deck to protect it from moisture and UV damage. A clear sealer or a waterproofing sealer can help prevent cracking, warping, and splitting of the wood. Apply the sealer using a brush or roller, following the manufacturer’s instructions for the specific product you’re using.
Make sure to apply the sealer in a thin, even layer, and allow it to dry completely before using your deck. It’s a good idea to apply a second coat of sealer for added protection, especially if your deck is exposed to harsh weather conditions.
| Tips for Staining and Sealing Your Deck: |
|---|
| 1. Choose the right stain for your deck material and desired look. |
| 2. Clean and prepare your deck thoroughly before staining. |
| 3. Apply the stain using a brush, roller, or sprayer. |
| 4. Seal your deck with a clear or waterproofing sealer. |
| 5. Apply a second coat of sealer for added protection. |
Questions and answers,
What can I use to pressure wash my deck?
You can use a pressure washer with a wide spray nozzle and a deck cleaner solution to pressure wash your deck. Make sure to follow the manufacturer’s instructions for the pressure washer and the deck cleaner.
Do I need to remove all the furniture and plants from my deck before pressure washing?
Yes, it is recommended to remove all furniture, plants, and other items from your deck before pressure washing. This will ensure that they are not damaged by the force of the water or by any chemicals used in the cleaning process.
Can I stain my deck right after pressure washing?
No, you should wait at least 48 hours after pressure washing your deck before applying stain. This will allow the wood to dry completely and ensure that the stain adheres properly.
What type of stain should I use for my deck?
The type of stain you should use for your deck will depend on your personal preference and the condition of your deck. There are three main types of deck stains: transparent, semi-transparent, and solid color. Transparent stains show the natural grain of the wood, semi-transparent stains provide some color while still allowing the grain to show through, and solid color stains completely cover the wood with a solid color. Choose a stain that is specifically formulated for use on decks and outdoor wood surfaces.
Recent Posts
-

How To Connect Soap To Honda Pressure Washer
June 28, 2024 -

A To Z Pressure Washing Scam
June 27, 2024 -

How To Pressure Wash Your Home With A Garden Hose
June 27, 2024 -

Where Can I Buy Honda Pressure Washer Parts
June 25, 2024 -
