
Blog
How To Pressure Wash And Stain Cedar Siding


Cedar siding is a popular choice for homeowners due to its natural beauty and durability. However, over time, exposure to the elements can cause the siding to become dirty and faded. To bring back the vibrant color and protect the wood, pressure washing and staining are essential maintenance tasks. While the process may seem daunting, with the right tools and techniques, you can easily restore your cedar siding to its former glory.
Before you begin pressure washing, it’s important to prepare your cedar siding. Start by removing any loose dirt or debris by sweeping or gently brushing the surface. This will prevent the dirt from being pushed deeper into the wood during the pressure washing process. Next, cover any nearby plants, windows, or delicate surfaces with plastic or drop cloths to protect them from the high-pressure water.
Once your cedar siding is prepped, it’s time to start pressure washing. Begin by using a low-pressure nozzle and hold the wand about 12 inches away from the surface. Gradually increase the pressure if needed, but be careful not to apply too much force as it can damage the wood. Use long, sweeping motions to evenly clean the siding, working from top to bottom. Pay extra attention to areas with heavy dirt or stains, and adjust the pressure as necessary.
After pressure washing, allow the cedar siding to dry completely before applying the stain. This may take a few days depending on the weather conditions. While waiting for the siding to dry, take the time to prepare the stain by stirring it thoroughly and pouring it into a paint tray. Choose a high-quality stain specifically formulated for cedar siding to ensure long-lasting protection and enhance the natural beauty of the wood.
When the cedar siding is dry, use a paintbrush or roller to apply the stain evenly, working in small sections at a time. Start from the top and work your way down, following the direction of the wood grain. Be sure to apply a generous coat of stain to fully penetrate the wood and provide adequate protection. Allow the stain to dry according to the manufacturer’s instructions, and apply additional coats if desired for better color depth and durability.
In conclusion, pressure washing and staining cedar siding is an essential maintenance task to restore and protect the beauty of your wood exterior. With proper preparation and technique, you can easily achieve professional-quality results. Remember to always follow safety guidelines when using pressure washers, and choose a high-quality stain to ensure long-lasting protection for your cedar siding. By investing time and effort into this process, you can enjoy a vibrant and visually appealing home exterior for years to come.
Planning and Preparation
Before beginning the pressure washing and staining process, it is important to plan and prepare accordingly. Taking the time to properly prepare will ensure that the cedar siding is cleaned and protected effectively.
First, assess the condition of the cedar siding. Make note of any areas that may require special attention, such as stains or mildew. This will help you determine the best approach for cleaning and staining.
Next, gather the necessary tools and materials. You will need a pressure washer, a stain applicator, a brush or roller, a ladder, and safety equipment such as goggles and gloves. Additionally, have the appropriate cleaning solution and stain ready for use.
Prepare the surrounding area by removing any furniture, plants, or other items that may be in the way. Cover any nearby surfaces or objects that you want to protect from overspray or stain splatter.
Prior to pressure washing, it is important to wet down any nearby plants or shrubs to minimize the risk of damage from the cleaning solution or pressure washer. It is also a good idea to test the pressure washer on a small, inconspicuous area of the cedar siding to ensure that it is not too powerful and will not cause damage.
Check the weather forecast and choose a day that is dry and mild. Avoid staining during periods of high humidity or when rain is expected, as this can affect the drying and absorption of the stain.
Finally, dress appropriately for the job. Wear old, comfortable clothing that you don’t mind getting dirty or stained. Opt for long sleeves, pants, and closed-toe shoes to protect your skin from the cleaning solution and stain.
By taking the time to plan and prepare, you will set yourself up for success when pressure washing and staining your cedar siding. Proper preparation will ensure a clean and beautiful finish that will protect the cedar for years to come.
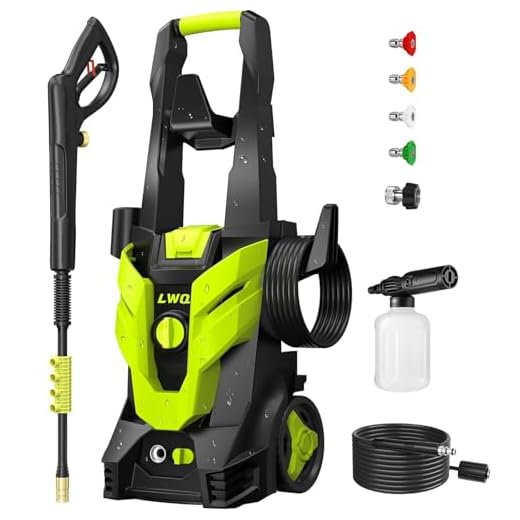
Choosing the Right Pressure Washer
When it comes to pressure washing your cedar siding, choosing the right pressure washer is essential. The two main types of pressure washers available are electric and gas-powered. Each type has its own advantages and disadvantages, so it’s important to consider your specific needs before making a decision.
Electric Pressure Washers:
- Electric pressure washers are typically more affordable and easier to maintain than gas-powered options.
- They are also quieter and produce zero emissions, making them a more environmentally friendly option.
- However, electric pressure washers may not have as much power as gas-powered models. This means they may take longer to clean large areas or remove tough stains.
- Electric pressure washers are best suited for smaller jobs or homeowners who plan to use them infrequently.
Gas-Powered Pressure Washers:
- Gas-powered pressure washers are typically more powerful and can clean larger areas more quickly than electric models.
- They are also more portable, as they do not rely on an electrical outlet for power.
- However, gas-powered pressure washers tend to be more expensive and require more maintenance than electric models.
- They also produce noise and emissions, which can be a concern for some users.
- Gas-powered pressure washers are best for larger properties or frequent use.
Overall, the choice between an electric or gas-powered pressure washer depends on your specific needs and preferences. Consider the size of your property, the amount of cleaning you plan to do, and your budget before making a decision. Regardless of which type you choose, both options can effectively clean and prepare your cedar siding for staining.
Gathering the Necessary Materials
Before you begin pressure washing and staining your cedar siding, it’s important to gather all the necessary materials. Having everything on hand will help ensure a smooth and efficient process. Here are the key materials you’ll need:
1. Pressure Washer
Invest in a good-quality pressure washer for this project. Look for one that has adjustable pressure settings to avoid damaging the cedar siding. A pressure washer with a PSI (pounds per square inch) between 1500 and 2000 should work well.
2. Cleaning Solution
Create a cleaning solution to use with your pressure washer. You can make your own by mixing equal parts water and oxygen bleach. This solution will help remove dirt, grime, and mildew from the cedar siding.
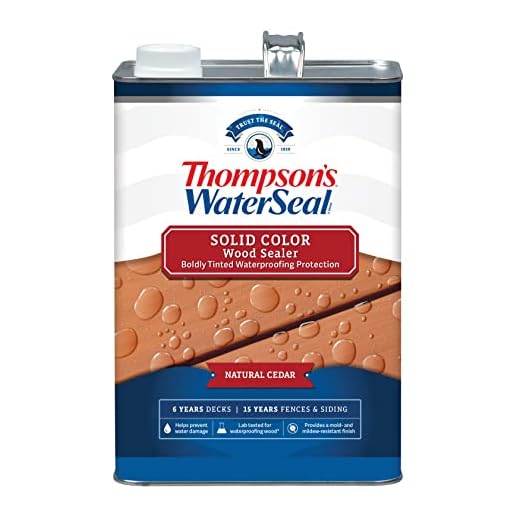
3. Stain and Sealer
Choose a high-quality stain and sealer specifically designed for cedar siding. Consider the color and finish you desire, as well as the level of protection you want for your siding. A transparent or semi-transparent stain is often the best choice for cedar.
4. Brushes and Rollers
You’ll need a brush or roller to apply the stain onto the cedar siding. Use a brush with natural bristles or a roller with a nap length suitable for rough surfaces. These tools will help ensure the stain is applied evenly and penetrates the wood properly.
5. Drop Cloths and Plastic Sheeting
Protect the surrounding areas by covering them with drop cloths and plastic sheeting. This will prevent any overspray or stain from getting onto windows, doors, or other surfaces. It’s important to take these precautions to avoid any unnecessary cleanup or damage.
6. Safety Gear
Always prioritize safety when pressure washing and staining. Wear protective gear such as goggles, gloves, and a mask to shield yourself from any potential harm, including chemical splashes or debris. Additionally, wear clothing that covers your skin to minimize exposure.
By gathering and preparing all these materials beforehand, you’ll be ready to tackle the pressure washing and staining process more efficiently and achieve the desired results for your cedar siding.
Inspecting and Repairing the Siding
Before beginning the pressure washing and staining process, it is important to thoroughly inspect the cedar siding for any damage or signs of decay. This step is crucial as it helps identify areas that may need repairs before proceeding further.
1. Visual Inspection
Start by visually inspecting the entire cedar siding. Look for any loose boards, cracks, or splintering. Pay close attention to the corners and joints where moisture may have seeped in over time. If you notice any discoloration or mold growth, this may indicate water damage or excessive moisture.
2. Testing for Rot
In addition to visual inspection, it is important to test the siding for rot. Use a sharp object like a screwdriver or a pocket knife to gently probe the wood in different areas. Rotting wood will feel soft, spongy, or crumbly. If you encounter any of these signs, it is likely that the wood is rotted and will need to be replaced.
If the damage is minor, you may be able to repair it with wood putty or epoxy filler. However, if the damage is extensive, it is recommended to replace the entire board or section of siding for best results.
By carefully inspecting and repairing the cedar siding, you ensure a solid and sturdy foundation for the pressure washing and staining process. Skipping this step could result in further damage or compromise the final results.
Cleaning the Cedar Siding
Before staining your cedar siding, it is important to thoroughly clean it to remove any dirt, grime, mold, and mildew that may have accumulated over time. Here are the steps to follow:
- Prepare the pressure washer: Set up your pressure washer according to the manufacturer’s instructions. Make sure to use the appropriate nozzle for washing cedar siding.
- Wet the siding: Before applying any cleaning solution, spray down the cedar siding with water to saturate it thoroughly. This will help to prevent the cleaning solution from drying too quickly.
- Create a cleaning solution: Mix a solution of water and a gentle detergent or specialized cedar siding cleaner in a bucket according to the manufacturer’s instructions. Avoid using bleach or harsh chemicals, as they can damage the cedar wood.
- Apply the cleaning solution: Using a soft-bristle brush or a low-pressure spray attachment on the pressure washer, apply the cleaning solution to the cedar siding. Work from the bottom up to prevent streaking and allow the solution to penetrate the wood fibers.
- Scrub the siding: Gently scrub the cedar siding using the brush or a soft sponge, paying extra attention to any areas with stubborn stains or mold growth.
- Rinse the siding: Once you have thoroughly scrubbed the siding, rinse off the cleaning solution using the pressure washer or a garden hose. Start from the top and work your way down to ensure that all the dirt and cleaning residue are flushed away.
- Allow the siding to dry: After rinsing, give the cedar siding enough time to dry completely before proceeding to the staining process. This will help the stain adhere properly and prevent any moisture-related issues.
By following these steps, you can ensure that your cedar siding is clean and ready for staining. Remember to take the necessary safety precautions when using a pressure washer and always read the instructions provided by the equipment and cleaning product manufacturers.
Removing Dirt and Debris
Before you can begin staining your cedar siding, it’s important to thoroughly clean the surface to remove any dirt, dust, or debris. This ensures that the stain adheres properly and allows for a smooth and even finish.
Here are the steps to remove dirt and debris from your cedar siding:
| Step 1: | Prepare the pressure washer by connecting the garden hose and setting the appropriate pressure level. |
| Step 2: | Protect any nearby plants or delicate surfaces by covering them with plastic sheeting. |
| Step 3: | Spray the cedar siding from top to bottom using a wide-angle spray nozzle. Keep the nozzle at a distance of approximately 12-18 inches to prevent damage to the wood. |
| Step 4: | Pay extra attention to areas with visible dirt or stains. You may need to adjust the pressure or get closer to remove stubborn grime. |
| Step 5: | Allow the cedar siding to dry completely before proceeding to the staining process. This could take anywhere from a few hours to a full day, depending on the weather conditions. |
By following these steps, you will ensure that your cedar siding is clean and ready for staining. This will result in a beautiful and long-lasting finish that enhances the natural beauty of the wood.
Treating Mildew and Mold
Mildew and mold are common issues that can affect cedar siding over time. These growths not only detract from the appearance of the wood but can also lead to damage if not treated properly. Here are some steps to effectively treat mildew and mold on cedar siding:
1. Identify the Problem Areas
Inspect your cedar siding for any areas that show signs of mildew or mold growth. Look for black or green spots, fuzzy or powdery textures, and musty odors. Pay particular attention to areas that are exposed to moisture, such as shaded or damp spots.
2. Prepare a Cleaning Solution
Mix a cleaning solution using a diluted bleach mixture or a commercial mildew and mold remover. Follow the manufacturer’s instructions for the proper dilution ratio. Remember to wear protective gloves and eyewear while handling the cleaning solution.
3. Apply the Cleaning Solution
Use a soft-bristle brush or a low-pressure spray nozzle to apply the cleaning solution to the affected areas. Allow the solution to sit for the recommended amount of time to effectively kill the mildew and mold spores. Avoid using high-pressure washing, as it can further damage the cedar siding.
4. Scrub and Rinse
Gently scrub the affected areas with a soft-bristle brush to remove the mildew and mold. Start from the bottom and work your way up to prevent streaking. Rinse the siding thoroughly with clean water, ensuring all traces of the cleaning solution are removed.
5. Prevent Future Growth
To prevent future mildew and mold growth on your cedar siding, take the following preventive measures:
- Trim trees and vegetation near the siding to allow for better airflow and sunlight exposure.
- Regularly clean gutters and downspouts to prevent water from accumulating and seeping into the siding.
- Repair any leaks or water damage promptly to minimize moisture retention.
- Consider applying a protective sealant or stain to the cedar siding to create a barrier against moisture.
By following these steps, you can effectively treat mildew and mold on your cedar siding and ensure its longevity and appearance for years to come.
Questions and answers,
What materials and equipment do I need to pressure wash and stain cedar siding?
To pressure wash and stain cedar siding, you will need a pressure washer, a stiff brush or broom, a cleaning solution, a pump sprayer or brush for applying the stain, a ladder, and safety equipment such as goggles and gloves.
Is it necessary to pressure wash cedar siding before staining?
Yes, it is essential to pressure wash cedar siding before staining. Pressure washing helps to remove dirt, dust, mildew, and old stain from the surface, ensuring better adhesion of the new stain and a more even finish.
Can I use a regular paintbrush to apply stain on cedar siding?
Yes, you can use a regular paintbrush to apply stain on cedar siding. However, using a brush can be time-consuming, especially for larger surfaces. Alternatively, you can also use a pump sprayer for faster and more efficient application.
How should I prepare the cedar siding before pressure washing?
Before pressure washing, you should remove any loose dirt or debris from the cedar siding using a stiff brush or broom. Trim away any vegetation near the siding and cover any nearby plants or objects to protect them from the cleaning solution.
What precautions should I take while pressure washing and staining cedar siding?
While pressure washing and staining cedar siding, it is important to wear goggles and gloves to protect your eyes and skin from any chemicals or debris. You should also be careful when working on a ladder and ensure it is stable and secure.
What is the best way to clean cedar siding before staining?
The best way to clean cedar siding before staining is to use a pressure washer. Start by wetting the siding with water, then apply a cleaning solution. Let the solution sit for a few minutes, then use the pressure washer to rinse off the dirt and debris. Be careful not to use too much pressure, as it can damage the wood.
Can I stain cedar siding without pressure washing it first?
While it is possible to stain cedar siding without pressure washing it first, it is not recommended. Pressure washing helps remove dirt, mold, and mildew that can prevent the stain from adhering properly to the wood. Additionally, pressure washing can also help revive the natural color of the cedar and ensure a more even stain application.
Recent Posts
-

How To Connect Soap To Honda Pressure Washer
June 28, 2024 -

A To Z Pressure Washing Scam
June 27, 2024 -

How To Pressure Wash Your Home With A Garden Hose
June 27, 2024 -

Where Can I Buy Honda Pressure Washer Parts
June 25, 2024 -
