
Blog
How To Fix Pressure Washer Surface Cleaner
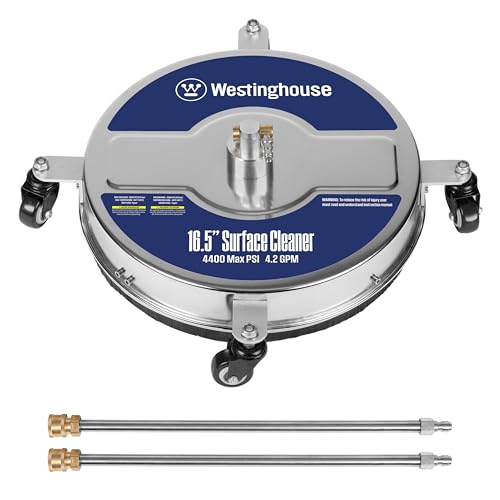
If you’re a proud owner of a pressure washer with a surface cleaner attachment, you know that it can make outdoor cleaning tasks a breeze. However, like any other tool, pressure washer surface cleaners can experience issues that may impede their performance. Before you give up on your surface cleaner or rush to buy a new one, it’s worth exploring some common problems and their solutions.
One common issue with pressure washer surface cleaners is low water pressure. If you notice that the cleaner is not spinning as fast as it should or leaving streaks on the surface, the problem may lie with water pressure. Check that the water supply valve is fully open and that there are no kinks or leaks in the hose. Additionally, make sure that the pressure washer itself is set to a suitable pressure for the surface cleaner to work effectively.


Another problem you may encounter is uneven cleaning. If you find that certain areas of the surface are not receiving a thorough clean, it could be due to worn or damaged nozzles. Inspect the nozzles for any signs of wear or debris buildup and clean or replace them as necessary. Additionally, ensure that the surface cleaner is making full contact with the surface and that you are using the correct technique for even cleaning.
Finally, if your pressure washer surface cleaner is making strange noises or vibrating excessively, it may indicate a problem with the spray bar. Check that the spray bar is securely attached and that there are no obstructions or damage to the jets. Sometimes, a simple adjustment or realignment of the spray bar can resolve these issues. If the problem persists, it may be worth seeking professional assistance to diagnose and fix the problem.
With proper maintenance and troubleshooting, you can extend the lifespan of your pressure washer surface cleaner and keep it functioning at its best. Remember to consult the user manual for your specific model for any additional guidance on troubleshooting and maintenance.
Steps To Repair Pressure Washer Surface Cleaner
If your pressure washer surface cleaner is not working correctly, there are a few steps you can take to try to repair it. Here are some common troubleshooting steps:
| Step 1: | Check the nozzle for clogs or debris. Use a small brush or needle to unclog any obstructions. |
| Step 2: | Inspect the spray gun trigger for any damage or wear. Replace any broken parts. |
| Step 3: | Make sure the water source is turned on and the water supply hose is not kinked or damaged. |
| Step 4: | Check the surface cleaner’s wheels for any obstructions or damage. Clean or replace as necessary. |
| Step 5: | Inspect the spray arm and nozzles for any blockages. Remove any debris and ensure proper alignment. |
| Step 6: | Verify that the pressure washer is providing adequate water pressure to the surface cleaner. Adjust the pressure if necessary. |
| Step 7: | If none of the above steps solve the issue, it may be necessary to disassemble and clean the surface cleaner thoroughly. Refer to the manufacturer’s instructions for guidance. |
| Step 8: | If the surface cleaner is still not working after cleaning, there may be a mechanical issue. In this case, it is recommended to contact a professional for repair or replacement. |
Step 1: Diagnosing the Problem
Before attempting to fix your pressure washer surface cleaner, it’s important to diagnose the specific problem you are experiencing. This will help you determine the most appropriate course of action and ensure that you don’t waste time and effort on unnecessary repairs.
1. Check for Power
The first step is to check if your pressure washer surface cleaner is receiving power. Make sure it is properly plugged in and that the power source is functioning correctly. If the surface cleaner is not turning on at all, the problem may lie with the power supply.
2. Inspect the Connections
Next, inspect the connections between the pressure washer and the surface cleaner. Ensure that all connections are secure and free from any damage or excessive wear. Loose or damaged connections can lead to inadequate water flow, causing the surface cleaner to malfunction.
Note: If you notice any leaks or cracks in the connections or hoses, these should be replaced before further use to prevent any potential accidents.
3. Check the Nozzles
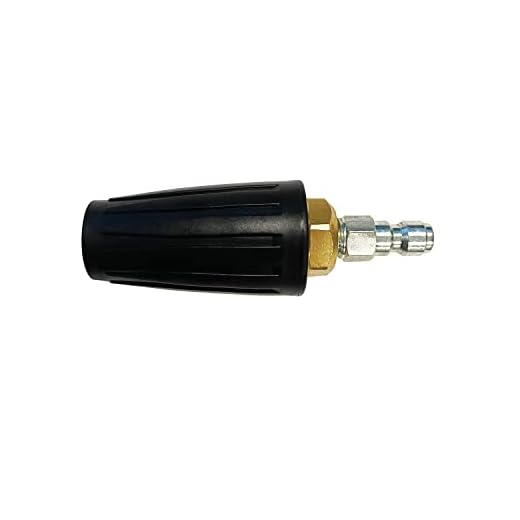
The nozzles on the surface cleaner are responsible for creating the high-pressure spray that cleans surfaces effectively. If the nozzles are clogged or damaged, it can result in poor performance or no pressure at all.
Tip: Remove the nozzles and clean them thoroughly with a nozzle cleaning tool or a small brush. If the nozzles are damaged, they should be replaced with new ones.
By following these initial diagnostic steps, you can identify the most likely cause of the problem with your pressure washer surface cleaner. Once you have determined the issue, you can move on to the appropriate troubleshooting and repair steps.
Step 2: Cleaning the Nozzles and Filters
Before continuing, make sure that the surface cleaner is disconnected from the pressure washer and the water source is turned off.
1. Locate the nozzles on the surface cleaner. These small openings are responsible for spraying water onto the surface. Remove any debris or dirt that may be blocking the nozzles. Use a small brush or a toothpick to gently clean each nozzle. Take care not to damage or enlarge the openings.
2. Check the filters on the surface cleaner. These filters prevent debris from entering the nozzles and clogging the system. Remove the filters and rinse them under running water to remove any dirt or buildup. If the filters are severely clogged, you may need to soak them in a mixture of water and vinegar for a more thorough cleaning. Make sure they are completely dry before reinserting them into the surface cleaner.
3. Inspect the O-rings and seals on the surface cleaner. These rubber components create a tight seal and prevent water leakage. Clean the O-rings and seals with a mild detergent and water solution. If any of the O-rings or seals are damaged or worn out, they should be replaced to ensure proper functioning of the surface cleaner.
4. Once you have cleaned the nozzles, filters, and O-rings, reassemble the surface cleaner. Make sure all the components are securely in place.
5. Connect the surface cleaner back to the pressure washer and turn on the water supply. Test the surface cleaner to see if the spraying pattern has improved and if any blockages have been cleared.
If the cleaning process does not resolve the issue or if you encounter any other problems, it is recommended to consult the manufacturer’s manual or contact customer support for further assistance.
Step 3: Inspecting and Replacing the O-Rings
One common issue with pressure washer surface cleaners is worn or damaged O-rings. These small rubber rings are crucial for maintaining a tight seal and preventing leaks. If you notice any leaks or a decrease in performance, it is important to inspect the O-rings and replace them if necessary.
To inspect the O-rings, first, make sure the pressure washer surface cleaner is turned off and disconnected from the power source. Then, remove the housing or cover of the surface cleaner to access the internal components.
Once you have access to the internal components, carefully examine the O-rings for any signs of wear, cracks, or damage. Pay close attention to areas where leaks are occurring or where there is a decrease in performance. These are often indications that the O-rings need to be replaced.
If you find any O-rings that need to be replaced, it is important to choose the correct size and type of O-ring for your pressure washer surface cleaner. Consult the manufacturer’s manual or contact customer support to ensure you get the right replacement parts.
To replace the O-rings, gently remove the old ones using a small tool, such as a flathead screwdriver or a pair of needle-nose pliers. Take note of their position and orientation, as this will be important when installing the new O-rings.
Before installing the new O-rings, it is recommended to apply a thin layer of lubricant, such as silicone grease, to ensure smooth installation and proper sealing. This will help extend the lifespan of the O-rings and prevent future leaks.
Once the new O-rings are lubricated, carefully place them in their designated positions, ensuring proper orientation and alignment. Press them firmly into place, making sure they sit snugly without any gaps or misalignment.
After replacing the O-rings, reassemble the housing or cover of the pressure washer surface cleaner, ensuring all components are properly aligned and secured. Once everything is back in place, reconnect the surface cleaner to the power source and conduct a test run to check for any leaks or performance issues.
By inspecting and replacing the O-rings, you can effectively fix common issues with pressure washer surface cleaners and ensure optimal performance and longevity.
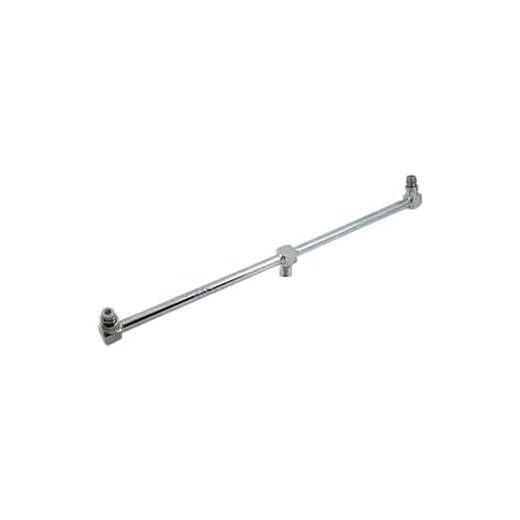
Step 4: Adjusting the Spray Angle
Once you have connected the pressure washer surface cleaner to your pressure washer and turned it on, you may need to adjust the spray angle to achieve the best results.
The spray angle determines the area covered by the surface cleaner. If the spray angle is too narrow, you may not be able to clean a wide enough area with each pass. On the other hand, if the spray angle is too wide, the surface cleaner may not be able to generate enough pressure to clean effectively.
To adjust the spray angle, you will typically have a nozzle or a set of nozzles on the surface cleaner. These nozzles can usually be rotated or tilted to change the angle of the spray.
- Start by positioning the surface cleaner parallel to the surface you want to clean. This will ensure that the spray is evenly distributed across the surface.
- Turn on the pressure washer and let it reach its maximum pressure.
- While the pressure washer is running, begin adjusting the spray angle of the surface cleaner. Test different angles to see which one provides the best cleaning performance.
- Once you have found the optimal spray angle, lock the nozzles in place to maintain the desired angle.
Remember, it may take some trial and error to find the right spray angle for your specific surface cleaner and cleaning job. Don’t be afraid to experiment and make adjustments as needed.
After you have adjusted the spray angle, you are ready to start using your pressure washer surface cleaner to clean a variety of surfaces effectively.
Step 5: Testing and Maintenance Tips
Once you have completed all the necessary repairs and replacements, it’s important to test your pressure washer surface cleaner before using it to ensure that everything is in working order. Here are some testing and maintenance tips to follow:
1. Test the spray nozzles
Start by connecting the surface cleaner to your pressure washer and turning it on. Check each spray nozzle to make sure that it is spraying evenly and without any blockages. If you notice any issues, you may need to clean or replace the nozzles.
2. Inspect the brush or spinner
Take a close look at the brush or spinner of your surface cleaner. Ensure that it is spinning freely and that there are no signs of damage or wear. If there are any issues, consider replacing the brush or spinner to maintain optimal performance.
3. Check for leaks
Inspect all the connections and seals of your pressure washer surface cleaner for any signs of leaks. Tighten any loose connections and replace any damaged or worn seals if necessary. Leaks can affect the efficiency of your surface cleaner and may lead to water damage.
4. Clean the surface cleaner
After each use, it’s important to clean your pressure washer surface cleaner thoroughly. Remove any debris or dirt that may have accumulated on the brush or spinner, as well as in the nozzles. This will help to prevent clogs and maintain the longevity of your equipment.
Remember: Always follow the manufacturer’s instructions for testing and maintenance specific to your pressure washer surface cleaner. Regular maintenance will help to ensure that your equipment remains in good working condition and lasts for a long time.
We hope that this guide has helped you in fixing your pressure washer surface cleaner and provided you with the necessary tips for testing and maintenance. By following these steps, you can keep your surface cleaner in optimal condition and enjoy efficient cleaning for various surfaces.
Questions and answers
What should I do if my pressure washer surface cleaner is not spinning?
If your pressure washer surface cleaner is not spinning, there are a few things you can do to fix it. First, check to make sure that the nozzles and brushes are clean and free of debris. If they are clogged, clean them out and try again. If that doesn’t fix the problem, check the drive belt or shaft for any damage or obstructions. If the belt is worn or broken, it will need to be replaced. If there are any obstructions in the shaft, remove them and try again. If none of these solutions work, it may be a problem with the motor or pump and you may need to contact a professional for repairs.
Why is my pressure washer surface cleaner not making enough pressure?
If your pressure washer surface cleaner is not making enough pressure, there could be a few reasons for this. First, check the water supply and make sure it is connected properly and turned on. If the water supply is fine, check the inlet screen on the pressure washer for any clogs or debris. Clean it out if necessary. If the inlet screen is clean, check the nozzle on the surface cleaner for any obstructions. If it is clogged, clean it out and try again. If none of these solutions work, there may be a problem with the motor or pump, and you may need to contact a professional for repairs.
How do I fix a leaking pressure washer surface cleaner?
If your pressure washer surface cleaner is leaking, there are a few things you can do to fix it. First, check the connections between the surface cleaner and the pressure washer. Make sure they are tight and secure. If they are loose, tighten them up and see if the leaking stops. If that doesn’t fix the problem, check the seals and O-rings on the surface cleaner for any damage or wear. If they are worn or damaged, they will need to be replaced. If none of these solutions work, there may be a larger issue with the surface cleaner and you may need to contact a professional for repairs.
How often should I clean and maintain my pressure washer surface cleaner?
To keep your pressure washer surface cleaner working properly, it is recommended to clean and maintain it regularly. After each use, you should rinse off any dirt or debris from the surface cleaner and allow it to dry before storing it. You should also regularly check the nozzles, brushes, and filters for any clogs or obstructions and clean them out if necessary. In addition, it is important to inspect the seals and O-rings on the surface cleaner for any wear or damage and replace them as needed. By regularly cleaning and maintaining your pressure washer surface cleaner, you can help prolong its lifespan and ensure it continues to work effectively.
Can I fix my pressure washer surface cleaner myself or do I need to hire a professional?
Whether you can fix your pressure washer surface cleaner yourself or need to hire a professional depends on the specific issue and your level of expertise. If the issue is something simple, such as a clogged nozzle or dirty filter, you should be able to fix it yourself with basic cleaning and maintenance. However, if the problem is more complex, such as a damaged motor or pump, you may need to hire a professional for repairs. It is important to assess your own skills and abilities before attempting any repairs on your pressure washer surface cleaner, as improper handling can cause further damage and void any warranties.
Why isn’t my pressure washer surface cleaner spinning?
If your pressure washer surface cleaner is not spinning, there could be a few different reasons for this issue. First, check to make sure that the nozzle in the surface cleaner is not clogged. Clean out any debris or dirt that may be blocking the nozzle. If this does not solve the problem, check to make sure that the spray arms on the surface cleaner are not bent or damaged. If the arms are bent, you may need to replace them. Another possible solution is to make sure that the surface cleaner is properly lubricated. Apply some oil or lubricant to the moving parts of the surface cleaner to see if this helps it spin. If none of these solutions work, it may be necessary to take your surface cleaner to a professional for repair.