
Blog
How To Disassemble Of High Pressure Washer Pump

When it comes to maintaining your high pressure washer, one of the key tasks is disassembling the pump. Whether you need to replace a faulty part or simply clean the pump, knowing how to properly disassemble it is essential. In this article, we will guide you through the step-by-step process of disassembling a high pressure washer pump.
Step 1: Safety First
Before you begin disassembling the pump, it is important to prioritize your safety. Make sure the pressure washer is turned off and unplugged. Wear protective gloves and eyewear to safeguard yourself from any potential harm.
Step 2: Release Pressure
Before disassembling the pump, you need to release the pressure. To do this, locate the pressure relief valve and turn it counterclockwise until the pressure is released. This step is crucial to prevent any accidental spraying or injuries.
Step 3: Remove Outer Casing
Once the pressure is released, you can now start removing the outer casing of the pump. Use a screwdriver or a wrench to remove any screws or bolts that are securing the casing. Carefully lift off the casing and set it aside.
Step 4: Identify and Remove Parts
With the outer casing removed, you can now identify the different parts of the pump. Take note of how they are positioned and connected. Start by removing the inlet and outlet connectors, followed by any other smaller parts such as valves or pistons. Be careful not to damage any of the parts during this process.
Step 5: Clean and Inspect
Once all the parts are removed, it is a good time to clean and inspect them. Use a mild detergent and a brush to clean any debris or dirt off the parts. Inspect each part carefully for any signs of damage or wear. Replace any faulty parts with new ones.
Following these steps will enable you to successfully disassemble your high pressure washer pump. Remember to take your time, stay organized, and exercise caution throughout the process. By properly disassembling the pump, you can effectively maintain and extend the lifespan of your high pressure washer.
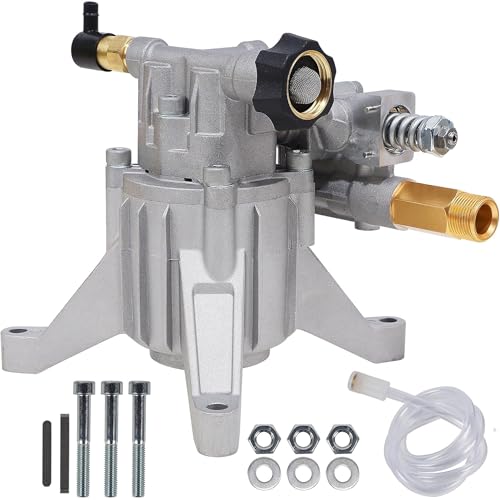
What is a High Pressure Washer Pump?
A high pressure washer pump is a crucial component in a pressure washer machine. It is responsible for creating and maintaining the high pressure water flow necessary for effective cleaning. The pump is typically powered by either an electric motor or a gas engine, depending on the model.
High pressure washer pumps are designed to handle the demands of heavy-duty cleaning tasks. They are built to withstand high pressures and are constructed with durable materials such as brass, stainless steel, or ceramic. The pump creates the necessary pressure by using pistons or plungers that move back and forth to force water through a small opening, which increases its velocity and pressure.
These pumps are commonly used in a variety of applications, including cleaning driveways, sidewalks, vehicles, and even buildings. Their high pressure output enables them to remove dirt, grime, grease, and other stubborn stains effectively. The ability to adjust the pressure allows users to choose the appropriate level for different cleaning tasks, ensuring optimal results without causing damage.
Regular maintenance and occasional disassembly of the high pressure washer pump are essential to keep it operating efficiently. This allows for thorough cleaning of the pump and inspection of its components. By disassembling the pump, you can easily access parts that may require cleaning or replacement, such as valves, seals, and O-rings.
Disassembling a high pressure washer pump may seem daunting, but with the right instructions and tools, it can be a relatively straightforward process. By following proper safety precautions and carefully following the manufacturer’s guidelines, you can safely disassemble the pump, perform maintenance tasks, and ensure optimal performance and longevity.
Preparing for Pump Disassembly
Before starting the disassembly process of your high pressure washer pump, it’s important to properly prepare and gather all the necessary tools. Here are the steps you should follow:
1. Safety First
Safety should always be your top priority when working with any machinery. Make sure to wear protective goggles, gloves, and clothing to avoid any potential injuries. It’s also advisable to work in a well-ventilated area.

2. Gather the Necessary Tools
Having the right tools will make the disassembly process much easier. Here are the common tools you will need:
- Wrenches: both open-end and box-end wrenches in various sizes.
- Screwdrivers: both flathead and Phillips-head screwdrivers.
- Allen wrenches: for removing any hex screws.
- Socket set: including different-sized sockets and a ratchet handle.
- Pliers: both needle-nose and regular pliers.
- Hammer: for tapping and loosening tight parts if necessary.
3. Gather Relevant Information
Before disassembling the pump, it’s helpful to gather any relevant information about your specific high pressure washer model. Check the manufacturer’s manual or website for any disassembly instructions or diagrams that may be available. This will ensure you have a better understanding of the pump’s internal components and how they fit together.
Once you have completed these preparatory steps, you will be ready to proceed with the disassembly of your high pressure washer pump.
Gathering the Necessary Tools
Before you begin disassembling a high pressure washer pump, it is important to gather all the necessary tools to ensure a smooth and efficient process. Here are the tools you will need:
- Socket set
- Allen wrenches
- Screwdrivers (both Phillips and flathead)
- Pliers
- Adjustable wrench
- Hammer
- Seal pick
- Rubber mallet
- Oil syringe
- Grease
- Shop rags or towels
- Safety glasses
Having these tools readily available will ensure that you are prepared for any situation that may arise during the disassembly process. It is important to use the correct tools for each task to avoid damaging the pump or injuring yourself. Additionally, wearing safety glasses is highly recommended to protect your eyes from any debris that may be released during the disassembly process.
Draining the Pump
Before disassembling the high-pressure washer pump, it is important to drain any remaining water or cleaning solution from the system. This will help prevent any accidental leaks or spills during the disassembly process.
To drain the pump, follow these steps:
- Turn off the power to the pressure washer.
- Disconnect the water supply hose from the inlet of the pump.
- Point the pump outlet hose into a bucket or container.
- Turn on the pressure washer for a few seconds to allow the water to be drained from the pump.
- Turn off the pressure washer once all the water has been drained.
By draining the pump, you ensure that there is no pressure or fluid remaining within the system, making it safer and easier to disassemble and work with the individual components.
Step-by-Step Disassembly Process
Disassembling a high pressure washer pump may seem like a daunting task, but with the right tools and a careful approach, it can be done efficiently. Here is a step-by-step guide on how to disassemble a high pressure washer pump:
Step 1: Begin by disconnecting the power source and relieving any pressure in the pump. This can be done by turning off the unit and pulling the trigger to release any remaining pressure.
Step 2: Locate the bolts that secure the pump housing. These bolts may be on the sides or underneath the pump, depending on the model. Use a wrench or socket to remove the bolts and set them aside.
Step 3: Gently separate the pump housing from the motor housing. Be careful not to force it apart, as there may be gaskets or seals that need to be preserved.
Step 4: Once the pump housing is removed, check the pistons and seals for any damage or wear. If necessary, replace any worn-out parts with new ones.
Step 5: Next, remove the valve plates and inspect them for any cracks or signs of wear. Replace any damaged valve plates as needed.
Step 6: Clean the pump housing, pistons, valve plates, and any other components using a mild detergent and a soft brush. Rinse them thoroughly and allow them to air dry before reassembly.
Step 7: Once all the components are clean and dry, begin reassembling the pump in the reverse order of disassembly. Make sure to follow the manufacturer’s instructions and use the appropriate torque settings for the bolts.
Step 8: Finally, reconnect the power source and test the pump to ensure it is working properly. If there are any issues, double-check the assembly and make any necessary adjustments.
By following these steps, you can safely and effectively disassemble and reassemble a high pressure washer pump. Remember to take your time and be cautious throughout the process to avoid any damage or injuries.
Removing the Pump from the Washer
Before starting the disassembly process, make sure to turn off the high pressure washer and unplug it from the power source. This will ensure your safety throughout the procedure.
To remove the pump from the washer, follow the steps below:
Step 1: Drain the Water
Release the pressure in the system by squeezing the trigger gun for a few seconds. Then, detach the water supply hose from the washer’s inlet.
Step 2: Remove the Pump Mounting Bolts
Locate the pump mounting bolts that attach the pump to the frame of the washer. Use a wrench or socket set to remove the bolts and carefully place them aside.
Step 3: Detach the Pump from the Motor
Depending on the washer model, you may have to remove a belt or direct drive coupler connecting the pump to the motor. Follow the manufacturer’s instructions to separate the pump from the motor.
Step 4: Disconnect Hoses and Cables
Identify the hoses and cables connected to the pump. Disconnect them by loosening the hose clamps or removing any fasteners. Take note of their positions and labels to ensure proper reassembly later.
Once all the connections have been removed, carefully lift the pump away from the washer’s frame. Be cautious of any remaining water in the pump or hoses.
With the pump successfully removed, you can now proceed to disassemble the pump to repair or replace any necessary components.
Separating the Pump Components
Before attempting to disassemble a high-pressure washer pump, it is important to turn off the machine and release any built-up pressure. This can be done by turning off the engine or unplugging the power cord, depending on the type of pump.
Once the pressure has been released, locate the pump on the machine. It is usually located near the water inlet or engine. The pump will have a series of bolts or screws that hold the components together.
Using the appropriate tools, carefully remove the bolts or screws to separate the pump components. Take note of the order in which the components are stacked as this will be important during reassembly.
As each component is removed, inspect it for any signs of damage or wear. This includes checking for cracks, leaks, or broken parts. Make sure to clean each component before moving on to the next one.
Some components, such as the pistons, valves, and seals, may require additional steps for removal. Refer to the manufacturer’s instructions or a repair manual for detailed guidance on disassembling these specific components.
Once all the components have been separated, it is recommended to organize them in a logical manner for easy reassembly. This can be done by placing them in a tray or using labeled bags to keep them organized.
Remember to handle each component with care to avoid causing any further damage. Avoid using excessive force when separating the components, as this can lead to breakage or distortion.
By carefully separating the pump components and inspecting them for damage, you can identify any issues and determine the necessary repairs or replacement parts needed.
Question-answer
How often should a high pressure washer pump be disassembled for maintenance?
The frequency of disassembling a high pressure washer pump for maintenance may vary depending on factors such as usage and operating conditions. However, it is generally recommended to perform regular maintenance on the pump every 50 to 100 hours of operation. This may include cleaning, inspecting, and lubricating components, as well as replacing any worn out or damaged parts.
What is a high pressure washer pump?
A high pressure washer pump is a component of a pressure washer that is responsible for generating and maintaining the high pressure water flow. It is usually powered by an electric motor or a gas engine and it pressurizes the water, allowing it to effectively remove dirt and grime from surfaces.
Why would I need to disassemble a high pressure washer pump?
There are several reasons why you might need to disassemble a high pressure washer pump. One possible reason is if the pump is not working properly and needs to be repaired. By disassembling the pump, you can access the internal components and diagnose the problem. Another reason is if you want to clean and maintain the pump to ensure its optimal performance. Disassembling the pump allows you to clean and replace any worn out or damaged parts, thus extending the lifespan of the pump.
Recent Posts
-

How To Connect Soap To Honda Pressure Washer
June 28, 2024 -

A To Z Pressure Washing Scam
June 27, 2024 -

How To Pressure Wash Your Home With A Garden Hose
June 27, 2024 -

Where Can I Buy Honda Pressure Washer Parts
June 25, 2024 -
