
Blog
How To Disassemble Giant Pressure Washer Gun
Introduction: If you own a giant pressure washer gun, it’s important to know how to properly disassemble it for cleaning, maintenance, or repair purposes. Regular disassembly and cleaning of your pressure washer gun can help ensure its optimal performance and prolong its lifespan. In this guide, we will walk you through the steps of disassembling a giant pressure washer gun, providing you with the knowledge and confidence to tackle this task efficiently.
Step 1: Safety Precautions
Before starting, it’s crucial to prioritize your safety. Make sure to disconnect the pressure washer from the power source and relieve any pressure in the system. Wear protective gear such as goggles and gloves to prevent any accidents or injuries during the disassembly process.
Step 2: Removing the Nozzle
The first step in disassembling a giant pressure washer gun is to remove the nozzle. This can usually be done by turning it counterclockwise until it comes off. Use a wrench or an adjustable wrench if necessary, but be cautious not to damage the nozzle threads.


Step 3: Removing the Trigger Handle
Once the nozzle is removed, you can proceed to remove the trigger handle. Unscrew the handle from the gun body by turning it counterclockwise. Some pressure washer guns may have screws or bolts that need to be loosened before the handle can be detached.
Step 4: Disassembling the Gun Body
Now that the nozzle and trigger handle are removed, you can focus on disassembling the gun body. Look for any screws, clips, or retaining rings that might be holding the gun body together. Use the appropriate tools to remove these components and carefully separate the gun body into its individual parts.
Step 5: Cleaning and Maintenance
Once the pressure washer gun is disassembled, you can proceed to clean each part thoroughly. Remove any dirt, debris, or clogs that might affect the gun’s performance. Inspect the parts for any signs of damage or wear and replace them if necessary. Lubricate any moving parts with a suitable lubricant to ensure smooth operation.
Conclusion: Disassembling a giant pressure washer gun may seem intimidating at first, but by following the steps outlined in this guide, you can do it with ease. Regular maintenance and cleaning of your pressure washer gun will not only improve its performance but also extend its lifespan. Remember to always prioritize safety and wear protective gear when working with pressure washers. Now that you have the knowledge and confidence, go ahead and give your pressure washer gun the care it deserves.
Understanding the Pressure Washer Gun
The pressure washer gun is a crucial component of a pressure washer system. It is the tool that allows you to control the flow of water and adjust the pressure to suit your needs. Understanding how the gun works and how to disassemble it will help you in maintaining and repairing your pressure washer effectively.
The pressure washer gun is typically made up of several parts, including the trigger, handle, nozzle, and lance. The trigger is the main control mechanism that activates the flow of water. The handle provides a comfortable grip and houses the necessary components for controlling the pressure. The nozzle is responsible for adjusting the spray pattern and determining the pressure strength. The lance connects the gun to the hose and extends the reach of the gun.
To disassemble the pressure washer gun, start by removing the lance from the gun. This can usually be done by twisting it counterclockwise until it loosens and can be pulled out. Next, locate the screws or bolts that hold the handle together and use the appropriate tool to remove them. Carefully separate the handle into two halves, taking note of any springs or other small components that may be inside.
To access the trigger mechanism, remove the screws or bolts that hold the trigger assembly in place. Once the trigger assembly is free, it can be pulled out, allowing you to clean or replace any damaged parts. Take care not to lose any small springs or pins that may be inside.
When disassembling the pressure washer gun, it is essential to pay attention to the position and orientation of each component. This will make reassembly much easier and ensure that everything functions properly once put back together.
Regular maintenance and cleaning of the pressure washer gun are essential for its longevity and optimal performance. After disassembling the gun, clean each component thoroughly using a mild detergent and warm water. Pay special attention to any areas that may have debris or build-up that can affect the gun’s functionality. Rinse the components well and allow them to dry completely before reassembly.
By understanding the pressure washer gun and knowing how to disassemble and clean it, you can ensure that it remains in good working condition for years to come. Regular maintenance will not only extend its lifespan but also improve the overall efficiency of your pressure washer system.
Tools Needed for Disassembly
When disassembling a giant pressure washer gun, you will need a few essential tools to ensure a smooth and successful process. These tools include:
1. Screwdriver Set
A set of screwdrivers with various sizes and types of heads will be necessary for removing screws and other fasteners. Make sure you have both flathead and Phillips head screwdrivers on hand.
2. Adjustable Wrench
An adjustable wrench will come in handy when it comes to removing nuts and bolts that may be holding the gun together. The adjustable design of the wrench allows you to adapt it to different sizes, making it versatile for a variety of fasteners.
3. Allen Wrench Set
An Allen wrench set, also known as hex keys, will be needed for removing screws and bolts that have hexagonal heads. These wrenches come in a set with different sizes to accommodate various fasteners.
4. Pliers
A pair of pliers will be useful for gripping and turning small parts, as well as holding components steady while you work on them. Look for a set of pliers with different sizes and types, such as slip-joint pliers and needle-nose pliers.
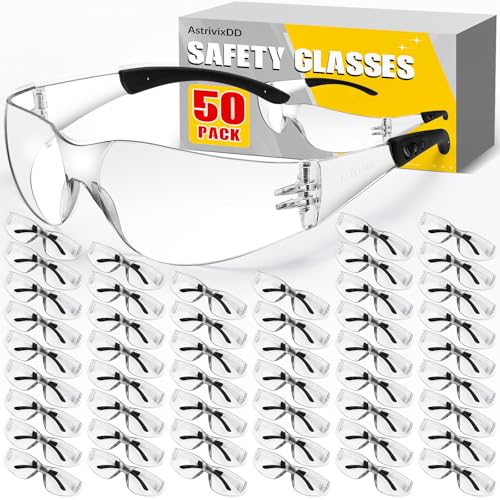
5. Safety Glasses
While not a tool in the traditional sense, safety glasses are essential for protecting your eyes from any debris or small particles that may fly off during disassembly. Always prioritize safety and wear your safety glasses throughout the entire process.
Having these tools readily available will make the disassembly of your giant pressure washer gun much easier and efficient. It’s important to use the right tools for the job to prevent any damage to the gun or injuries to yourself.
Step-by-Step Disassembly Process
Disassembling a giant pressure washer gun may seem intimidating, but with the right tools and careful steps, it can be a straightforward process. Follow these steps to disassemble your pressure washer gun:
- Start by turning off the pressure washer and disconnecting it from the power source.
- Release the pressure from the gun by squeezing the trigger until no water comes out.
- Locate the screws or bolts that hold the gun together and use the appropriate screwdriver or wrench to remove them.
- Once the screws/bolts are removed, carefully separate the gun into its major components, such as the handle, trigger, and nozzle holder.
- Inspect each component for any signs of damage or wear. If necessary, clean or replace any faulty parts.
- If there are any smaller parts or assemblies within the gun, such as springs or valves, make sure to note their position and how they fit together before removing them.
- To remove smaller parts or assemblies, use a pair of pliers or a screwdriver to gently pry or unscrew them.
- Continue disassembling the gun, taking care to keep track of each part and its position.
- Once all the necessary parts have been disassembled, you can clean them thoroughly using water and a mild detergent.
- After cleaning, dry each part thoroughly before reassembling the gun.
- Reassemble the gun by following the steps in reverse order, making sure to align each part correctly.
- Tighten the screws/bolts securely but be cautious not to overtighten them, as this could cause damage.
- Once the gun is fully reassembled, reconnect it to the power source and test it to ensure everything is functioning properly.
By following these step-by-step instructions, you can easily disassemble and reassemble your giant pressure washer gun, ensuring its optimal performance and longevity.
Troubleshooting Common Issues
If you are experiencing any problems with your giant pressure washer gun, there are a few common issues that you can check for and troubleshoot. Here are some steps you can take to identify and resolve these issues:
- Low Pressure: If you are not getting enough pressure from your pressure washer gun, first check the water supply to ensure it is not restricted or turned off. Additionally, check the nozzle on the gun to make sure it is not clogged or damaged. Clean or replace the nozzle if necessary.
- No Pressure: If there is no pressure coming out of the gun, check the wand extension and gun handle for any leaks. Tighten any loose connections or replace any damaged parts. Also, check the inlet filter for any blockages and clean or replace it as needed.
- Leaking Gun: If your pressure washer gun is leaking, check the fittings and connections for any cracks or damages. Tighten any loose fittings and replace any damaged parts. If the gun is still leaking, it may need to be disassembled and inspected for any internal damages or worn-out seals.
- Gun Trigger Sticking: If the gun trigger is sticking or not moving smoothly, check for any dirt or debris trapped inside the trigger mechanism. Clean the trigger mechanism thoroughly and lubricate it with an appropriate lubricant.
- Inconsistent Pressure: If the pressure from your gun is inconsistent, check the wand extension for any blockages or obstructions. Clean the wand extension thoroughly and ensure a smooth flow of water. Also, check the pressure regulator for any damages or malfunctions and adjust it accordingly.
By following these troubleshooting steps, you should be able to identify and resolve common issues with your giant pressure washer gun. If the problem persists or if you are unsure about any disassembly or repair processes, it is recommended to consult the user manual or contact a professional for assistance.
Tips for Proper Reassembly
When reassembling your giant pressure washer gun, it’s important to follow these tips to ensure proper functionality and safety:
- Organize your parts: Before beginning the reassembly process, make sure that you have all the necessary parts and tools laid out in an organized manner. This will help you avoid any confusion or missing pieces during the reassembly.
- Refer to the user manual: If you are unsure about any step of the reassembly process, consult the user manual that came with your pressure washer gun. The manual will provide detailed instructions and diagrams to guide you through the process.
- Clean and lubricate: Before putting the parts back together, make sure they are clean and free from any debris or residue. Additionally, apply a thin layer of lubricant to any moving parts to ensure smooth operation and prevent corrosion.
- Take it one step at a time: Reassembling a pressure washer gun can be complex, so it’s important to take it slow and follow the instructions carefully. Avoid rushing through the process to prevent any errors or damage to the gun.
- Check for proper fit: As you go through each step of the reassembly, make sure that each part fits snugly into place. Test the functionality of the gun as you progress to ensure that everything is working correctly.
- Secure all fasteners: Double-check that all nuts, bolts, and screws are securely fastened. Use the appropriate tools to tighten them but be careful not to overtighten, as this can cause damage.
- Test before use: After completing the reassembly, test the functionality of your giant pressure washer gun before putting it into regular use. This will allow you to identify any potential issues or adjustments that may need to be made.
Following these tips will help ensure that your giant pressure washer gun is properly reassembled and ready for efficient and safe use.
Question-answer
What is a pressure washer gun?
A pressure washer gun is a handheld tool used to control the flow of water in a pressure washer. It is typically connected to the hose and is used to spray water at high pressure to clean various surfaces.
Why would I need to disassemble a pressure washer gun?
There could be several reasons why you would need to disassemble a pressure washer gun. It may be necessary to clean or replace certain parts, fix a malfunctioning gun, or simply to understand how the gun works.
How do I disassemble a giant pressure washer gun?
To disassemble a giant pressure washer gun, you will first need to remove any attachments, such as nozzles or tips. Then, unscrew the handle from the gun body using a screwdriver or wrench. Once the handle is removed, you can access the internal components for further disassembly if necessary.
Are there any safety precautions I should take when disassembling a pressure washer gun?
Yes, there are a few safety precautions you should take when disassembling a pressure washer gun. Make sure the gun is not connected to a power source and that the water supply is turned off. Wear safety gloves and goggles to protect yourself from any potential injury. Also, read the user manual for specific instructions and guidelines.
Can I reassemble a pressure washer gun after disassembling it?
Yes, you can reassemble a pressure washer gun after disassembling it. Simply follow the reverse steps of disassembly, making sure to align and tighten all the components properly. Refer to the user manual for any specific instructions or diagrams that may help with reassembly.