
Blog
How To Clean Your Pressure Washer Cabureator
Having a pressure washer can be a great asset when it comes to cleaning those tough outdoor surfaces. However, like any machine, it requires regular maintenance to ensure its optimal performance. One crucial part that often gets overlooked is the carburetor. The carburetor is responsible for mixing the fuel and air to create the combustion needed to power the pressure washer.
Over time, the carburetor can become clogged with dirt, debris, and old fuel residue, resulting in engine problems such as hard starting, rough idling, and even complete engine failure. Cleaning your pressure washer’s carburetor is a simple yet essential task that can save you money on costly repairs and prolong the life of your machine.
Before you begin, it’s crucial to consult your pressure washer’s manual for specific instructions and safety precautions. Once you have familiarized yourself with the manufacturer’s recommendations, gather the necessary tools: a screwdriver, a can of carburetor cleaner, a rag, and safety glasses. With these in hand, you are ready to start cleaning your pressure washer’s carburetor!
Step-by-Step Guide to Cleaning Your Pressure Washer Carburetor
If your pressure washer is having trouble starting or running smoothly, a dirty carburetor could be the culprit. Over time, residue from fuel and other contaminants can build up in the carburetor and clog the small passageways, preventing proper fuel flow to the engine. Cleaning the carburetor can help restore proper functioning and improve the performance of your pressure washer. Here is a step-by-step guide to help you clean your pressure washer carburetor:
Step 1: Safety First
Before performing any maintenance on your pressure washer, always remember to turn off the engine and disconnect the spark plug wire to prevent accidental starting. Safety goggles and gloves are also recommended to protect your eyes and hands.
Step 2: Locate the Carburetor
The carburetor is usually located on top of the engine, underneath an air filter cover. Consult your pressure washer’s manual to locate the exact position of the carburetor.
Step 3: Remove the Air Filter Cover
Using a screwdriver or socket wrench, remove the screws or bolts that secure the air filter cover to the engine. Carefully remove the cover and set it aside.
Step 4: Remove the Carburetor
Disconnect the linkage and fuel lines attached to the carburetor. Use a socket wrench or pliers to remove the bolts or clips that secure the carburetor to the engine. Gently remove the carburetor and place it on a clean work surface.
Step 5: Disassemble the Carburetor
Carefully disassemble the carburetor, taking note of the order and position of the various components. Use a carburetor cleaner spray to remove any built-up residue from the carburetor’s body, passages, and jets. Use a small brush or toothbrush to scrub away stubborn deposits.
Step 6: Inspect and Clean the Float Bowl
Remove the float bowl from the carburetor body and inspect it for any signs of damage or contamination. Clean the float bowl with carburetor cleaner and a brush, making sure to remove any debris or residue.
Step 7: Reassemble the Carburetor
Once you have thoroughly cleaned all the carburetor components, carefully reassemble them in the correct order and position. Make sure all gaskets and seals are properly installed.
Step 8: Reinstall the Carburetor
Place the carburetor back onto the engine and secure it with the bolts or clips. Reconnect the linkage and fuel lines, making sure they are properly attached.
Step 9: Reinstall the Air Filter Cover
Place the air filter cover back onto the engine and secure it with the screws or bolts. Make sure it is tightly sealed to prevent any debris from entering the carburetor.
Step 10: Test and Adjust
After cleaning the carburetor, start the pressure washer and let it run for a few minutes to ensure smooth operation. If necessary, adjust the carburetor settings according to your pressure washer’s manual.
Step 11: Regular Maintenance
To prevent future carburetor issues, it is recommended to perform regular maintenance on your pressure washer, including cleaning or replacing the air filter, using clean fuel, and checking for any fuel leaks or blockages.
Following these step-by-step instructions, you can effectively clean your pressure washer carburetor and keep your equipment running smoothly.
Preparing for Carburetor Cleaning
Before you begin cleaning the carburetor on your pressure washer, there are a few steps you need to take to ensure the process goes smoothly and safely. By properly preparing for carburetor cleaning, you can avoid damaging your pressure washer and ensure that the cleaning process is effective.
Gather Your Tools
First, gather all the necessary tools and materials for the job. These may include:
- Screwdrivers
- Socket wrenches
- Clean rags or towels
- Carburetor cleaner
- Compressed air
- Wire brush
- Container for soaking parts
Having everything you need in one place will make the cleaning process more efficient.
Review the Manufacturer’s Instructions
Before you start cleaning the carburetor, review the manufacturer’s instructions for your pressure washer. These instructions may provide specific guidelines for carburetor cleaning and maintenance.
Make sure to follow any specific instructions or warnings provided by the manufacturer to avoid damaging your pressure washer or voiding any warranties.
Important: Make sure you have a basic understanding of your pressure washer’s carburetor system and how it functions. If you are unsure, consult the manufacturer’s instructions or seek professional assistance.
Note: It is also a good idea to have a clean and well-ventilated workspace for the cleaning process. This will help prevent any debris or fumes from getting into the carburetor or other sensitive parts of your pressure washer.
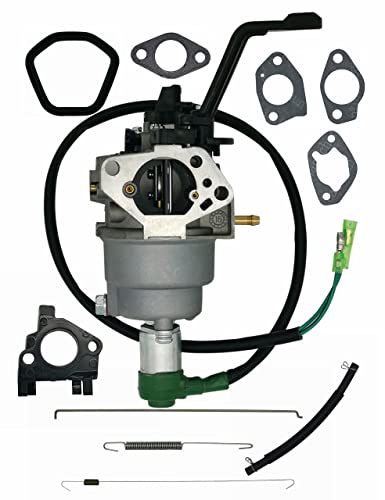
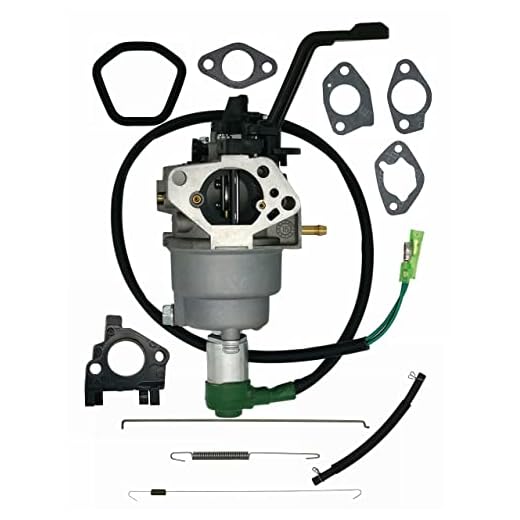
Removing the Carburetor from Your Pressure Washer
Before starting the process of cleaning your pressure washer’s carburetor, it is essential to remove it from the machine. The carburetor is responsible for mixing air and fuel in the correct proportions for combustion. Over time, dirt, debris, and old fuel can clog the carburetor, affecting its performance.
To remove the carburetor, follow these steps:
| Step 1 | Make sure to turn off the pressure washer and disconnect it from any power source. |
| Step 2 | Locate the carburetor on your pressure washer. It is usually attached to the engine and connected to the air filter and the fuel line. |
| Step 3 | Using a wrench or socket set, loosen and remove the screws or bolts that hold the carburetor in place. |
| Step 4 | Gently disconnect the fuel line from the carburetor and the air filter housing. |
| Step 5 | Once all connections are detached, carefully lift the carburetor off the engine. |
It is important to handle the carburetor with care as it is a delicate and intricate component of the pressure washer. If you encounter any difficulties or if there are additional attachments holding the carburetor, refer to your pressure washer’s manual or consult a professional for guidance.
Cleaning the Carburetor
The carburetor is a crucial component of your pressure washer’s engine, as it mixes fuel and air to create the necessary combustible mixture for proper engine performance. Over time, dirt, debris, and old fuel can build up inside the carburetor, obstructing the proper flow of fuel and air. This can lead to poor engine performance, starting problems, and even engine damage. Therefore, it is important to regularly clean the carburetor of your pressure washer.
1. Remove the Carburetor
Before cleaning the carburetor, you will need to detach it from the engine. Start by turning off the pressure washer and disconnecting the spark plug wire to ensure safety. Then, locate the carburetor, which is generally positioned near the air filter and fuel tank. Carefully disconnect the fuel line and loosen the mounting bolts to remove the carburetor from the engine.
2. Disassemble the Carburetor
Once the carburetor is removed, it is essential to disassemble it for thorough cleaning. Carefully remove any external parts, such as the fuel bowl and air filter, and set them aside. Take note of the disassembling sequence to aid in reassembling the carburetor later.
Note: It is recommended to wear protective gloves during this process to prevent contact with harmful chemicals and sharp parts.
3. Clean the Carburetor Components
Using a carburetor cleaner or a mixture of mild detergent and water, thoroughly clean all the components of the carburetor. Pay special attention to small passages, jets, and valves, as these are prone to blockage. Use a small brush, such as a toothbrush, to dislodge any stubborn dirt or debris. Rinse all the components with water and allow them to dry completely before reassembly.
4. Reassemble the Carburetor
Once the cleaned components are completely dry, carefully reassemble the carburetor in the reverse order of disassembly. Make sure to properly align all the parts and tighten the mounting bolts securely. Reattach the fuel line and double-check all the connections before proceeding.
5. Test the Pressure Washer
After reassembling the carburetor, it is important to test the pressure washer to ensure proper functioning. Reconnect the spark plug wire, check the oil level, and fill the fuel tank with fresh fuel. Start the engine and let it warm up for a few minutes. Observe the engine’s performance, ensuring smooth operation and no unusual noises or vibrations.
Regularly cleaning the carburetor of your pressure washer is essential for its optimal performance and longevity. Following these steps will help keep your carburetor free from dirt and debris, ensuring a clean fuel and air mixture for efficient engine operation.
Reassembling and Testing Your Pressure Washer
Once you have cleaned the carburetor of your pressure washer, it’s time to reassemble it and test its performance. Follow these steps to ensure proper reassembly and functioning of your pressure washer:
1. Start by carefully placing the cleaned carburetor back onto the engine. Make sure it aligns properly with the mounting holes.
2. Reconnect any fuel lines or hoses that were disconnected during the cleaning process. Ensure that they are securely attached and properly tightened.
3. If there were any gaskets or seals that were removed, replace them with new ones to ensure a proper seal. This will help prevent any air or fuel leaks.
4. Reinstall any screws or bolts that were removed during the disassembly process. Make sure they are tightened to the manufacturer’s specifications, but do not overtighten them to avoid damaging the carburetor or other components.
5. Double-check all the connections, hoses, and components to ensure that everything is securely in place. Any loose or improperly connected parts can cause performance issues or leaks.
6. Once the carburetor is reassembled, fill the fuel tank with fresh fuel and ensure that the oil level is correct. Follow the manufacturer’s guidelines for the proper type and amount of oil to use.
7. Before starting the pressure washer, turn on the fuel and check for any signs of leaks. If you notice any leaks, immediately turn off the fuel and inspect and reseal the affected area before proceeding.
8. Once you have confirmed that there are no leaks, start the pressure washer and let it run for a few minutes to warm up. Observe its performance and listen for any unusual noises or vibrations. If you notice any issues, turn off the pressure washer and investigate the problem before further use.
By following these steps for reassembling and testing your pressure washer after cleaning the carburetor, you can ensure its optimal performance and prolong its lifespan.
Questions and answers,
Why is it important to clean the pressure washer carburetor?
It is important to clean the pressure washer carburetor regularly because over time, dirt and debris can build up and clog the carburetor, leading to decreased performance and potentially damaging the engine.
What are the signs that indicate a dirty carburetor in a pressure washer?
Some signs that indicate a dirty carburetor in a pressure washer include difficulty starting the engine, rough idle, loss of power, and black smoke coming from the exhaust.
Can I clean the pressure washer carburetor myself?
Yes, you can clean the pressure washer carburetor yourself. It is a relatively simple process that requires a few basic tools and cleaning solutions. However, if you are unsure or uncomfortable doing it yourself, it is recommended to seek professional help.
What tools do I need to clean the pressure washer carburetor?
To clean the pressure washer carburetor, you will need a socket or wrench set, carburetor cleaner, a small brush or toothbrush, compressed air, and a clean cloth or rag.
How often should I clean the pressure washer carburetor?
It is recommended to clean the pressure washer carburetor at least once a year or more frequently if you use your pressure washer frequently or in dusty/dirty conditions. Regular maintenance will help ensure optimal performance and prolong the life of your pressure washer.
Why should I clean my pressure washer carburetor?
Cleaning your pressure washer carburetor is important to maintain proper fuel flow and ensure that your machine runs smoothly. Over time, the carburetor can become clogged with dirt, debris, and old fuel, which can lead to poor performance and potential damage to the engine.
Recent Posts
-

How To Connect Soap To Honda Pressure Washer
June 28, 2024 -

A To Z Pressure Washing Scam
June 27, 2024 -

How To Pressure Wash Your Home With A Garden Hose
June 27, 2024 -

Where Can I Buy Honda Pressure Washer Parts
June 25, 2024 -
