
Blog
How To Change Nozzle On Ryobi Pressure Washer


When using a Ryobi pressure washer, it is important to have the right nozzle for the job. The nozzle on a pressure washer determines the pressure and spray pattern, allowing you to customize your cleaning experience. Whether you need a narrow, high-pressure stream for tough stains or a wide, low-pressure spray for delicate surfaces, knowing how to change the nozzle on your Ryobi pressure washer is essential.
To change the nozzle on your Ryobi pressure washer, follow these simple steps:

- Power off the pressure washer: Before attempting to change the nozzle, make sure the pressure washer is turned off and disconnected from any power source.
- Release pressure: Engage the trigger on the pressure washer wand to release any remaining pressure in the system. This will prevent any accidental spray when changing the nozzle.
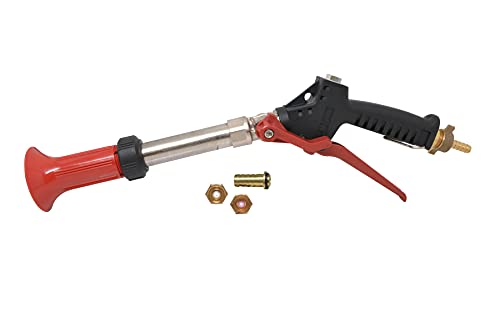
- Remove the nozzle: Hold the wand firmly in one hand and use the other hand to unscrew the nozzle counterclockwise. Some models may require a wrench or pliers for additional leverage.
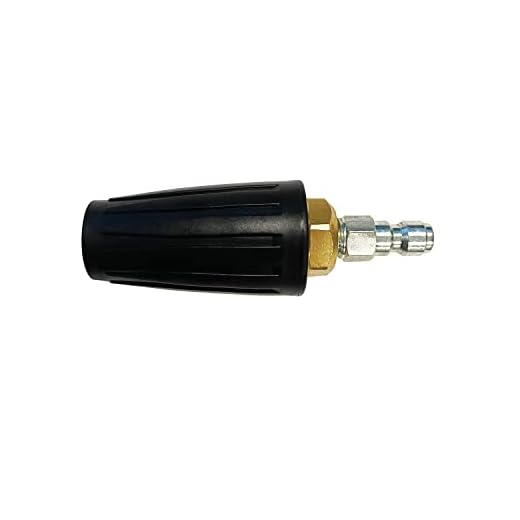
- Choose the new nozzle: Select the appropriate nozzle for your cleaning needs. Ryobi pressure washers typically come with a variety of nozzle options, such as 0-degree, 15-degree, 25-degree, and 40-degree.
- Attach the new nozzle: Align the threads of the new nozzle with the wand and screw it on clockwise. Hand-tighten the nozzle firmly, but avoid over-tightening as this may cause damage.
- Test the new nozzle: Before starting any cleaning, turn on the pressure washer and test the new nozzle to ensure it is working properly. Adjust the spray pattern as needed for your specific cleaning task.
Remember to always follow the manufacturer’s instructions and safety guidelines when using a pressure washer. Proper nozzle selection and maintenance will not only improve your cleaning efficiency but also prolong the lifespan of your Ryobi pressure washer.
Understanding the Importance of Nozzle Replacement
A pressure washer nozzle plays a crucial role in determining the efficiency and effectiveness of your cleaning tasks. Over time, the nozzle can become worn out and damaged, leading to decreased performance and potential issues with your pressure washer. That’s why it’s important to understand the importance of nozzle replacement and to know when it’s time to change it.
One of the main reasons why you should replace your pressure washer nozzle is to maintain the desired level of pressure. Each nozzle is designed with a specific orifice size that determines the flow rate and pressure output. If the nozzle becomes worn or damaged, it can alter the spray pattern and reduce the pressure, resulting in poor cleaning performance. By regularly inspecting and replacing the nozzle, you can ensure consistent and optimal pressure for your cleaning tasks.
Another reason to replace your nozzle is to address any blockages or clogs. Over time, dirt, debris, and other contaminants can accumulate inside the nozzle, leading to reduced flow and pressure. This can result in uneven cleaning or even cause damage to the internal components of your pressure washer. By replacing the nozzle, you can eliminate any blockages and ensure smooth and uninterrupted operation.
In addition, changing the nozzle can help you customize your cleaning experience. Pressure washer nozzles come in different spray angles, such as 0 degrees, 15 degrees, 25 degrees, and 40 degrees. Each angle provides a different level of pressure and coverage, allowing you to choose the most suitable option for various cleaning tasks. By having a range of nozzles and changing them as needed, you can achieve optimal results and tackle different surfaces and materials effectively.
Overall, understanding the importance of nozzle replacement is essential for ensuring the longevity and performance of your pressure washer. Regularly inspecting and replacing the nozzle can help maintain the desired pressure, prevent blockages, and provide a customized cleaning experience. So, don’t underestimate the significance of this simple yet crucial component and make sure to replace your nozzle when needed.
Choosing the Right Nozzle for Your Needs
When it comes to using a Ryobi pressure washer, choosing the right nozzle for the task at hand is essential. The nozzle you select will determine the pressure and spray pattern of the water, allowing you to effectively clean a variety of surfaces. Here are some factors to consider when choosing the right nozzle for your needs:
1. Pressure Level
Each nozzle is designed to deliver a specific pressure level, ranging from low to high. It’s important to match the nozzle’s pressure rating with the surface you want to clean. For example, a lower pressure nozzle would be suitable for delicate surfaces like cars or windows, while a higher pressure nozzle would be more effective for removing tough stains on concrete or brick.
2. Spray Pattern
The spray pattern of the nozzle determines the width of the water stream. Different spray patterns are suitable for different tasks. For instance, a wide fan spray pattern is ideal for large surfaces like decks or patios, as it covers a larger area in less time. On the other hand, a narrow, concentrated spray pattern is perfect for targeted cleaning, such as removing stubborn grease or grime.
Keep in mind that some Ryobi pressure washers come with interchangeable nozzles that provide a variety of spray patterns. This allows you to switch between patterns depending on the task at hand.
Lastly, it’s essential to always follow the manufacturer’s instructions and guidelines when using different nozzles with your Ryobi pressure washer. This will ensure your safety and the proper functioning of the equipment.
In conclusion, choosing the right nozzle for your Ryobi pressure washer is crucial for achieving optimal cleaning results. Consider the pressure level and spray pattern that best suit your needs, and always follow the instructions provided. With the right nozzle in hand, you’ll be able to tackle any cleaning task with ease and efficiency.
Step-by-Step Guide
Changing the nozzle on your Ryobi pressure washer is a simple process that can be done in a few easy steps. Follow this step-by-step guide to replace the nozzle and get your pressure washer back up and running efficiently.
Step 1: Turn off the pressure washer and disconnect it from the power source. This will ensure your safety while working on the machine.
Step 2: Locate the nozzle on the end of the spray wand. The nozzle is held in place by a threaded connection.
Step 3: Using a wrench or pliers, carefully loosen and remove the old nozzle by turning it counterclockwise. Be cautious not to damage the threads or the spray gun.
Step 4: Once the old nozzle is removed, inspect it for any signs of damage or clogging. If necessary, clean the nozzle or replace it with a new one.
Step 5: Take the new nozzle and place it onto the end of the spray wand. Make sure the nozzle is aligned with the threads and tighten it clockwise using a wrench or pliers.
Step 6: Ensure the nozzle is securely attached by gently tugging on it. It should not come loose or wobble.
Step 7: Reconnect the pressure washer to a power source and turn it on. Test the new nozzle by spraying water to check for proper function.
Step 8: If everything is working correctly, you have successfully changed the nozzle on your Ryobi pressure washer. Congratulations!
Note: It is important to select the appropriate nozzle size for your desired pressure and application. Refer to the manufacturer’s guidelines or the nozzle’s packaging for more information.
Gather the Necessary Tools and Equipment
To change the nozzle on your Ryobi pressure washer, you will need a few tools and equipment. Gathering these items before you start the process will ensure a smooth and efficient nozzle change. Here is a list of the necessary tools and equipment you will need:
- Replacement nozzle
- Adjustable wrench
- Pressure washer nozzle tip set
- Gloves
The replacement nozzle should be compatible with your Ryobi pressure washer model. Check the user manual or label on your pressure washer for the appropriate nozzle size and type. An adjustable wrench is required to loosen and tighten the nozzle, ensuring a secure fit. Investing in a pressure washer nozzle tip set provides you with a variety of nozzle options for different cleaning tasks.
Lastly, it is important to wear gloves during the nozzle change process to protect your hands from any potential injuries or accidents. Pressure washers can generate high pressure and can be dangerous if not used correctly. Wearing gloves will provide an extra layer of safety while handling the equipment.
Prepare the Pressure Washer
Before changing the nozzle on your Ryobi pressure washer, it’s important to properly prepare the machine. Follow these steps to ensure a safe and effective nozzle replacement:
1. Power off the Pressure Washer
The first step is to turn off the pressure washer and unplug it from the power source. This will prevent any accidental starting or electrical shock while working on the nozzle.
2. Release Pressure
Next, you’ll want to release any built-up pressure in the system. Start by squeezing the trigger on the spray gun to relieve pressure. You may hear a hissing sound as the pressure is released. Once the pressure is fully released, you can proceed to the next step.
3. Disconnect the Spray Gun
To access the nozzle, you’ll need to disconnect the spray gun from the pressure washer. This is usually done by simply twisting the spray gun counterclockwise until it detaches from the hose. Set the spray gun aside in a safe place.
4. Remove the Nozzle
Now you can remove the existing nozzle from the spray wand. Depending on the model of your Ryobi pressure washer, the nozzle may either screw off or pull off. Refer to your owner’s manual for specific instructions on how to remove the nozzle for your particular model.
Note: It’s always a good idea to wear safety gloves and goggles when handling the nozzle or any other parts of the pressure washer.

With the nozzle removed, you’re now ready to install a new one or clean the existing nozzle. Follow the manufacturer’s instructions for installing or cleaning the nozzle, and then reassemble the spray gun and pressure washer. Your Ryobi pressure washer is now prepared for its next cleaning task!
Remove the Old Nozzle
Before you begin removing the old nozzle on your Ryobi pressure washer, it’s important to make sure the machine is turned off and the pressure is released. This will ensure your safety during the process.
Once you have taken the necessary precautions, follow these steps to remove the old nozzle:
Step 1: Locate the Nozzle
The nozzle is typically located at the end of the wand or lance, depending on the model of your Ryobi pressure washer. It is where the water comes out and determines the spray pattern and pressure.
Step 2: Unscrew the Nozzle
Using a pair of pliers or an adjustable wrench, carefully unscrew the old nozzle in a counterclockwise direction. Be cautious not to damage the threads or the nozzle itself during this process.
Note: If the nozzle is difficult to unscrew, you may need to use some lubricant, such as WD-40, to loosen it.
Step 3: Inspect the Nozzle
After removing the old nozzle, take a moment to inspect it for any signs of damage or clogging. If the nozzle is cracked, worn out, or clogged with debris, it will need to be replaced.
Pro Tip: It’s a good idea to clean your nozzles regularly to prevent any blockages and maintain optimal performance.
Now that you have successfully removed the old nozzle, you are ready to install the new one. Refer to the manufacturer’s instructions or continue reading our guide on how to change the nozzle on your Ryobi pressure washer.
Questions and answers
How often should I change the nozzle on my Ryobi pressure washer?
It is recommended to regularly inspect the nozzle for any signs of wear or damage. If you notice any problems, such as a worn-out tip or a damaged spray pattern, it is a good idea to replace the nozzle. Additionally, if you are experiencing low pressure or poor cleaning performance, changing the nozzle may help improve the situation.
What tools do I need to change the nozzle on my Ryobi pressure washer?
You will typically need a wrench or pliers to remove the old nozzle and install the new one. Different pressure washer models may require different tools, so it is best to consult the user manual for your specific Ryobi pressure washer to determine the tools needed.
How do I know which size nozzle to use for my Ryobi pressure washer?
The size of the nozzle depends on the specific cleaning task and the pressure washer model. Usually, pressure washer nozzles are color-coded, with each color representing a different spray angle and intensity. You can refer to the user manual or contact Ryobi customer support for guidance on selecting the appropriate nozzle size for your cleaning needs.
Can I use a generic nozzle on my Ryobi pressure washer?
While it is possible to use a generic nozzle on your Ryobi pressure washer, it is generally recommended to use genuine Ryobi replacement parts. Generic nozzles may not be compatible with your pressure washer model, and they may not provide the same level of performance and durability as genuine Ryobi nozzles.
Is changing the nozzle on a Ryobi pressure washer a difficult task?
Changing the nozzle on a Ryobi pressure washer is usually a simple task that can be done by following a few basic steps. However, it is important to follow the instructions in the user manual and take proper safety precautions, such as shutting off the pressure washer and releasing any built-up pressure before changing the nozzle. If you are unsure or uncomfortable with the process, it is recommended to seek assistance from a professional or contact Ryobi customer support for guidance.
Recent Posts
-

How To Connect Soap To Honda Pressure Washer
June 28, 2024 -

A To Z Pressure Washing Scam
June 27, 2024 -

How To Pressure Wash Your Home With A Garden Hose
June 27, 2024 -

Where Can I Buy Honda Pressure Washer Parts
June 25, 2024 -
