
Blog
How To Assemble A Parkside Pressure Washer


Assembling a Parkside pressure washer may seem like a daunting task, but with the right instructions, it can be a straightforward process. Whether you’re an experienced DIY enthusiast or a novice, this guide will provide step-by-step instructions to help you assemble a Parkside pressure washer with ease.
Step 1: Gather all the necessary materials and tools needed for assembly. These typically include the pressure washer unit, hoses, nozzles, spray gun, and user manual. Make sure you have a clear workspace and enough room to maneuver around the unit.
Step 2: Unpack the pressure washer unit and carefully remove all packaging materials. It’s important to handle the unit with care to avoid any damage during the assembly process.
Step 3: Refer to the user manual to locate the specific parts and components of the pressure washer. Familiarize yourself with the different parts, such as the pump, motor, hose connectors, and spray gun. Understanding the various components will make the assembly process much easier.
Step 4: Begin assembling the pressure washer by attaching the hoses to the appropriate connectors. Make sure to tighten the hose connectors securely to prevent any leaks or damage during operation. It’s essential to follow the user manual’s instructions carefully to ensure proper installation.

Step 5: Connect the spray gun to the pressure washer unit using the provided connectors. Ensure that the connection is secure and tight to avoid any leaks during operation. Double-check the user manual to confirm the correct attachment method for your specific model.
Step 6: Once all the hoses and connectors are securely attached, it’s time to add water to the system. Connect the pressure washer to a water source, such as a garden hose, and check for any leaks. It’s also important to purge any air from the system by running the water through the unit for a few minutes.
Step 7: Familiarize yourself with the different spray nozzles and choose the appropriate one for your cleaning needs. Attach the selected nozzle to the spray gun and ensure a tight connection. This will allow you to adjust the spray pattern and pressure according to your specific requirements.
By following these step-by-step instructions, you’ll be able to assemble your Parkside pressure washer efficiently. Remember to always consult the user manual for specific instructions and guidelines for your model. Now you can confidently assemble your pressure washer and start tackling all your outdoor cleaning tasks with ease!
Preparing for Assembly: Checking the Contents
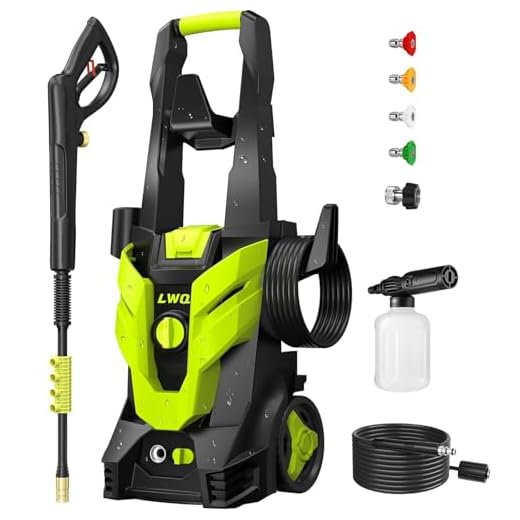
Before you begin assembling your Parkside pressure washer, it is important to check that all the necessary components are present. This will ensure that you have everything you need to complete the assembly process smoothly. Here is a checklist of items to verify:
- High-pressure hose
- Trigger gun with safety lock
- Quick-release connector
- Extension lance
- Nozzle set (including different spray patterns)
- Water inlet connector
- Power cord
- Instruction manual
Make sure to carefully inspect each item on the list to ensure there are no damages or missing parts. If you find any issues, contact the manufacturer for assistance. Additionally, take a look at the instruction manual and familiarize yourself with the different components and their functions. This will make the assembly process much easier.
Once you have verified that all the components are present and in good condition, you can proceed with the assembly process. Following the instructions provided in the manual, you will be able to assemble your Parkside pressure washer and get ready to tackle various cleaning tasks with ease.
Unboxing the Parkside Pressure Washer
When you receive your Parkside pressure washer, you might be excited to put it to use immediately. However, before you can start cleaning, you need to unbox and assemble the pressure washer properly. Follow these steps to ensure a smooth unboxing process:
Step 1: Open the package
Using a sharp object, carefully cut through the packaging tape to open the box. Be cautious not to damage the contents inside.
Step 2: Inspect the contents
Once the box is open, inspect the contents to ensure that everything is present and undamaged. The main components you should find include the pressure washer unit, the hose, the spray gun, a vario lance, and a dirt blaster lance. Additionally, check for any accessories or attachments that may come with your specific model.
Step 3: Read the manual
Before proceeding with the assembly, it is crucial to read the instruction manual provided by Parkside. This manual will guide you through the proper assembly process, important safety precautions, and provide you with essential information for operating the pressure washer effectively and safely.
Step 4: Assemble the pressure washer
Follow the instructions in the manual to assemble the pressure washer unit. Typically, this involves connecting the hose to the unit, attaching the spray gun, and fitting the desired lance onto the spray gun. Ensure that all connections are secure and tightened properly.
Step 5: Connect to a water source
Move the pressure washer near a water source or faucet, such as a garden hose tap. Connect the provided hose to the pressure washer unit and the water source. Ensure that the connection is tight and free from any leaks.
Step 6: Prepare for operation
Before using the pressure washer, make sure the electrical cord is connected to a power source and is in good condition. Check that the power switch is off. Also, ensure that the water source is turned on and delivering water to the pressure washer.
Note: For more detailed instructions and safety guidelines, refer to the instruction manual provided by Parkside.
Now that you have successfully unboxed and assembled your Parkside pressure washer, you are ready to start cleaning. Follow the user manual’s instructions for operating the unit and enjoy the benefits of a clean outdoor space!
Gathering the Tools and Materials
Before assembling your Parkside pressure washer, it is important to gather all the necessary tools and materials. This will ensure a smooth and efficient assembly process.
Here is a list of tools and materials that you will need:
- Pressure washer components (including pump, motor, hose, and trigger gun)
- Screwdriver
- Wrench set
- Socket set
- Teflon tape
- Safety goggles
- Gloves
- Owner’s manual
Having these tools and materials prepared in advance will save you time and frustration during the assembly process. Make sure to read through the owner’s manual thoroughly before starting the assembly to familiarize yourself with the individual components and their proper installation.
What You’ll Need Before You Start
Before you begin assembling your Parkside pressure washer, make sure you have all the necessary tools and equipment. Here’s a list of what you’ll need:
1. Parkside Pressure Washer Kit
You’ll obviously need the Parkside pressure washer itself. Make sure you have all the components that came with it, including the main unit, the hoses, the trigger gun, and the nozzles.
2. Water Source
In order to use your pressure washer, you’ll need a water source. This can be an outdoor faucet or a water tank. Make sure the water source is easily accessible and has a sufficient water supply.
3. Electrical Outlet
The Parkside pressure washer is powered by electricity, so you’ll need an electrical outlet nearby. Make sure the outlet is compatible with the pressure washer’s plug and has a grounded connection.
4. Safety Gear
Working with a pressure washer can be dangerous, so it’s important to have the right safety gear. Make sure you have safety goggles to protect your eyes, gloves to protect your hands, and sturdy footwear to protect your feet.
Once you have gathered all the necessary tools and equipment, you’ll be ready to start assembling your Parkside pressure washer. Keep in mind that it’s always a good idea to read the instruction manual provided by the manufacturer to ensure you assemble the pressure washer correctly.
Step-by-Step Assembly Instructions
Assembling your Parkside pressure washer is a straightforward process that can be completed in just a few simple steps. Follow the instructions below to assemble your pressure washer:
Step 1: Unboxing
Start by carefully unboxing your Parkside pressure washer and laying out all the components. Make sure you have all the necessary parts before proceeding.
Step 2: Handle Assembly
Attach the handle to the main unit by aligning the holes on the handle with the corresponding holes on the main unit. Insert the bolts provided and tighten them using the included wrench. Make sure the handle is securely fastened to the main unit.
Step 3: Hose Connection
Connect one end of the high-pressure hose to the water outlet on the main unit. Twist it clockwise until it is securely attached. Connect the other end of the hose to the spray gun by twisting it clockwise as well.
Step 4: Nozzle Attachment
Select the appropriate nozzle for your cleaning task. Insert the nozzle into the spray gun and twist it clockwise until it locks into place. Make sure the nozzle is securely attached.
Step 5: Water Inlet
Locate the water inlet on the main unit and connect the garden hose to it. Twist it clockwise until it is securely attached.
Step 6: Electrical Connection
If your pressure washer is electric-powered, place the plug into a nearby electrical outlet. If it is gas-powered, ensure there is enough fuel in the tank and follow the instructions to start the engine.
Step 7: Testing
With all the connections made, turn on the pressure washer and check for any leaks or abnormal sounds. Test the functionality of the spray gun and nozzle by spraying water onto a designated area.
Once you have completed these steps, your Parkside pressure washer is assembled and ready to use. Refer to the user manual for further instructions on operating and maintaining your pressure washer.
Putting together the Parkside Pressure Washer
Assembling a Parkside Pressure Washer is a straightforward process that can be completed quickly and easily. Follow the steps below to put together your pressure washer:

| Step 1: Unpack the box | Start by opening the box and removing all the components included with the pressure washer. Check the contents against the supplied list to ensure everything is included. |
| Step 2: Attach the handle | Locate the handle assembly and attach it to the main body of the pressure washer. Use the provided screws or fasteners to secure the handle in place. |
| Step 3: Connect the hose | Take the high-pressure hose and connect one end to the outlet on the pressure washer body. Make sure it is securely fastened and tightened to prevent any leaks. |
| Step 4: Install the lance | Insert the lance into the lance holder on the side of the pressure washer. Ensure that it is inserted all the way and securely locked in place. |
| Step 5: Prepare the water supply | Connect the water inlet on the pressure washer to a hose or faucet. Ensure that the water supply is turned on and the connection is tight to prevent any leaks. |
| Step 6: Check for proper setup | Double-check all the connections and ensure that everything is properly secured and tightened. This will help prevent any issues during use. |
Once you have completed these steps, your Parkside Pressure Washer should be fully assembled and ready to use. Consult the user manual for specific operating instructions and safety guidelines before using the pressure washer.
Questions and answers,
What is a Parkside pressure washer?
A Parkside pressure washer is a machine used for cleaning various surfaces by spraying high-pressure water.
What are the components of a Parkside pressure washer?
A Parkside pressure washer usually consists of a motor, a water pump, a high-pressure hose, a spray gun, and various nozzles.
Can I use a Parkside pressure washer without assembling it?
No, you cannot use a Parkside pressure washer without assembling it first. Proper assembly is necessary to ensure the machine functions correctly and safely.
What are the steps to assemble a Parkside pressure washer?
Assembling a Parkside pressure washer involves several steps. Firstly, unpack all the parts and read the instruction manual carefully. Next, attach the handle to the main body of the pressure washer using the screws provided. Then, connect the high-pressure hose to the spray gun and the other end to the pressure washer. After that, attach the lance or nozzle to the spray gun. Finally, insert the detergent bottle if needed and connect the pressure washer to a power source.
Do I need any additional tools to assemble a Parkside pressure washer?
No, you do not need any additional tools to assemble a Parkside pressure washer. The pressure washer usually comes with all the necessary parts and screws for assembly. However, it is always a good idea to keep a set of basic tools like screwdrivers and wrenches handy in case you need to make any adjustments during the assembly process.
Recent Posts
-

How To Connect Soap To Honda Pressure Washer
June 28, 2024 -

A To Z Pressure Washing Scam
June 27, 2024 -

How To Pressure Wash Your Home With A Garden Hose
June 27, 2024 -

Where Can I Buy Honda Pressure Washer Parts
June 25, 2024 -
