
Blog
How To Adjust Psi Simpson Pressure Washer


If you own a Simpson pressure washer, you know how powerful and efficient these machines can be. However, sometimes you may need to adjust the PSI (pounds per square inch) of the pressure washer to safely and effectively clean various surfaces. Adjusting the PSI on a Simpson pressure washer is a straightforward process that can be done in just a few simple steps.
Step 1: Before adjusting the PSI, it is important to understand the recommended PSI for different cleaning tasks. High PSI is suitable for tough cleaning jobs like concrete or brick surfaces, while lower PSI is better for more delicate tasks like washing cars or windows. Refer to the owner’s manual or manufacturer’s guidelines for the recommended PSI settings for different surfaces.
Step 2: Start by turning off the pressure washer and relieving the pressure in the system by squeezing the trigger on the spray gun until no water or pressure is coming out. This is important for safety reasons, as it prevents accidental spraying or damage when adjusting the PSI.
Step 3: Locate the pressure adjustment knob or dial on your Simpson pressure washer. This knob is usually located near the engine or pump and is labeled with PSI markings. To increase the PSI, turn the knob clockwise; to decrease the PSI, turn the knob counterclockwise. Make small adjustments and test the pressure washer after each adjustment to ensure you are achieving the desired PSI level.
By following these simple steps, you can easily adjust the PSI on your Simpson pressure washer to suit your cleaning needs. Remember to always check the manufacturer’s guidelines and use the appropriate PSI for each cleaning task to ensure efficient and safe operation of your pressure washer.
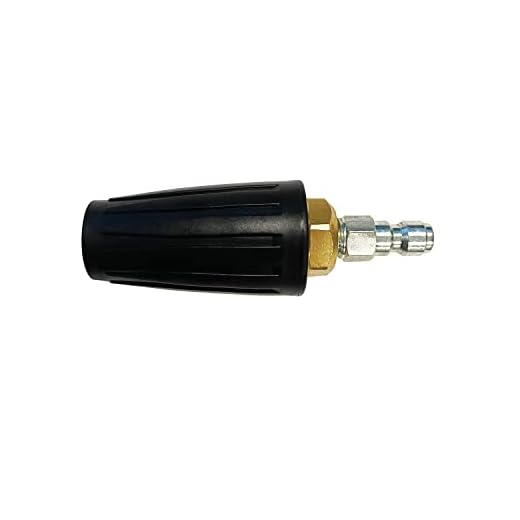
Adjusting the PSI on a Simpson Pressure Washer: A Step-by-Step Guide
If you own a Simpson pressure washer and find that the water pressure is either too high or too low for your cleaning needs, you may need to adjust the PSI (pounds per square inch). Adjusting the PSI on a Simpson pressure washer is a straightforward process that can be done in just a few simple steps. This step-by-step guide will walk you through the process to ensure you get the desired water pressure.
Step 1: Prepare the Pressure Washer
Before adjusting the PSI, make sure your Simpson pressure washer is properly set up and ready for use. Ensure that the water supply is connected, the detergent tank is filled if needed, and the hose and trigger gun are attached securely.
Step 2: Locate the Unloader Valve
To adjust the PSI, you will need to locate the unloader valve on your Simpson pressure washer. The unloader valve is typically located on the pump or near the pressure adjustment knob.
Step 3: Turn Off the Pressure Washer
Before making any adjustments, make sure the pressure washer is turned off and the engine is not running. This will prevent any accidents or injuries while adjusting the PSI.
Step 4: Adjust the PSI
- Using a wrench or pliers, gently turn the pressure adjustment knob counterclockwise to decrease the PSI or clockwise to increase the PSI. The pressure adjustment knob is usually labeled with a plus (+) and minus (-) sign, indicating the direction to turn for adjusting the PSI.
- Start with small adjustments and test the water pressure after each adjustment to ensure you achieve the desired PSI.
- Keep in mind that increasing the PSI too much can damage surfaces, so it is crucial to find the right balance for your specific cleaning task.
Step 5: Test the Water Pressure
Once you have made the necessary adjustments, turn on the pressure washer and test the water pressure. Use the trigger gun to spray water onto a surface and observe the pressure. If the pressure is too high or too low, you may need to make further adjustments to the PSI.
By following these simple steps, you can easily adjust the PSI on your Simpson pressure washer to ensure optimal water pressure for your cleaning needs. Remember to always exercise caution when making adjustments and follow the manufacturer’s instructions for your specific pressure washer model.
Understanding the Importance of PSI Adjustment
The PSI (pounds per square inch) setting on your Simpson pressure washer plays a crucial role in determining the cleaning power and effectiveness of the machine. Properly adjusting the PSI is essential for achieving the desired results for different cleaning tasks.
Optimal Cleaning Performance:
Adjusting the PSI allows you to tailor the pressure output of your pressure washer to match the specific cleaning job at hand. The right PSI ensures optimal cleaning performance by providing the right amount of pressure to effectively remove dirt, grime, and other stubborn stains from various surfaces.
Safety Considerations:
Using a pressure washer with too high of a PSI setting can pose safety risks, such as damaging delicate surfaces, stripping paint, or causing injury due to excessive pressure. On the other hand, using a pressure washer with insufficient PSI may not deliver enough pressure to properly clean the intended surface.
Types of Adjustments:
Depending on the model of your Simpson pressure washer, PSI adjustments can be made through either a pressure regulator valve or by selecting different nozzle tips. The pressure regulator valve allows you to manually adjust the PSI output, while different nozzle tips provide preset PSI levels for specific cleaning tasks.
Factors to Consider:
When determining the PSI adjustment for a particular cleaning job, several factors should be considered, including the type of surface being cleaned, the level of dirt or grime buildup, and the distance between the pressure washer and the surface. The right PSI can help you achieve optimal cleaning results while ensuring the safety of both the surface and the operator.
Experimentation and Observation:
It is recommended to start with a lower PSI setting and gradually increase it if necessary. This allows you to observe the cleaning performance and adjust accordingly, preventing any potential surface damage or injury. Testing the pressure washer on a small, inconspicuous area before proceeding with the entire cleaning task is always a good practice.
Conclusion:
Understanding the importance of PSI adjustment is key to maximizing the cleaning power of your Simpson pressure washer. Properly adjusting the PSI ensures both effective cleaning results and safety precautions, allowing you to tackle a wide range of cleaning tasks with confidence.
Step 1: Checking the Current PSI Setting
Before adjusting the PSI on your Simpson pressure washer, it’s important to check the current PSI setting. This will give you a baseline to work with and ensure that you’re making the necessary adjustments.
To check the current PSI setting, locate the pressure gauge on your pressure washer. The pressure gauge is usually located near the pump or on the control panel.
Once you’ve located the pressure gauge, take a close look at the numbers on the gauge. The PSI setting is typically represented by a needle pointing to a number on a scale. This number indicates the current PSI output of your pressure washer.
Take note of the current PSI setting and compare it to the desired PSI for your specific cleaning task. If the current PSI is already at the desired level, there may be no need for adjustment. However, if the current PSI is too high or too low, it’s time to make some changes.
Common PSI Settings for Different Cleaning Tasks
It’s important to know the recommended PSI settings for different cleaning tasks to ensure that you’re getting the best results. Here are some common PSI settings for various cleaning tasks:
- Household Cleaning: 1500-2000 PSI
- Car Washing: 1200-1500 PSI
- Deck Washing: 1500-2500 PSI
- Concrete Cleaning: 2500-4000 PSI
Keep these PSI settings in mind as you check the current PSI setting on your pressure washer. If the current setting doesn’t match your desired PSI for the specific cleaning task, proceed to the next steps for adjustment.
Step 2: Adjusting the PSI on the Pressure Washer
Once you have familiarized yourself with the different components of your Simpson pressure washer and have ensured that it is properly connected to a power source, you can proceed to adjust the PSI (pounds per square inch) to suit your specific cleaning needs.
Determine the PSI Requirement
Before making any adjustments, it is important to know the PSI requirement for the task at hand. This information can usually be found in the user manual or on the cleaning product’s packaging. Different cleaning tasks may require different levels of pressure, so it is crucial to adjust the PSI accordingly to avoid damaging surfaces.
Using the Pressure Regulator
Most Simpson pressure washers are equipped with a pressure regulator, which allows you to adjust the PSI output. Locate the pressure regulator on your pressure washer –it is typically a dial or knob–and turn it clockwise to increase the pressure or counterclockwise to decrease it.
It is important to make gradual adjustments to avoid sudden changes in pressure, as this can lead to damage or injuries. Start by setting the pressure regulator to the lowest PSI level, then gradually increase it until you reach the desired pressure.
Be aware that the maximum PSI limit of your pressure washer should not be exceeded, as this can cause the unit to malfunction or become unsafe to operate.
Take note that adjusting the PSI may also affect the flow rate of the pressure washer, so it is recommended to find a balance between pressure and flow to achieve optimal cleaning results.
Once you have made the necessary adjustments to the PSI, you can now proceed with using your pressure washer for your cleaning tasks. Remember to always follow safety precautions and guidelines provided by the manufacturer to ensure a safe and effective operation.
Questions and answers,
What is PSI and why is it important to adjust it on a Simpson pressure washer?
PSI stands for pounds per square inch, and it measures the pressure or force of the water coming out of the pressure washer. It is important to adjust the PSI on a Simpson pressure washer because different cleaning tasks require different levels of pressure. Adjusting the PSI allows you to customize the pressure to suit the specific cleaning job, ensuring effective and efficient cleaning without causing any damage.
How do I adjust the PSI on my Simpson pressure washer?
To adjust the PSI on your Simpson pressure washer, start by turning off the machine and disconnecting the spray gun from the wand. Locate the pressure adjustment knob, which is typically located on the pressure washer’s pump. Turn the knob clockwise to increase the pressure or counterclockwise to decrease it. Start with a lower setting and gradually increase the pressure until you achieve the desired cleaning power.
What PSI should I use for cleaning my car with a Simpson pressure washer?
For cleaning a car with a Simpson pressure washer, it is recommended to use a PSI of around 1200-1500. Start with a lower pressure setting and gradually increase it if needed. Be careful not to use too high of a pressure, as it can damage the paint or cause other damage to the car’s exterior surfaces.
What PSI should I use for cleaning my deck with a Simpson pressure washer?
The PSI required for cleaning a deck with a Simpson pressure washer depends on the type of wood and the level of dirt or grime. As a general guideline, you can start with a PSI of around 1500-2000 for most wooden decks. However, it is important to test the pressure on a small and inconspicuous area first to avoid any potential damage. If the pressure is too high and starts to strip away the wood’s surface, reduce the PSI or increase the distance between the pressure washer wand and the deck.
Is it possible to adjust the PSI on a Simpson pressure washer without a pressure adjustment knob?
In some cases, Simpson pressure washers may not have a pressure adjustment knob. If that’s the case, you can still adjust the pressure by using a different nozzle or spray tip. Different nozzles have different spray angles and pressure ratings, which can affect the overall PSI. Experiment with different nozzles to find the one that provides the desired pressure for your cleaning task. However, keep in mind that not all models may have interchangeable nozzles, so it’s important to consult your pressure washer’s manual or manufacturer for specific guidance.
What is a Simpson pressure washer?
A Simpson pressure washer is a type of high-pressure cleaning equipment that is used to remove dirt, grime, and other contaminants from various surfaces. It uses a high-pressure stream of water to powerfully clean different surfaces.
Recent Posts
-

How To Connect Soap To Honda Pressure Washer
June 28, 2024 -

A To Z Pressure Washing Scam
June 27, 2024 -

How To Pressure Wash Your Home With A Garden Hose
June 27, 2024 -

Where Can I Buy Honda Pressure Washer Parts
June 25, 2024 -
