
Blog
How To Add Hoses To Simipson Premium Pressure Washer


One of the most important aspects of using a pressure washer is having the right hoses. The hoses are what connect the pressure washer to the water source and the spray gun, allowing for the efficient and effective cleaning of various surfaces. If you have a Simpson Premium Pressure Washer and are wondering how to add hoses to it, you’ve come to the right place.
Step 1: Choosing the Right Hoses
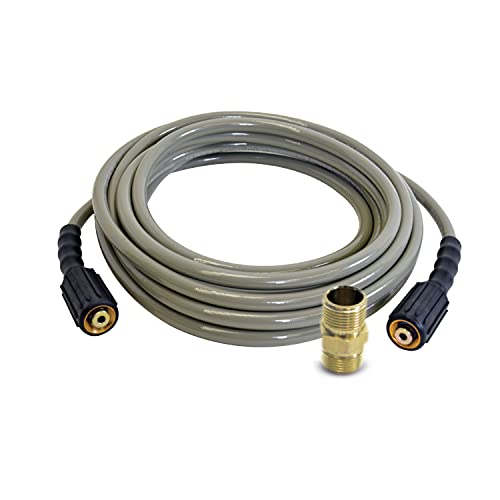
Before adding hoses to your Simpson Premium Pressure Washer, it’s important to choose the right ones. Look for hoses that are compatible with your pressure washer’s water inlet and spray gun. Consider factors such as the length and thickness of the hoses, as well as their material and durability. Opt for high-quality hoses that can withstand high pressure and are resistant to kinks and leaks.
Step 2: Preparing the Pressure Washer
Once you have the right hoses, it’s time to prepare your Simpson Premium Pressure Washer for hose installation. Start by turning off the power and disconnecting the pressure washer from the power source. Make sure the pressure washer is cool and not in use before proceeding further. This ensures your safety and prevents any potential damage to the pressure washer.
Step 3: Attaching the Hoses

To add hoses to your Simpson Premium Pressure Washer, begin by connecting one end of the hose to the water inlet on the pressure washer. Ensure the connection is tight and secure to prevent any water leakage. Then, attach the other end of the hose to the spray gun, making sure it is also properly connected. Double-check all connections to ensure they are tight and secure.
Remember to follow the manufacturer’s instructions and guidelines when adding hoses to your Simpson Premium Pressure Washer. Improper installation or use of incompatible hoses can lead to damage and affect the performance of your pressure washer.
Step 4: Testing the Hoses
After attaching the hoses, it’s essential to test them to ensure everything is working properly. Turn on the pressure washer and check for any leaks, kinks, or other issues with the hoses. Inspect the connection points and adjust them if necessary. Run water through the hoses to confirm a steady flow without any interruptions or irregularities.
Following these steps will help you add hoses to your Simpson Premium Pressure Washer and get it ready for your cleaning tasks. Remember to take proper care of your hoses by storing them correctly and inspecting them regularly for any signs of wear and tear. With the right hoses, your pressure washer will continue to deliver excellent cleaning performance for years to come.
An Overview of Adding Hoses to Simpson Premium Pressure Washer
Adding hoses to your Simpson Premium Pressure Washer is a straightforward process that allows you to expand the capabilities of your machine. By increasing the reach and versatility of your pressure washer, you can tackle a wider range of cleaning tasks with ease.
Step 1: Choose the Right Hose
Before adding a hose to your Simpson Premium Pressure Washer, it’s essential to select the right hose for your specific needs. Consider factors such as hose length, diameter, and pressure rating. Ensure that the hose is compatible with your pressure washer model to achieve optimal performance.
Step 2: Prepare the Pressure Washer
Before adding the hose, ensure that your pressure washer is turned off and disconnected from the power source. This precautionary measure is crucial for safety reasons.
Next, locate the water inlet on the pressure washer unit. It is usually labeled and positioned near the pump. Remove the plastic plug or cap covering the water inlet and set it aside.
Step 3: Attach the Hose
Take one end of the hose and connect it to the water inlet on your pressure washer. Ensure a secure fit by twisting the hose clockwise until it is tight. Make sure that the connection is snug to prevent any leaks during operation.
If your pressure washer has a quick-connect system, align the hose with the corresponding connector on your machine and push them together until they click into place.
Step 4: Secure the Hose
Once the hose is attached, make sure it is properly secured. Use any provided clips or attachments to fasten the hose to the pressure washer unit securely. This step is essential to prevent any accidental trips or tangles while using your pressure washer.
Step 5: Test the Connection
Before using your pressure washer, it’s important to check the hose connection for any leaks. Turn on the water supply and briefly squeeze the trigger on the pressure washer wand to check for any signs of leakage around the hose connection. If any leaks are detected, tighten the hose connection further or replace any damaged parts.
Once you are satisfied that the connection is secure, you can proceed to use your Simpson Premium Pressure Washer with the added hose. Enjoy the extended reach and flexibility that a new hose brings, and tackle your outdoor cleaning tasks with confidence.
| Benefits of Adding Hoses to Simpson Premium Pressure Washer |
|---|
| Increased reach for cleaning larger areas |
| Ability to clean hard-to-reach areas |
| Greater versatility for different cleaning tasks |
| Enhanced water pressure and flow |
| Improved cleaning efficiency |
Choosing the Right Hose
When it comes to adding hoses to your Simpson Premium Pressure Washer, it’s important to choose the right one for your needs. The hose you choose will depend on a few factors, including the type of cleaning tasks you will be performing and the amount of pressure your pressure washer can produce.
Here are some things to consider when choosing the right hose for your pressure washer:
- Length: Consider the distance you need to cover with the hose. Longer hoses are convenient for reaching distant areas, but keep in mind that longer hoses may decrease the water pressure at the nozzle.
- Diameter: The diameter of the hose determines the amount of water flow. Standard pressure washer hoses typically come in 1/4-inch, 5/16-inch, and 3/8-inch sizes. A larger diameter hose will allow for more water flow, increasing the cleaning power of your pressure washer.
- Material: Choose a hose made from high-quality materials that is durable and resistant to kinks or bends. Look for hoses made from materials like rubber or PVC that can withstand the high pressure of the water.
- Pressure Rating: Check the pressure rating of the hose to ensure it can handle the maximum pressure that your pressure washer can produce. Using a hose with a lower pressure rating may result in damage to the hose or a decrease in cleaning performance.
- Connectors: Make sure the hose has the right connectors to attach to your pressure washer and the nozzle. Most hoses come with standard threaded connectors, but it’s always a good idea to double-check the compatibility.
By considering these factors and choosing the appropriate hose for your Simpson Premium Pressure Washer, you can ensure optimal performance and maximize the cleaning power of your pressure washer.
Preparing the Pressure Washer for Hose Installation
Before installing hoses on your Simpson Premium Pressure Washer, it’s important to properly prepare the machine to ensure a successful and efficient process. Here are the steps you should follow:
Step 1: Safety First
Prior to any maintenance or installation work, always prioritize safety. Make sure the pressure washer is turned off and disconnected from the power source. Allow the machine to cool down if it has been recently used.
Note: It’s also advisable to wear protective gloves and eyewear while working on a pressure washer.
Step 2: Check the Manual
Refer to the instruction manual provided with your Simpson Premium Pressure Washer. Familiarize yourself with the specific model’s components and their functions. This will help you understand the correct process for installing hoses.
Step 3: Inspect Existing Components
Check the existing hoses and connectors if you are planning to replace or add new ones. Look for any signs of wear, damage, or leaks. It’s important to address these issues before installing new hoses to prevent any further damage or decrease in performance.
Note: If you notice any damaged components, it’s recommended to purchase genuine replacement parts from an authorized dealer.
Step 4: Clean the Connections
Ensure that the connections and fittings on both the pressure washer and hoses are clean. Remove any dirt, debris, or previous sealant remnants. This will ensure a secure and leak-free connection between the hoses and the pressure washer.
Note: Use a soft cloth or brush to clean the connections and avoid using abrasive materials that could damage the surfaces.
Step 5: Lubricate the O-rings
Most hoses and connectors come with O-rings to ensure a watertight seal. Apply a thin layer of lubricant, such as petroleum jelly, to the O-rings before installation. This will make it easier to connect the hoses and reduce the chance of damaging the O-rings.
By following these preparation steps, you’ll be ready to install hoses on your Simpson Premium Pressure Washer in no time. Remember to consult the manual provided by the manufacturer for model-specific instructions and precautions.
Installing the Hose
To add hoses to your Simpson Premium Pressure Washer, follow these steps:
Step 1: Unpack and Inspect
Start by unpacking the hoses and inspecting them for any damage. Check for any leaks, cracks, or signs of wear and tear.
Step 2: Attach the Hose Reel
Locate the hose reel on the pressure washer and align it with the mounting holes. Insert and tighten the screws to secure the hose reel in place.
Step 3: Connect the High-Pressure Hose
Take the high-pressure hose and connect one end to the hose reel. Ensure that it is securely connected. Attach the other end of the high-pressure hose to the pressure washer’s water outlet.

Step 4: Attach the Trigger Gun
Connect the trigger gun to the other end of the high-pressure hose. Make sure it is tightly secured in place.
Step 5: Connect the Garden Hose
Take the garden hose and connect it to the pressure washer’s water inlet port. Ensure it is tightly attached.
Once all the hoses are connected, turn on the water supply and test the pressure washer to make sure it is working properly.
Note: Always refer to the manufacturer’s instructions for your specific pressure washer model when installing hoses. If you are unsure or need assistance, consult a professional.
Troubleshooting and Maintenance Tips for Hoses
The hoses of your Simpson Premium Pressure Washer are an essential component for its proper functioning and cleaning performance. To ensure their longevity and efficiency, it is important to follow some troubleshooting and maintenance tips:
Inspect for Damage
Regularly inspect your hoses for any visible signs of damage, such as cracks, leaks, or worn fittings. Damaged hoses should be repaired or replaced immediately to avoid any loss in pressure or potential accidents.
Check for Blockages
If you notice a decrease in water flow or pressure, check for any blockages in the hose. Clear any debris or obstructions that may have accumulated, and ensure that the hose is free from any kinks or twists that could restrict the water flow.
Tip: To prevent blockages, make sure to use a filter or strainer on the water source that connects to the pressure washer. This will help to filter out any large particles or sediment that could clog the hose.
Proper Storage
After each use, properly store your hoses to prevent damage or tangling. Coil the hose neatly and secure it with cable ties or straps to prevent it from unraveling or getting tangled. Store the hoses away from direct sunlight, extreme temperatures, and any sharp objects that could puncture or damage them.
Note: Exposing the hoses to extreme temperatures or UV rays for prolonged periods can cause them to deteriorate faster.

By following these troubleshooting and maintenance tips, you can ensure that the hoses of your Simpson Premium Pressure Washer remain in optimal condition, providing reliable performance for all your cleaning tasks.
Question-answer
What is the best way to add hoses to a Simpson Premium Pressure Washer?
The best way to add hoses to a Simpson Premium Pressure Washer is to start by identifying the connection points on the pressure washer and the hoses. Once you have located the connection points, you will need to ensure that they are clean and free from any debris or obstructions. Then, you can attach the hoses to the pressure washer by aligning the male and female couplers and twisting them together until they are securely connected. Finally, you can turn on the pressure washer and test the hoses to ensure that they are working properly.
What tools do I need to add hoses to a Simpson Premium Pressure Washer?
To add hoses to a Simpson Premium Pressure Washer, you will need a few basic tools. First, you will need a wrench or pliers to loosen and tighten the couplers on the pressure washer and the hoses. You may also need a hose clamp or zip ties to secure the hoses in place. Additionally, it is always a good idea to have a bucket of soapy water and a hose brush on hand to clean the connection points before attaching the hoses.
Can I use any type of hose with a Simpson Premium Pressure Washer?
No, you cannot use any type of hose with a Simpson Premium Pressure Washer. It is important to use hoses that are specifically designed for pressure washers and can handle the high water pressure generated by the machine. Look for hoses that are labeled as “pressure washer hoses” or “high-pressure hoses.” These hoses are typically reinforced with strong materials like steel or polyester to ensure durability and safety while in use.
What are some common mistakes to avoid when adding hoses to a Simpson Premium Pressure Washer?
When adding hoses to a Simpson Premium Pressure Washer, there are a few common mistakes that you should avoid. First, make sure that the hoses are properly connected and secured to the pressure washer. Loose connections can lead to leaks and reduce the effectiveness of the pressure washer. Additionally, be careful not to kink or bend the hoses, as this can restrict the flow of water and decrease the pressure. Finally, always follow the manufacturer’s instructions and recommendations for hose length and diameter, as using the wrong size hoses can also affect the performance of the pressure washer.
Recent Posts
-

How To Connect Soap To Honda Pressure Washer
June 28, 2024 -

A To Z Pressure Washing Scam
June 27, 2024 -

How To Pressure Wash Your Home With A Garden Hose
June 27, 2024 -

Where Can I Buy Honda Pressure Washer Parts
June 25, 2024 -
