
Blog
How To Add A Soap Tank To A Pressure Washer


Pressure washers are powerful cleaning tools that can help you tackle even the toughest cleaning tasks. But sometimes, plain water is not enough to get the job done. That’s where a soap tank comes in handy.
A soap tank is an additional feature that allows you to add detergent or soap to your pressure washer, giving you the ability to break down tough dirt, grime, and stains more effectively. Adding a soap tank to your pressure washer is a relatively simple process that can greatly enhance its cleaning capabilities.
In this article, we will guide you through the steps of adding a soap tank to your pressure washer, so you can get the most out of your cleaning experience.

Step 1: Gather the necessary materials
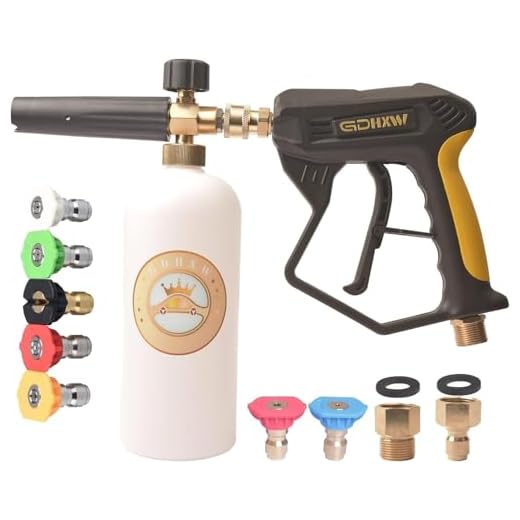
Before you begin, make sure you have all the necessary materials. You will need a soap tank kit, which typically includes a soap tank, hoses, fittings, and a nozzle. You may also need additional tools such as pliers, a wrench, and Teflon tape to ensure a secure and leak-free installation.
Why You Should Add a Soap Tank to Your Pressure Washer
Adding a soap tank to your pressure washer can greatly enhance its cleaning capabilities and provide a number of benefits.
Firstly, a soap tank allows you to easily apply detergent or soap to the surface you are cleaning. This is particularly useful for tackling stubborn dirt, grime, or stains that may not be effectively removed by water alone. By applying soap directly to the surface, you can break down and loosen the dirt, making it easier to remove with the pressure washer.
Secondly, a soap tank saves you time and effort. Without a soap tank, you would need to manually apply soap to the surface using a separate container or brush. This can be tedious and time-consuming, especially if you are cleaning a large area. With a soap tank, you can simply fill it up with soap or detergent, and the pressure washer will automatically mix the soap with water to create a foamy solution that can be easily sprayed onto the surface.
In addition, a soap tank allows for more precise and controlled cleaning. Some pressure washers come with adjustable soap injection systems, which allow you to control the amount of soap being mixed with the water. This means you can use less soap for lighter cleaning tasks or increase the soap concentration for tougher stains. Having control over the soap ratio can help you achieve the desired cleaning results without wasting soap or water.
Furthermore, a soap tank can extend the lifespan of your pressure washer. By using soap or detergent to help break down dirt and grime, you can reduce the pressure and time needed to clean a surface. This can prevent unnecessary wear and tear on the pressure washer’s motor and components, ultimately prolonging its overall lifespan.
In conclusion, adding a soap tank to your pressure washer is a smart investment that can make your cleaning tasks more efficient, save you time and effort, and prolong the lifespan of your pressure washer. Whether you are cleaning your car, patio, or outdoor furniture, a soap tank will enhance the cleaning process and help you achieve better results.
The Benefits of Having a Soap Tank
Adding a soap tank to your pressure washer can greatly enhance its cleaning capabilities and provide several benefits:
- Improved cleaning power: With a soap tank, you can easily apply detergent or soap to your cleaning surface, allowing for a deeper and more effective clean. This is especially useful when tackling stubborn dirt, grime, or stains.
- Time-saving: Having a dedicated soap tank eliminates the need for frequent refills or carrying around a separate container of soap. This can save valuable time and make your cleaning process more efficient.
- Convenience: A built-in soap tank offers convenience and ease of use. You can adjust the soap-to-water ratio according to your cleaning needs and easily switch between soap and water without the hassle of manually mixing or measuring detergent.
- Versatility: By having a soap tank, your pressure washer can be used for a variety of cleaning tasks. Whether you need to clean your car, siding, patio, or deck, the soap tank allows for effective and versatile cleaning options.
- Protects your pressure washer: Using a soap tank can help protect your pressure washer from potential damage caused by using the wrong type of soap or detergent. The built-in soap tank ensures that you are using the correct cleaning solution for your specific pressure washer model.
Overall, adding a soap tank to your pressure washer is a wise investment that can enhance your cleaning experience, save time, and provide more effective results. It offers convenience, versatility, and improved cleaning power, making it a valuable accessory for any pressure washer owner.
How to Install a Soap Tank on Your Pressure Washer
Adding a soap tank to your pressure washer can greatly enhance its cleaning capabilities. With a soap tank, you can easily apply detergent or cleaning solutions to your surfaces before pressure washing, resulting in a more thorough and effective clean. In this guide, we will walk you through the steps involved in installing a soap tank on your pressure washer.
Step 1: Choose the Right Soap Tank
Before you begin the installation process, it’s important to choose a soap tank that is compatible with your pressure washer. Soap tanks come in various sizes and designs, so make sure to select one that suits your specific needs. You can find soap tanks at most home improvement stores or online retailers.
Step 2: Prepare Your Pressure Washer
Before installing the soap tank, you’ll need to prepare your pressure washer. Begin by turning off the pressure washer and disconnecting it from any power source. Next, remove the high-pressure hose and trigger wand from the pressure washer. This will allow you to access the connection point where the soap tank will be installed.
Step 3: Install the Soap Tank
Take your selected soap tank and locate the soap injection point on your pressure washer. This is usually located near the water inlet or on the pump. Attach the soap tank to the soap injection point using the provided connectors or fittings. Make sure the connections are tight and secure to prevent any leaks.
Step 4: Test for Leaks
Once the soap tank is securely attached, it’s important to test for any leaks before using your pressure washer. Fill the soap tank with water and turn on the pressure washer. Let the pressure washer run for a few minutes and observe if any water is leaking from the connections. If you notice any leaks, tighten the connections or replace any faulty parts.
Step 5: Fill the Soap Tank
After successfully installing the soap tank and ensuring there are no leaks, you can now fill the soap tank with your desired detergent or cleaning solution. Follow the manufacturer’s instructions for diluting the detergent, if necessary. Be sure not to overfill the soap tank, as this can cause excess foam and reduce its effectiveness.
Step 6: Start Pressure Washing
Once the soap tank is filled, you’re ready to start pressure washing with the added soap feature. Connect the high-pressure hose and trigger wand back to the pressure washer, and turn on the machine. Whenever you want to apply soap, simply adjust the pressure washer’s settings to activate the soap injection function. This will allow the detergent to mix with the water and be applied through the trigger wand.
With a newly installed soap tank, your pressure washer is now equipped to handle a wider range of cleaning tasks. Always follow the manufacturer’s instructions for proper use and maintenance of your pressure washer and soap tank, and remember to rinse off the surfaces with clean water after applying detergent for the best results.

Questions and answers,
Why should I add a soap tank to my pressure washer?
Adding a soap tank to your pressure washer allows you to easily apply detergent or soap to surfaces before pressure washing them. This can help to loosen dirt and grime, making the pressure washing process more effective.
Can I add a soap tank to any pressure washer?
The ability to add a soap tank will depend on the specific model and make of your pressure washer. Not all pressure washers are designed to have a soap tank attachment. It is best to consult the manufacturer’s guidelines or contact customer support to determine if your pressure washer is compatible.
How can I add a soap tank to my pressure washer?
To add a soap tank to your pressure washer, you will first need to purchase a soap tank attachment that is compatible with your specific model. Once you have the attachment, follow the manufacturer’s instructions for installation. This typically involves attaching the soap tank to the pressure washer’s wand or frame and connecting it to the detergent intake valve.
Where can I purchase a soap tank attachment for my pressure washer?
You can purchase soap tank attachments for pressure washers at home improvement stores, online retailers, or directly from the manufacturer. Make sure to check the compatibility of the attachment with your pressure washer model before making a purchase.
Are there any tips for using a soap tank with a pressure washer?
When using a soap tank with your pressure washer, it is important to follow the manufacturer’s instructions for diluting the detergent or soap. Using too much concentrate can result in excessive foam or clogging of the nozzle. Additionally, make sure to rinse the soap tank and system thoroughly after each use to prevent any residue from clogging the system.

What is a soap tank?
A soap tank is a container attached to a pressure washer that holds soap or detergent for cleaning purposes. It allows users to easily mix and dispense soap while using the pressure washer.
Recent Posts
-

How To Connect Soap To Honda Pressure Washer
June 28, 2024 -

A To Z Pressure Washing Scam
June 27, 2024 -

How To Pressure Wash Your Home With A Garden Hose
June 27, 2024 -

Where Can I Buy Honda Pressure Washer Parts
June 25, 2024 -
