
Blog
How Do You Clean Vinyl Siding With A Pressure Washer
Vinyl siding is a popular choice for many homeowners due to its durability and low maintenance. However, over time, it can accumulate dirt, algae, and other debris, leaving your home looking dirty and unkempt. One of the most effective ways to clean vinyl siding is by using a pressure washer.
Pressure washing is a powerful cleaning method that uses high-pressure water to remove stubborn stains and grime from surfaces. When done correctly, it can restore the appearance of your vinyl siding and make it look as good as new. However, it’s important to use the right techniques and equipment to ensure the best results and avoid causing any damage.
Before you begin pressure washing your vinyl siding, it’s essential to prepare the area and take a few necessary precautions. Start by removing any furniture, plants, or decorations near the siding to prevent them from getting wet or damaged. Cover electrical outlets and light fixtures with plastic or tape to protect them from water.
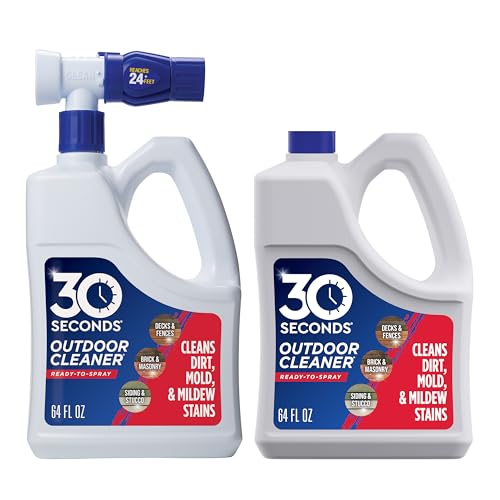
Next, mix a solution of water and a mild detergent specifically designed for pressure washing or vinyl siding cleaning. Avoid using bleach or harsh chemicals, as they can cause damage to the siding. Fill the pressure washer’s detergent dispenser with the mixture and attach the appropriate nozzle for cleaning vinyl siding.
Importance of cleaning vinyl siding
Cleaning vinyl siding is an important part of maintaining the aesthetics and prolonging the lifespan of your home. Over time, dirt, grime, and other contaminants can accumulate on the surface of your vinyl siding, which can detract from its appearance and potentially cause damage.


Regularly cleaning your vinyl siding can help prevent the growth of mold, mildew, and algae, which can thrive in damp conditions and cause unsightly stains and discoloration. These contaminants can also break down the vinyl siding material, leading to cracks, warping, or fading.
In addition to preserving the integrity of your vinyl siding, regular cleaning can also improve your home’s curb appeal. Dirty siding can make your house look unkempt and neglected, while clean siding can give it a fresh and well-maintained appearance.
Using a pressure washer to clean vinyl siding is an effective and efficient way to remove dirt and grime. The powerful stream of water can reach all areas of the siding, including crevices and hard-to-reach spots. Just be sure to use a low-pressure setting and hold the spray nozzle at a safe distance to avoid causing any damage to the siding.
In conclusion, properly cleaning vinyl siding is essential for maintaining its appearance and durability. Regular cleaning can prevent the growth of mold and other contaminants, which can cause long-term damage. Additionally, clean siding enhances your home’s curb appeal and creates a more inviting and well-maintained exterior.
Choosing the right pressure washer
When it comes to cleaning vinyl siding with a pressure washer, choosing the right machine is crucial. Here are some important factors to consider:
Pressure
The pressure of the pressure washer is measured in pounds per square inch (PSI). For cleaning vinyl siding, a pressure washer with a pressure range of 1,500 to 2,000 PSI is usually sufficient. Higher PSI may cause damage to the vinyl siding, while lower PSI may not provide enough cleaning power.
Flow Rate
The flow rate of the pressure washer is measured in gallons per minute (GPM). A higher flow rate means more water is used, which can help to clean the siding more effectively. For vinyl siding cleaning, a pressure washer with a flow rate of 1.5 to 2.2 GPM is recommended.
Nozzle Tips
The nozzle tips play a crucial role in determining the cleaning power of the pressure washer. Different nozzle tips produce different spray patterns and pressures. For vinyl siding cleaning, a wide-angle fan nozzle tip is usually the most appropriate. This helps to avoid concentrated spray streams that can cause damage to the siding.
Detergent Injection
Some pressure washers come with a detergent injection system that allows you to apply cleaning solutions to the siding. This can be helpful in removing stubborn dirt, stains, or mildew. If you anticipate needing to use detergents, look for a pressure washer with this feature.
Once you have considered these factors, it’s important to choose a pressure washer that meets your requirements. Take the time to read reviews, compare features, and select a reliable and reputable brand. A quality pressure washer will make the vinyl siding cleaning process easier and more efficient.
| Factor | Recommended Range |
|---|---|
| Pressure (PSI) | 1,500 – 2,000 |
| Flow Rate (GPM) | 1.5 – 2.2 |
| Nozzle Tips | Wide-angle fan nozzle |
Preparing the area before cleaning
Before you start cleaning your vinyl siding with a pressure washer, it’s important to properly prepare the area to ensure the best results and to protect any surrounding surfaces or landscaping. Here are some steps to follow:
- Clear the area: Start by removing any furniture, decorations, or objects that are near or on the vinyl siding. This will prevent any damage or interference during the cleaning process.
- Trim plants and bushes: If you have any plants, bushes, or trees close to the vinyl siding, make sure to trim them back or tie them up to prevent them from getting in the way or being damaged by the pressure washer.
- Cover delicate surfaces: Use plastic tarps or drop cloths to cover any delicate or sensitive surfaces, such as windows, outdoor lighting fixtures, or electrical outlets. This will protect them from any potential damage caused by water or debris.
- Tape off areas: If there are any areas you want to protect from water or cleaning solution, such as doorways or vents, use painter’s tape to seal them off. This will ensure that no water or cleaning solution gets inside.
- Disconnect electrical components: If you have any outdoor electrical components, such as lights or outlets, make sure to disconnect them before you start cleaning. This will prevent any damage to the electrical system.
- Cover or remove outdoor furniture: If you have any outdoor furniture or other objects that cannot be easily moved, cover them with plastic tarps or remove them from the area to protect them from the pressure washer.
By properly preparing the area before cleaning, you can ensure a more efficient and safe vinyl siding cleaning process with your pressure washer.
Mixing the cleaning solution for vinyl siding
Before you start pressure washing your vinyl siding, it’s important to prepare a cleaning solution that will effectively remove dirt, grime, and mildew. Here is a step-by-step guide to mixing the perfect cleaning solution:
1. Gather the necessary materials:
To create a cleaning solution for vinyl siding, you will need the following ingredients:
- 1 cup of trisodium phosphate (TSP)
- 1 gallon of water
- Bucket or container for mixing
- Mixing stick or spoon
2. Measure the trisodium phosphate (TSP):
Trisodium phosphate (TSP) is a powerful cleaning agent that helps remove tough stains and dirt from vinyl siding. Measure 1 cup of TSP and pour it into the mixing container.
3. Add water:
Pour 1 gallon of water into the mixing container with the measured TSP. It’s important to follow the recommendations on the TSP packaging for the correct water-to-TSP ratio.
4. Mix thoroughly:
Use a mixing stick or spoon to thoroughly mix the TSP and water together. Make sure the TSP is completely dissolved and the solution is well-blended.
Note: It’s important to wear protective gloves and eyewear while handling TSP, as it can cause skin and eye irritation.
5. Test the solution:
Before applying the cleaning solution to the entire vinyl siding, it’s recommended to test a small inconspicuous area. This will help ensure that the solution does not cause any damage or discoloration.
Pro tip: If you prefer to use a milder solution, you can substitute TSP with a mixture of 1 part household bleach and 4 parts water. This solution can be equally effective in removing stains and mildew from vinyl siding.
Once your cleaning solution is prepared, you can proceed with pressure washing your vinyl siding to remove dirt and grime. Remember to follow all safety guidelines and manufacturer’s instructions when using a pressure washer.
Cleaning vinyl siding with a pressure washer
When it comes to cleaning vinyl siding, using a pressure washer can be an effective and efficient method. However, it’s important to follow the proper steps to ensure you clean your siding thoroughly without causing any damage.
Step 1: Prepare the area
Before starting, remove any obstacles or furniture from the area near the siding. Cover any delicate plants or objects that could be damaged by the high-pressure water. Close all windows and doors to prevent water from entering the house.
Step 2: Inspect the siding
Inspect the vinyl siding for any cracks, loose panels, or signs of damage. It’s crucial to fix any issues before cleaning to prevent water from seeping behind the siding and causing further damage.
Step 3: Choose the right nozzle and pressure
When using a pressure washer to clean vinyl siding, it’s important to select the appropriate nozzle and pressure setting. A nozzle with a wide spray pattern will provide a more gentle cleaning, while a narrow spray pattern will be more potent. Start with a lower pressure setting and increase if needed, being cautious not to use excessive pressure that could damage the siding.
Step 4: Apply cleaning solution
Mix a solution of mild detergent and water in a bucket. Apply the solution to the vinyl siding using a soft brush or sponge. This step will help break down any dirt, grime, or mold on the surface, making it easier to remove with the pressure washer.
Step 5: Clean the siding
Starting from the bottom, work your way up and clean the siding using the pressure washer. Keep the nozzle at a slight angle and maintain a distance of about 6-12 inches from the surface. Use even and overlapping strokes to ensure thorough cleaning.
Step 6: Rinse and inspect
After cleaning the entire siding, thoroughly rinse it with clean water to remove any remaining detergent or debris. Inspect the siding again to ensure all dirt and grime have been removed. Repeat the process for any stubborn stains if necessary.
Following these steps will help you effectively clean vinyl siding with a pressure washer. Always remember to prioritize safety by wearing appropriate protective gear, such as goggles and gloves, and following the manufacturer’s instructions for your pressure washer.
Post-cleaning maintenance and tips
Once you have successfully cleaned your vinyl siding with a pressure washer, it’s important to perform some post-cleaning maintenance to ensure its longevity and keep it looking its best. Here are some helpful tips:
Inspect for any damage
After cleaning, take the time to inspect your vinyl siding for any signs of damage or wear. Look out for cracks, chips, or loose panels. If you notice any issues, it’s best to address them promptly to prevent further damage.
Remove any remaining dirt or stains
While pressure washing does a great job of removing dirt and stains, there may still be some stubborn spots left behind. Use a soft brush or sponge to gently scrub these areas with a mixture of mild detergent and water. Rinse thoroughly with clean water afterwards.
It’s important to avoid using harsh cleaning agents or abrasive brushes as they can cause damage to the vinyl siding’s surface.
Apply a protective coating
To keep your vinyl siding looking its best and protect it from the elements, consider applying a protective coating. There are various products available on the market specifically designed for vinyl siding. Follow the manufacturer’s instructions for application.
Regularly clean gutters
Gutters can easily get clogged with dirt and debris, which can lead to water damage and affect the appearance of your vinyl siding. Make sure to regularly clean out your gutters to prevent any issues.
Additionally, check that the gutters are securely attached to the house and functioning properly to ensure that water is directed away from the vinyl siding.
By following these post-cleaning maintenance tips, you can keep your vinyl siding looking great and protect its durability for years to come!
Q&A
Can I clean vinyl siding with a pressure washer?
Yes, you can clean vinyl siding with a pressure washer. In fact, it is one of the most effective and efficient methods to remove dirt, grime, and mildew from your vinyl siding.
Do I need any special attachments or settings on the pressure washer to clean vinyl siding?
No, you don’t need any special attachments or settings on the pressure washer to clean vinyl siding. However, it is recommended to use a wide-angle spray nozzle and set the pressure to a lower setting to avoid damaging the siding.
What is the best way to clean vinyl siding with a pressure washer?
The best way to clean vinyl siding with a pressure washer is to start from the bottom and work your way up. Use a low-pressure setting and a wide-angle spray nozzle to avoid causing any damage. Begin by spraying the siding with water to remove loose dirt and debris. Then, apply a cleaning solution specifically designed for vinyl siding and let it sit for a few minutes. Finally, rinse off the siding with the pressure washer, making sure to keep the nozzle at a slight angle to prevent water from getting behind the siding.
Can I use bleach to clean vinyl siding with a pressure washer?
Yes, you can use bleach to clean vinyl siding with a pressure washer. However, it is recommended to dilute the bleach with water before applying it to the siding. A common ratio is one part bleach to four parts water. Be sure to wear protective gloves and eyewear when working with bleach, and avoid using too much bleach as it can damage the siding.