
Blog
Can You Pressure Wash A Deer Skull


Deer skulls can be a popular decorative item and a symbol of wildlife appreciation. However, over time, these skulls can accumulate dirt, dust, and other debris that can dull their natural beauty. One question that often arises is whether you can pressure wash a deer skull to clean it effectively.
The answer to this question is not entirely straightforward. While pressure washing can be an efficient way to remove dirt and grime from many surfaces, it may not be the best method for cleaning a delicate deer skull. The powerful jets of water could potentially damage or break the fragile bones.
Instead of using a pressure washer, it is recommended to opt for a gentler cleaning method for your deer skull. One popular option is to use a soft brush, such as a toothbrush, to gently scrub away any dirt or debris. You can also use a mild soap or detergent mixed with water to help lift stubborn stains.
Remember to handle the deer skull with care and avoid applying too much pressure while cleaning. A gentle touch and patience will ensure that you preserve the integrity and beauty of this natural piece of art.
Benefits of Pressure Washing
Pressure washing is a highly effective and efficient method of cleaning various surfaces. From outdoor areas to vehicles and equipment, pressure washing offers several benefits that make it a popular choice among homeowners and professionals alike.
1. Powerful Cleaning
One of the main benefits of pressure washing is its ability to provide a deep and thorough clean. The high-pressure water stream can remove dirt, grime, mold, mildew, and other stubborn stains from almost any surface. Whether it’s driveways, decks, or concrete walls, pressure washing can restore the original cleanliness and appearance of these areas.
2. Time-Saving
Compared to traditional cleaning methods, pressure washing saves a significant amount of time. With the use of high-pressure water, cleaning tasks that would have taken hours can be completed in a fraction of the time. This is especially beneficial for large outdoor areas or commercial spaces that require frequent cleaning.
Pro Tip: Combine pressure washing with appropriate cleaning agents to enhance its effectiveness and achieve even better results.
3. Cost-Effective
Investing in a pressure washer can be cost-effective in the long run. By owning your own pressure washer, you can save money on professional cleaning services and have the flexibility to clean whenever it’s needed. Additionally, compared to other cleaning methods, pressure washing requires fewer cleaning agents, reducing the overall cost of maintenance.
4. Eco-Friendly
Pressure washing is an environmentally friendly cleaning method. The high-pressure water stream can remove dirt and stains without the need for harsh chemicals, which can be harmful to the environment. Additionally, pressure washing can also help conserve water, as it uses less water compared to traditional cleaning methods.
In conclusion, pressure washing offers powerful cleaning capabilities, saves time and money, and is environmentally friendly. Whether you’re looking to clean your own property or provide professional cleaning services, pressure washing is a versatile and effective solution.
Preparing the Deer Skull
Before pressure washing the deer skull, it is important to properly prepare it. This involves removing any excess flesh, tissue, or brain matter that may still be attached to the skull.
1. Begin by using a sharp knife or bone saw to carefully remove the lower jawbone and any remaining flesh or tissue from the skull.
2. Next, remove the brain matter by carefully making small incisions in the skull and using a small brush or tool to extract it. Take caution not to damage the delicate bone structure while doing this.
3. Once all the flesh and brain matter has been removed, fill a large pot or container with a mixture of water and a degreasing agent, such as dish soap or hydrogen peroxide. Place the skull in the mixture and let it soak for at least 24 hours. This will help loosen any remaining tissue and fats.
4. After soaking, remove the skull from the mixture and use a toothbrush or small brush to scrub away any remaining residue. Pay close attention to hard-to-reach areas, such as the nasal cavity and eye sockets.
5. Rinse the skull thoroughly with clean water to remove any remaining soap or degreaser.
6. Finally, allow the skull to air dry completely before proceeding with the pressure washing process. This will ensure that all moisture has evaporated and the skull is ready for cleaning.
| Materials Needed: |
|---|
| – Sharp knife or bone saw |
| – Small brush or tool for brain removal |
| – Large pot or container |
| – Degreasing agent (dish soap or hydrogen peroxide) |
| – Toothbrush or small brush for scrubbing |
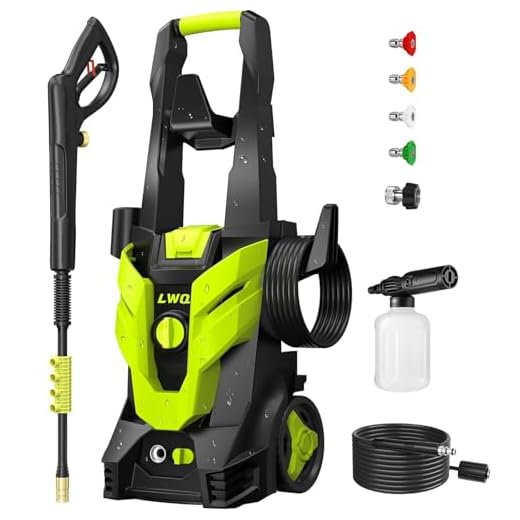
Steps to Pressure Wash a Deer Skull
Pressure washing a deer skull can be an effective method to clean and prepare it for displays or decorations. Here are the steps to pressure wash a deer skull:
|
Step 1: Top Rated
14" Surface Cleaner for Efficient Pressure Washing Easily cleans driveways and patios
This 14" Stainless Steel Surface Cleaner is designed for quick and effective cleaning of large flat surfaces. Its durable design and mobility enhance its usability on any concrete or patio area.
|
Take safety precautions by wearing protective gloves, goggles, and a mask to prevent any injuries or inhalation of particles. |
|
Step 2: |
Attach a low-pressure nozzle to your pressure washer, as a high-pressure nozzle may damage the delicate bones of the skull. |
|
Step 3: |
Set up a workspace outdoors or in a well-ventilated area, as pressure washing can create a spray of water and debris. |
|
Step 4: |
Rinse the deer skull with a hose or bucket of water to remove any loose dirt or debris. |
|
Step 5: |
Hold the pressure washer nozzle about 1 to 2 feet away from the skull, at a low-pressure setting, and begin spraying the skull. |
|
Step 6: |
Move the pressure washer nozzle across the skull, focusing on areas with stubborn dirt or stains. Be careful not to apply too much pressure, as it may damage the delicate bone structure. |
|
Step 7: |
Continue pressure washing until the skull is thoroughly clean, ensuring all dirt and debris are removed. |
|
Step 8: |
After pressure washing, inspect the skull for any remaining dirt or stains. If necessary, repeat the process or use a brush to scrub off stubborn residues. |
|
Step 9: |
Once clean, allow the deer skull to air dry completely before preserving or displaying it. |
Following these steps will help you pressure wash a deer skull effectively and safely. Remember to take caution when using a pressure washer and always prioritize your safety.
Deer Skull Preservation Tips
Preserving a deer skull can be a rewarding way to commemorate a successful hunt or a unique natural find. Whether you’re a hunter, a nature enthusiast, or just someone who appreciates the beauty of deer antlers, these tips will help you properly preserve a deer skull.
- Cleaning: Before preservation, it’s essential to clean the deer skull properly. Remove any remaining flesh and tissue from the skull, using gloved hands or a scraping tool. Be careful not to damage the bone while doing this. You can also use a degreaser to remove any grease or oil.
- Pressure washing: While pressure washing may seem like a quick and efficient way to clean a deer skull, it’s not recommended. The intense water pressure can damage the fragile bone structure and cause cracks. It’s best to avoid pressure washing and use alternative cleaning methods.
- Boiling: Boiling the skull is one popular cleaning method. Submerge the skull in a pot of water and add a small amount of dish soap. Simmer for several hours until the remaining flesh can be easily removed. Be cautious not to boil the skull for too long, as this can weaken the bone.
- Whitening: Once the skull is properly cleaned, you may want to whiten it to enhance its appearance. Use a mixture of hydrogen peroxide and water or a specialized skull whitening solution. Gently apply the whitening solution to the skull and let it sit for the recommended amount of time. Rinse thoroughly and repeat the process if necessary.
- Protecting: To protect the deer skull from damage and discoloration, you can apply a clear sealant or varnish. This will help preserve the bone and maintain its natural look for an extended period.
- Display: Once the deer skull is properly preserved, you can choose to display it in various ways. Mounting it on a plaque or shadow box can create an attractive display piece. Alternatively, you can use it as a unique addition to your home decor or as a conversation starter.
Following these preservation tips will ensure that your deer skull remains in good condition for years to come, allowing you to admire its natural beauty and cherish the memories associated with it.
Alternative Cleaning Methods
If you don’t have access to a pressure washer or prefer not to use one, there are alternative methods you can use to clean a deer skull. These methods can be just as effective, although they may require a bit more time and effort.
Boiling method: One popular alternative method is to boil the skull to remove any remaining flesh and debris. Start by boiling a large pot of water and then submerge the skull in the boiling water for about two hours. This will help loosen any remaining flesh and make it easier to remove. After boiling, use a sharp knife or a wire brush to gently scrape away the loosened tissue. Be sure to wear gloves and exercise caution to avoid injury.
Burying method: Another option is to bury the skull in a container filled with soil or sand. Bury the skull completely and leave it for several weeks, allowing nature and natural decomposition processes to break down any remaining tissue. After the skull has been buried for a sufficient amount of time, dig it up and use a brush or toothbrush to remove any remaining debris.
Dermestid beetles: For those looking for a more natural approach, a popular option is to use dermestid beetles to clean the skull. These beetles feed on flesh, and their larvae can effectively eat away any remaining tissue. You can purchase dermestid beetles or consult a local museum or taxidermist to see if they offer beetle-cleaning services.
Remember to always take proper safety precautions and wear protective gear when cleaning deer skulls, regardless of the method you choose.
Questions and answers
Can you pressure wash a deer skull?
Yes, you can pressure wash a deer skull. It is a popular method for cleaning and preparing skulls for display or mounting. However, you should use caution and follow proper guidelines to avoid damaging the skull.
What is the best pressure washer setting to clean a deer skull?
The best pressure washer setting to clean a deer skull is a low-pressure, wide-angle nozzle. This will help prevent any damage to the skull and ensure a thorough cleaning. It is important to avoid using high pressure or a narrow nozzle, as this can cause damage to the fragile bones.
Are there any alternative methods to clean a deer skull besides pressure washing?
Yes, there are alternative methods to clean a deer skull besides pressure washing. Some people prefer to use chemicals or boiling water to remove flesh and debris from the skull. These methods may require more time and effort, but they can be effective as well. It is important to choose a method that works best for your specific situation and skill level.
Should I remove the antlers before pressure washing a deer skull?
It is generally recommended to remove the antlers before pressure washing a deer skull. This will allow for better access to clean all areas of the skull and prevent any damage to the antlers. However, if you are comfortable pressure washing the skull with the antlers attached, you can do so with caution.
How long does it take to pressure wash a deer skull?
The time it takes to pressure wash a deer skull can vary depending on the size and condition of the skull. On average, it can take anywhere from 10 minutes to 1 hour to thoroughly clean a deer skull using a pressure washer. It is important to take your time and ensure that all flesh and debris are removed before proceeding to the next steps of the skull preparation.
Recent Posts
-

How To Connect Soap To Honda Pressure Washer
June 28, 2024 -
A To Z Pressure Washing Scam
June 27, 2024 -

How To Pressure Wash Your Home With A Garden Hose
June 27, 2024 -

Where Can I Buy Honda Pressure Washer Parts
June 25, 2024 -
