
Blog
How To Attach Cleaner To Pressure Washer Simulator
When it comes to keeping your home or workplace clean, a pressure washer is a valuable tool to have. It can effectively remove dirt, grime, and other stubborn stains from various surfaces. However, to maximize its cleaning power, it is important to attach the right cleaner to your pressure washer simulator.
The first step is to choose the appropriate cleaner for the specific task at hand. There are different types of cleaners available, including detergent, degreaser, and bleach. Each cleaner is designed to tackle different types of stains and surfaces. Make sure to read the instructions on the cleaner’s label to ensure it is compatible with your pressure washer.
Once you have chosen the right cleaner, it’s time to attach it to your pressure washer simulator. Start by turning off the pressure washer and disconnecting it from the power source. Then, locate the detergent intake valve on the pressure washer. This valve is usually marked and can be found near the water inlet connection.


Next, attach the cleaner bottle or container to the detergent intake valve. Ensure that it is securely fastened to prevent any leaks or spills. If your pressure washer has a separate attachment for cleaner, follow the manufacturer’s instructions to attach it properly.
After the cleaner is attached, turn on the pressure washer and let it run for a few seconds to allow the cleaner to mix with the water. Adjust the pressure setting on the pressure washer according to your cleaning needs. Now, you are ready to start cleaning with the power of your pressure washer and the added cleaning power of the attached cleaner.
Remember to always follow the safety instructions provided by both the pressure washer and the cleaner manufacturer. Wear appropriate protective gear such as goggles and gloves to protect yourself from any potential hazards. Regularly clean and maintain your pressure washer simulator to ensure its optimal performance.
By following these steps and choosing the right cleaner, you can effectively attach a cleaner to your pressure washer simulator and achieve outstanding cleaning results. Keep your surroundings clean and enjoy the benefits of a well-maintained pressure washer.
Step-by-Step Guide
Attaching a cleaner to a pressure washer is a straightforward process that can be done in a few simple steps. Follow the instructions below to ensure a secure and effective attachment:

Step 1: Prepare the Pressure Washer
Before attaching the cleaner, make sure your pressure washer is in good working condition. Check the water supply, remove any debris from the nozzle, and ensure that the machine is properly connected to a power source.
Step 2: Choose the Right Cleaner
Select a cleaner that is compatible with your pressure washer and the surface you plan to clean. Different cleaners are designed for specific applications, such as concrete, wood, or vehicles. Read the instructions on the cleaner to ensure it is suitable for your pressure washer.
Step 3: Connect the Cleaner
Locate the attachment point on your pressure washer where the cleaner will connect. This is typically located near the nozzle or lance. Ensure that the pressure washer is turned off before attaching the cleaner.
Insert the cleaner’s connection point into the attachment point on the pressure washer. Align the notches or grooves on both parts, and push the cleaner in until it clicks or locks into place.
Step 4: Secure the Connection
Once the cleaner is attached, secure the connection by tightening any locking mechanisms or fasteners. This will prevent the cleaner from coming loose during operation. Check the manufacturer’s instructions for any specific steps or requirements.

Step 5: Test the Attachment
Turn on the pressure washer and test the attachment by spraying water onto a small area. Ensure that there are no leaks or unusual vibrations. Adjust the pressure settings if necessary to achieve the desired cleaning effect.
Step 6: Follow Safety Precautions
When using a pressure washer with a cleaner attachment, it is important to follow safety guidelines. Wear protective eyewear, gloves, and clothing to shield yourself from any potential splashes or debris. Keep a safe distance from the surface being cleaned and avoid directing the spray at people or animals.
By following these step-by-step instructions, you can easily attach a cleaner to your pressure washer and achieve effective cleaning results. Always refer to the manufacturer’s guidelines for specific instructions and safety precautions.
Required Tools and Materials
Before you begin attaching a cleaner to your pressure washer, it’s important to gather all the necessary tools and materials. Here is a list of items you will need:
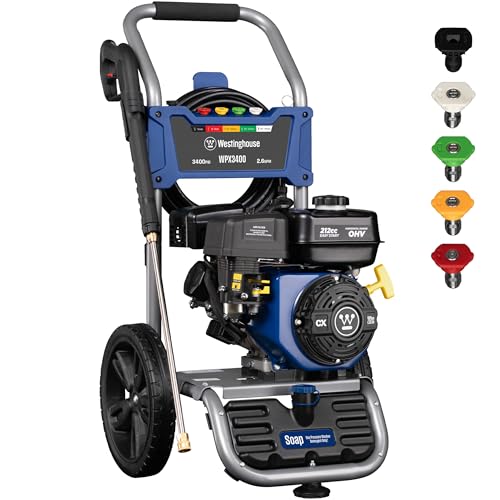
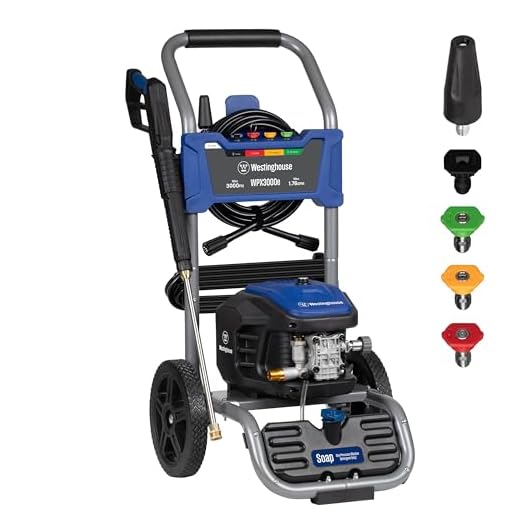
- Pressure washer
- Pressure washer cleaner attachment
- Cleaner solution suitable for your specific cleaning task
- Extension wand (if required)
- Nozzle tips (if required)
- Garden hose
- Water source
- Safety goggles
- Gloves
- Protective clothing
- User manual for your pressure washer
It’s important to ensure that you have all the necessary tools and materials listed above before you start the process. This will ensure a smooth and successful attachment of a cleaner to your pressure washer.

Preparing the Pressure Washer Simulator
Before attaching the cleaner to the pressure washer simulator, it is important to properly prepare the simulator for the task. Follow these steps to ensure a smooth and efficient cleaning process:
Step 1: Ensure a Stable Environment
Find a flat and stable surface to set up the pressure washer simulator. This will help prevent any accidents or damage during the cleaning process.
Step 2: Connect the Water Supply
Attach a garden hose to a nearby water source and connect the other end to the water inlet valve of the pressure washer simulator. Make sure the connection is secure and there are no leaks.

Step 3: Check the Pressure Washer Controls
Inspect the pressure washer simulator’s control panel and familiarize yourself with the various settings and buttons. Ensure that the simulator is turned off before making any adjustments.
Step 4: Fill the Detergent Tank
If your pressure washer simulator has a detergent tank, fill it with the appropriate cleaning solution. Check the manufacturer’s instructions for the recommended amount of detergent to use.
Step 5: Attach the Cleaner

Locate the attachment point for the cleaner on the pressure washer simulator. Depending on the model, it may be a quick-connect nozzle or a threaded connection. Follow the manufacturer’s instructions to securely attach the cleaner.
Step 6: Test the Pressure Washer
Before starting the cleaning process, it is important to test the pressure washer simulator to ensure everything is functioning correctly. Turn on the simulator and let it run for a few minutes to check for any abnormal noises or leaks.
By properly preparing the pressure washer simulator, you can ensure a safe and effective cleaning experience. Follow these steps and refer to the manufacturer’s instructions for any specific details about your particular simulator model.
Attaching the Cleaner
To attach the cleaner to your pressure washer, follow these simple steps:

Step 1: Assemble the Cleaner
Before attaching the cleaner to the pressure washer, you need to assemble it properly. Refer to the instruction manual for detailed instructions on how to assemble the cleaner.
Step 2: Connect the Cleaner
Once you have assembled the cleaner, it’s time to connect it to the pressure washer. Most cleaners come with a quick-connect mechanism, which makes it easy to attach them. Locate the nozzle on the pressure washer and align it with the connector on the cleaner.
Note: Some cleaners may require an adapter to connect them to the pressure washer. Make sure to check if an adapter is needed and follow the instructions to attach it correctly.
Step 3: Secure the Connection
After aligning the nozzle and connector, push the cleaner firmly onto the pressure washer until it clicks securely into place. Give it a gentle tug to ensure that it is attached firmly.
Step 4: Test the Connection
Before starting to use the pressure washer, it’s essential to check if the cleaner is attached correctly. Run water through the pressure washer without engaging the trigger to check for any leaks or loose connections. If everything looks secure, you are ready to start using the pressure washer with the cleaner attached.

Remember to always consult the instruction manual provided with your cleaner and pressure washer for specific guidelines and safety precautions.
Using the Pressure Washer Simulator with Cleaner
When using a pressure washer simulator, it is important to know how to properly attach a cleaner to enhance the cleaning process. By following these steps, you can ensure that your pressure washer is effectively removing dirt, grime, and debris from surfaces.
- Start by turning off the pressure washer simulator and disconnecting it from any power sources.
- Inspect the cleaner attachment to ensure it is in good condition and free from any damage. Replace any worn or damaged parts as needed.
- Locate the designated cleaner attachment connection point on the pressure washer simulator. This is typically located near the spray nozzle.
- Align the cleaner attachment with the connection point and securely fasten it into place. Ensure that it is tightly secured to prevent any leaks or malfunctions during operation.
- Once the cleaner attachment is properly attached, connect a suitable cleaning solution to the attachment. This can be a specific pressure washer detergent or a DIY solution suitable for the cleaning task at hand.
- Turn on the pressure washer simulator and adjust the settings if necessary. Refer to the user manual for instructions on setting the appropriate pressure and spray pattern for your cleaning needs.
- Begin by spraying the surface with the cleaner solution, using broad, sweeping motions. Allow the solution to penetrate and loosen any dirt or grime for a few minutes.
- After the allotted time, switch to a high-pressure spray pattern and thoroughly rinse the surface. Move the spray wand in a consistent back-and-forth motion to ensure even cleaning.
- Continue this process until the surface is clean to your satisfaction. For stubborn stains or heavily soiled areas, you may need to repeat the cleaning process or use a stronger cleaning solution.
- Once cleaning is complete, turn off the pressure washer simulator and disconnect the cleaner attachment. Rinse the attachment thoroughly to remove any remaining cleaning solution.
- Store the cleaner attachment in a clean, dry place to prevent damage and ensure its longevity.
By following these steps, you can effectively use a cleaner attachment with your pressure washer simulator, achieving optimal cleaning results for a range of surfaces and applications.
Cleaning and Maintenance
Proper cleaning and maintenance of your pressure washer and attached cleaner are essential for optimal performance and longevity. Here are some tips to keep your equipment in top shape:
1. Cleaning the Pressure Washer:
After each use, flush out any remaining detergent and clean water through the system to prevent clogging and buildup. Make sure to remove any debris or dirt from the nozzle and the inlet screen. Store your pressure washer in a clean and dry place to avoid moisture damage.
2. Maintaining the Cleaner Attachment:
Regularly check the cleaner attachment for any signs of wear or damage. Replace worn or damaged parts to ensure proper functioning. Clean the attachment after each use to remove any detergent residue. Use a brush or a soft cloth to wipe off any debris from the attachment.
3. Inspecting Hoses and Connectors:
Regularly inspect the hoses and connectors for any leaks or damage. Replace any damaged hoses or connectors to avoid water leakage and ensure a secure connection. Use thread seal tape when attaching or resealing connections.
4. Storing Properly:
When not in use, properly store your pressure washer and cleaner attachment. Coil the hoses neatly and secure them with straps or hooks. Store the equipment in a clean and dry area away from extreme temperatures and direct sunlight.
5. Safety Precautions:
Always follow the manufacturer’s instructions and safety guidelines when operating and maintaining your pressure washer and cleaner attachment. Wear protective gear, such as gloves and safety goggles, to prevent any injuries. Keep children and pets away from the operating area.
By following these cleaning and maintenance tips, you can ensure that your pressure washer and cleaner attachment will continue to perform at their best and have a longer lifespan.
Questions and answers
What is a pressure washer simulator?
A pressure washer simulator is a virtual reality (VR) program or game that allows users to experience the sensation and mechanics of using a pressure washer in a virtual environment.
Why would someone want to attach a cleaner to a pressure washer simulator?
Attaching a cleaner to a pressure washer simulator adds an extra layer of realism to the experience. It allows users to simulate the process of cleaning various surfaces and objects with different types of cleaners, enhancing the immersion and training potential of the simulator.
How can one attach a cleaner to a pressure washer simulator?
Attaching a cleaner to a pressure washer simulator typically involves accessing the simulator’s settings or options menu and selecting the option to attach a cleaner. This can be done by following the instructions provided by the simulator’s creators or by referring to the simulator’s user manual or online documentation.
What types of cleaners can be attached to a pressure washer simulator?
A variety of cleaners can be attached to a pressure washer simulator, depending on the capabilities and features of the simulator. This can include general-purpose cleaners, degreasers, window cleaners, car wash solutions, and more. Some simulators may also offer specialized cleaners for specific surfaces or applications.
Are there any considerations to keep in mind when attaching a cleaner to a pressure washer simulator?
When attaching a cleaner to a pressure washer simulator, it is important to ensure compatibility between the simulator and the cleaner. This may involve checking the simulator’s system requirements, reading user reviews or forums to learn about others’ experiences with specific cleaners, and considering any recommended or approved cleaners suggested by the simulator’s creators. It may also be necessary to adjust the simulator’s settings or controls to properly interact with the attached cleaner.

What is the purpose of attaching a cleaner to a pressure washer simulator?
The purpose of attaching a cleaner to a pressure washer simulator is to enhance the cleaning power of the simulator. By using a cleaner attachment, you can apply a chemical solution or detergent to the surface being cleaned, which helps to loosen dirt, grime, and other contaminants. This makes the cleaning process more effective and efficient. The pressure from the simulator then helps to rinse away the cleaner and the loosened dirt, leaving the surface cleaner and possibly even sanitized. Using a cleaner attachment can be particularly useful for cleaning outdoor areas, such as driveways, decks, and patios, as well as for vehicles and other large items that require a more thorough cleaning. It is important to note that not all pressure washers are compatible with cleaner attachments, so it is important to check the manufacturer’s instructions before attempting to attach a cleaner.